our kitchen update!
/
i’m finally getting around to sharing some photos of the kitchen update we did this past february!
this happened immediately after our upstairs bathroom remodel was completed. giving the kitchen this face lift seemed 100x less daunting than starting from the bones up, as we had just done after completely gutting the bathroom.
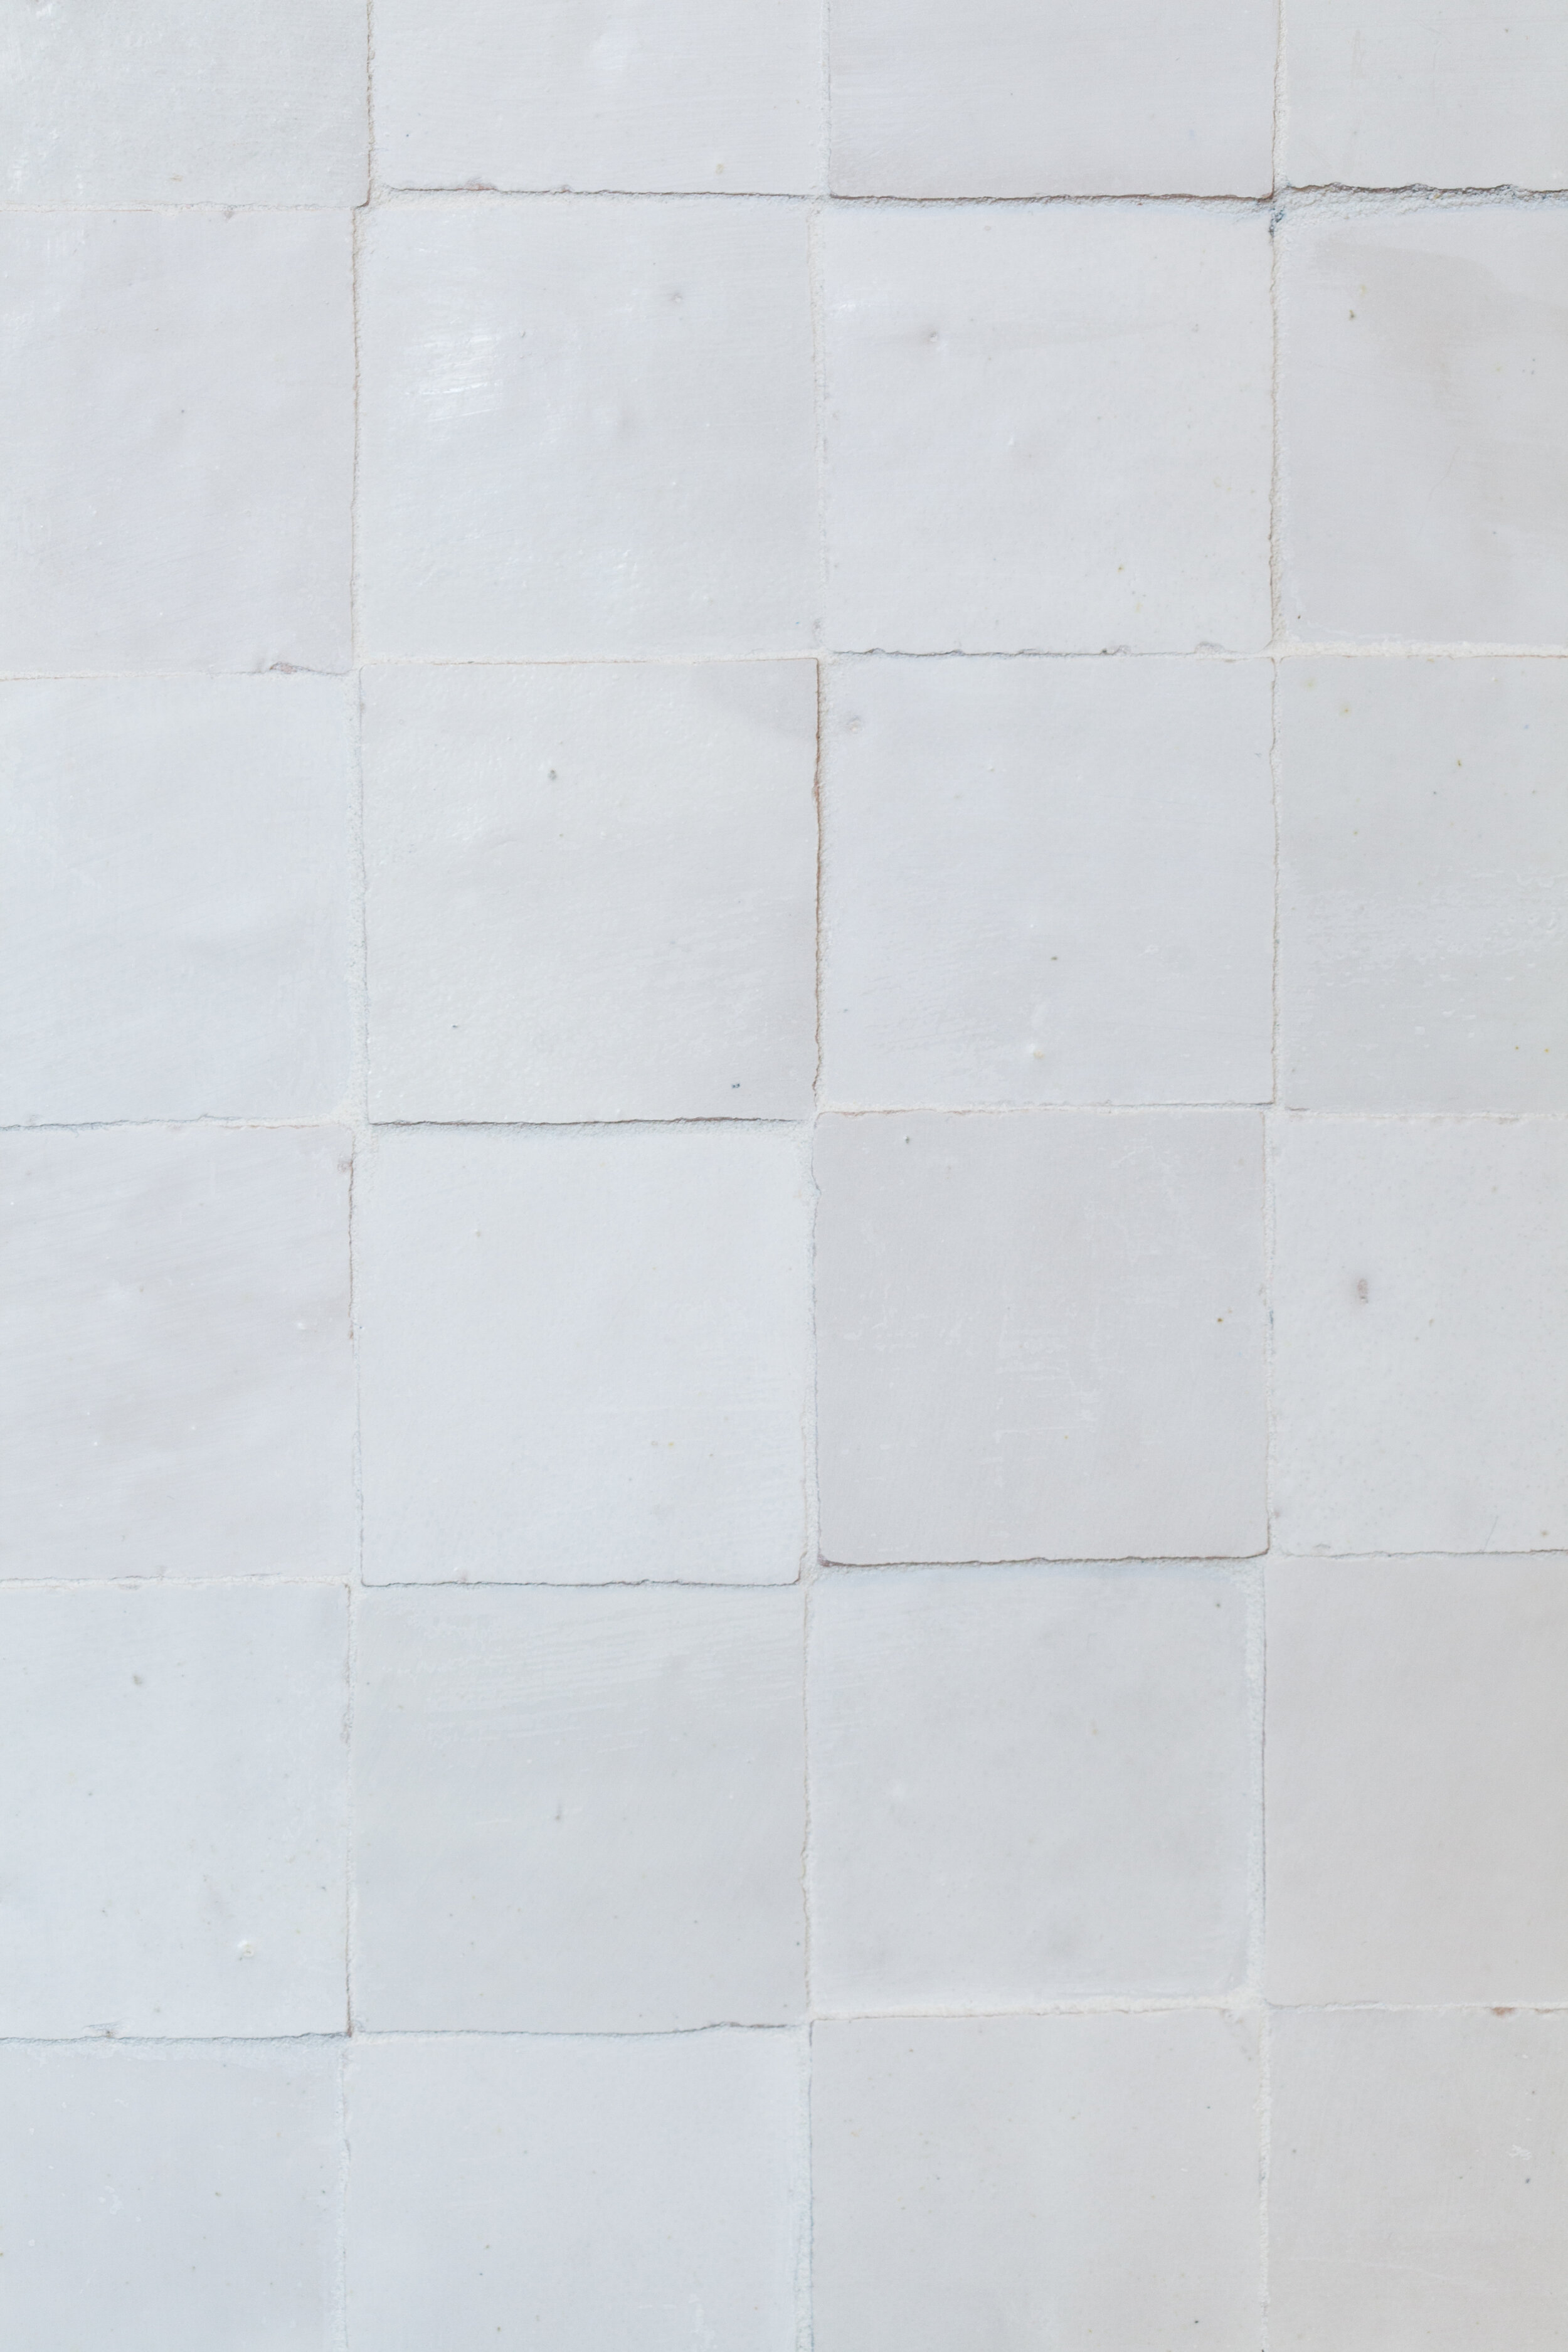
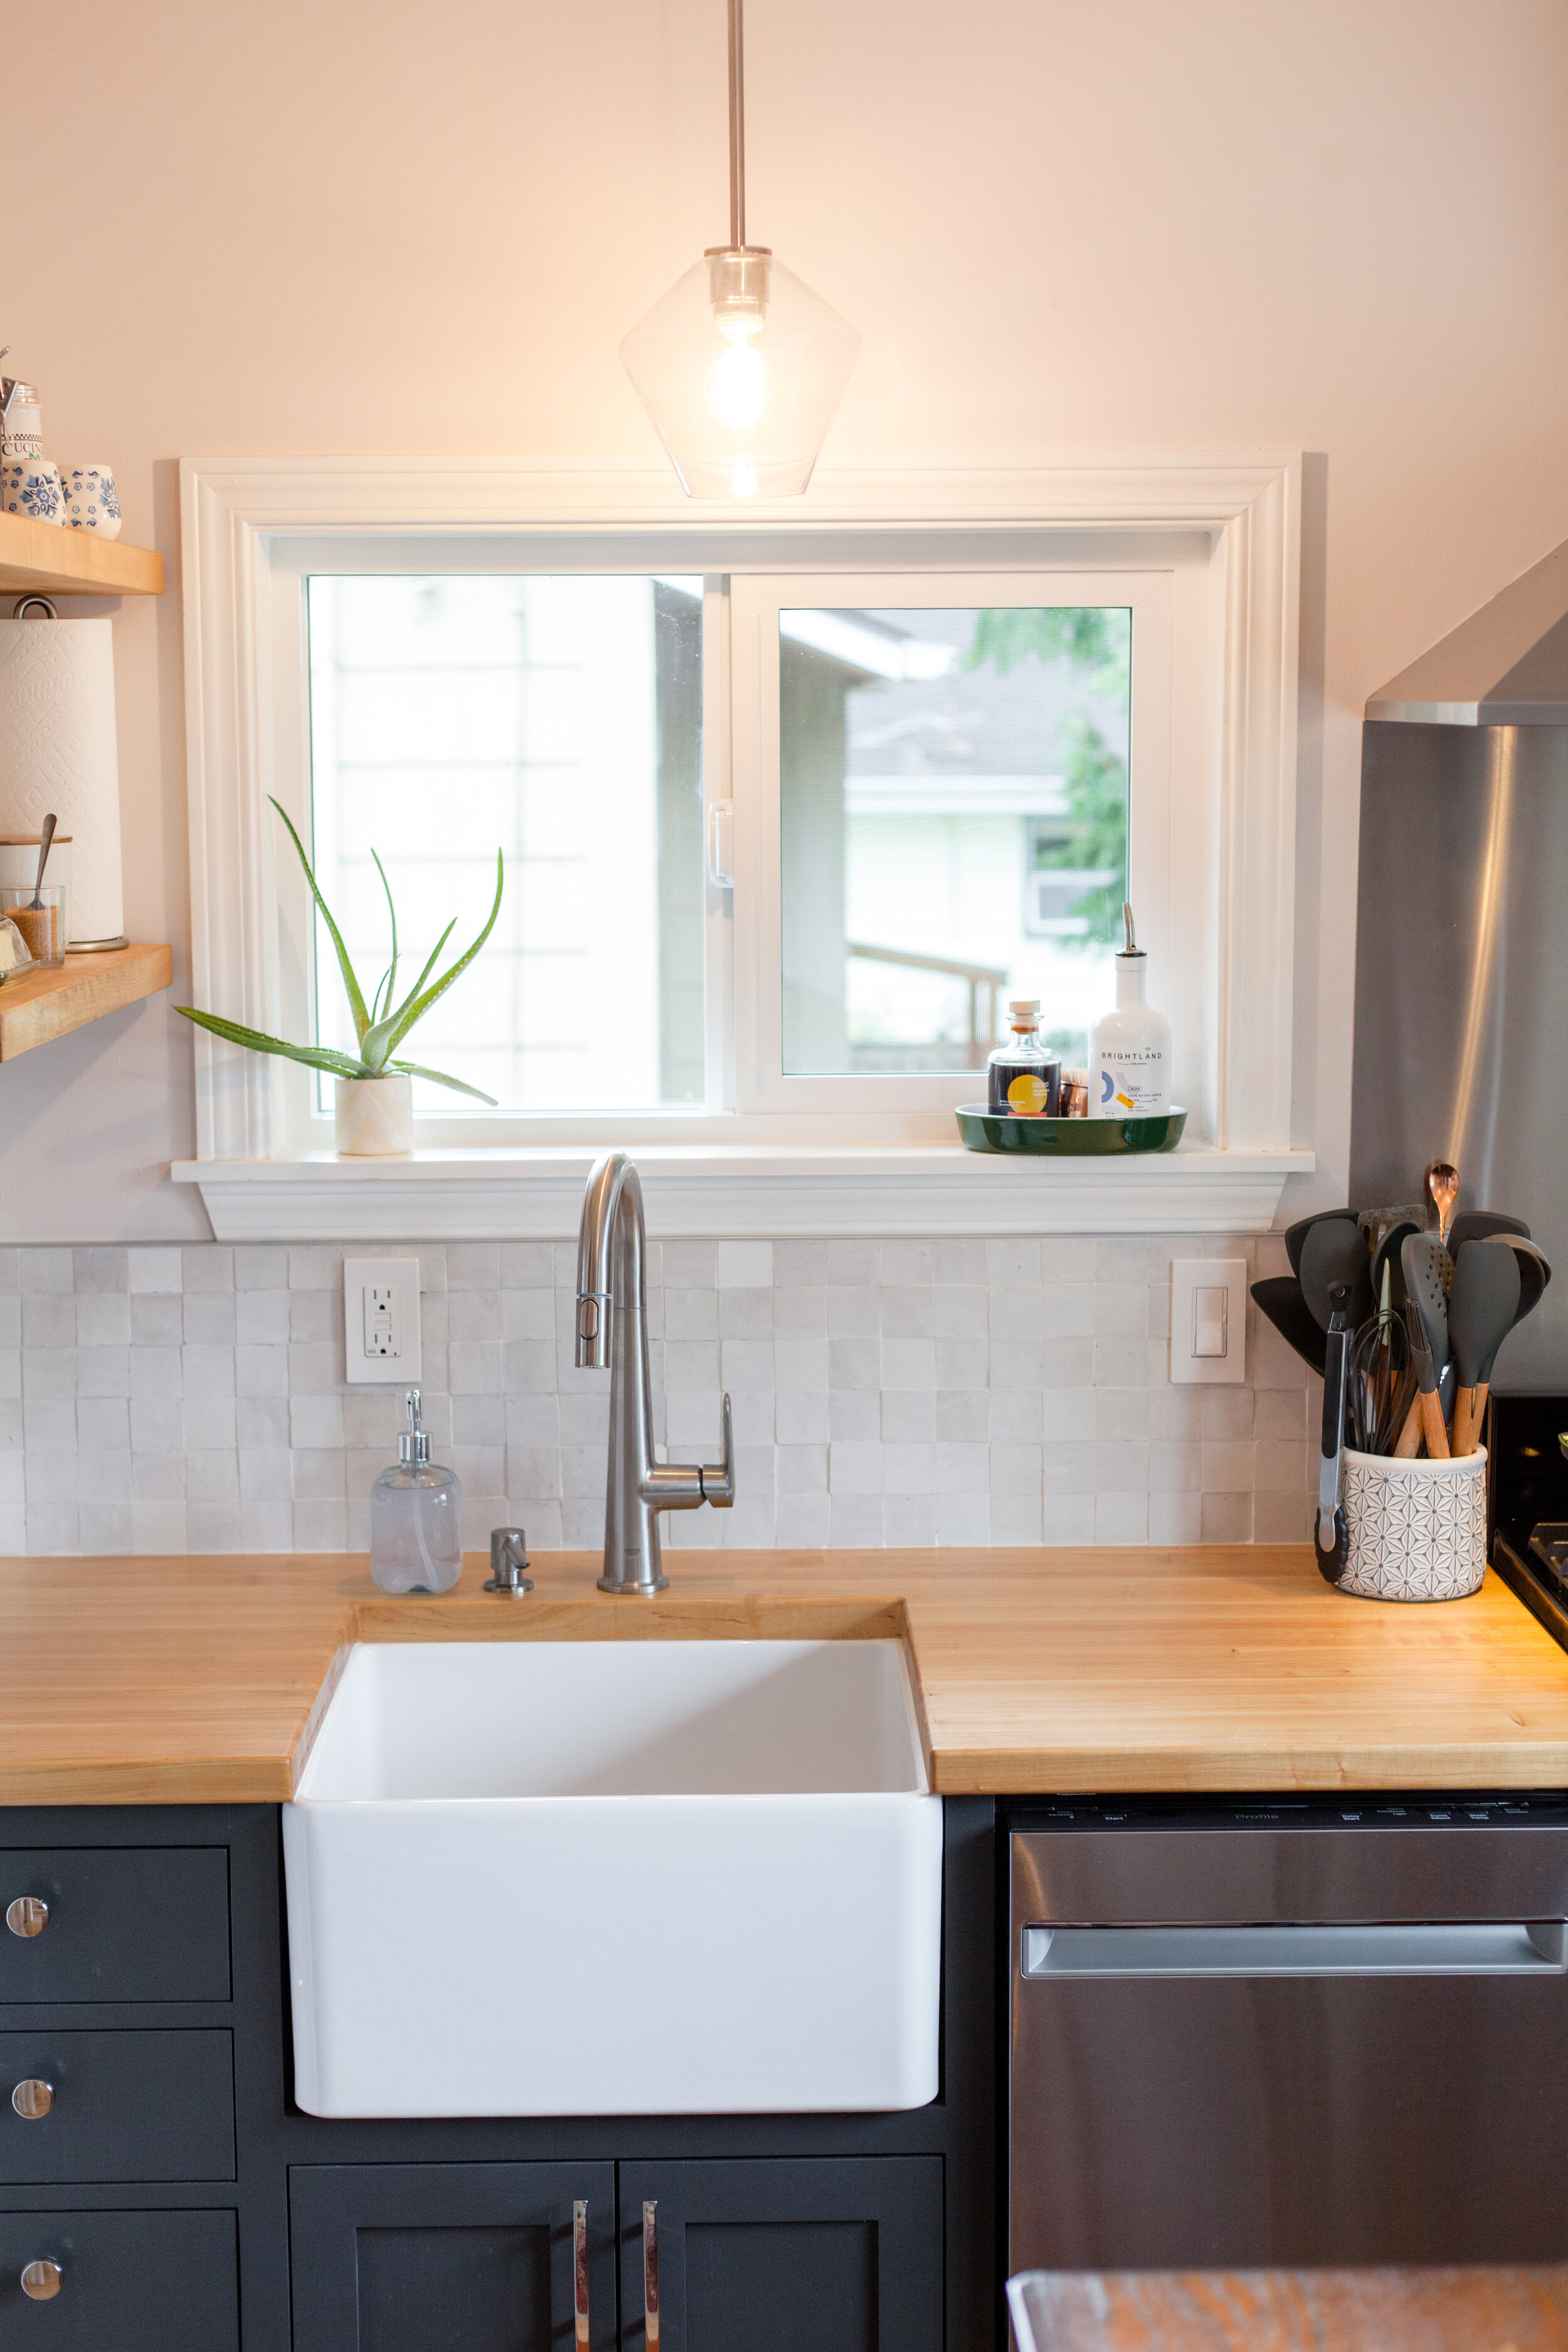
i knew i wanted to continue the square zellige tiles into the kitchen, so that the new modern bathroom didn’t look too out of place amidst our funky 1912 home. this time, i went for the smaller 2x2 square zellige tiles from zia tile, in pure white. i would have LOVED to have the more irregularly colored casablanca white tiles, but they were super backordered and we didn’t have time to waste.

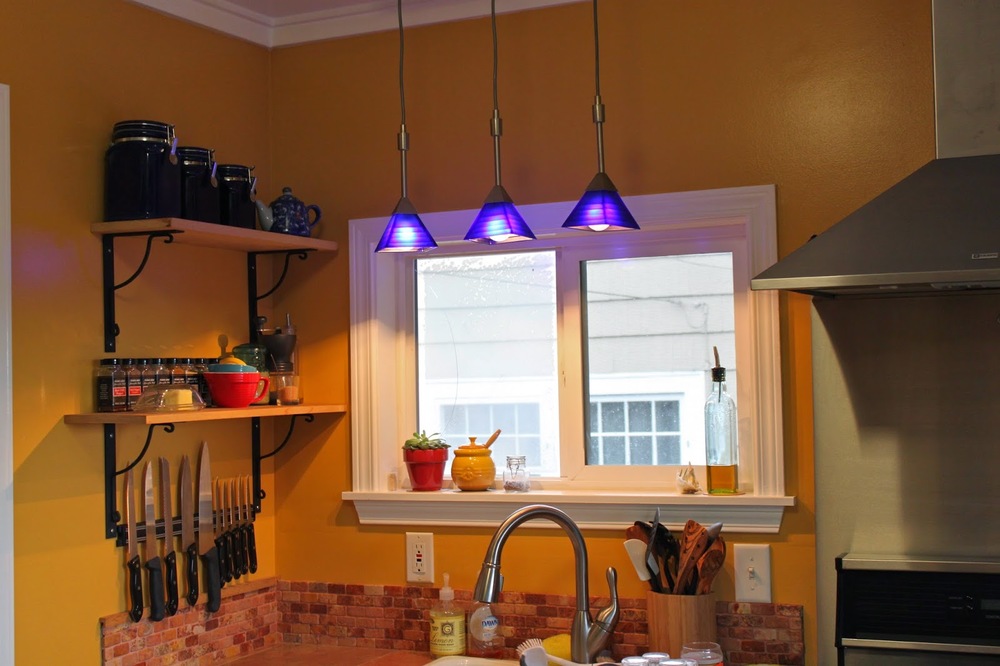
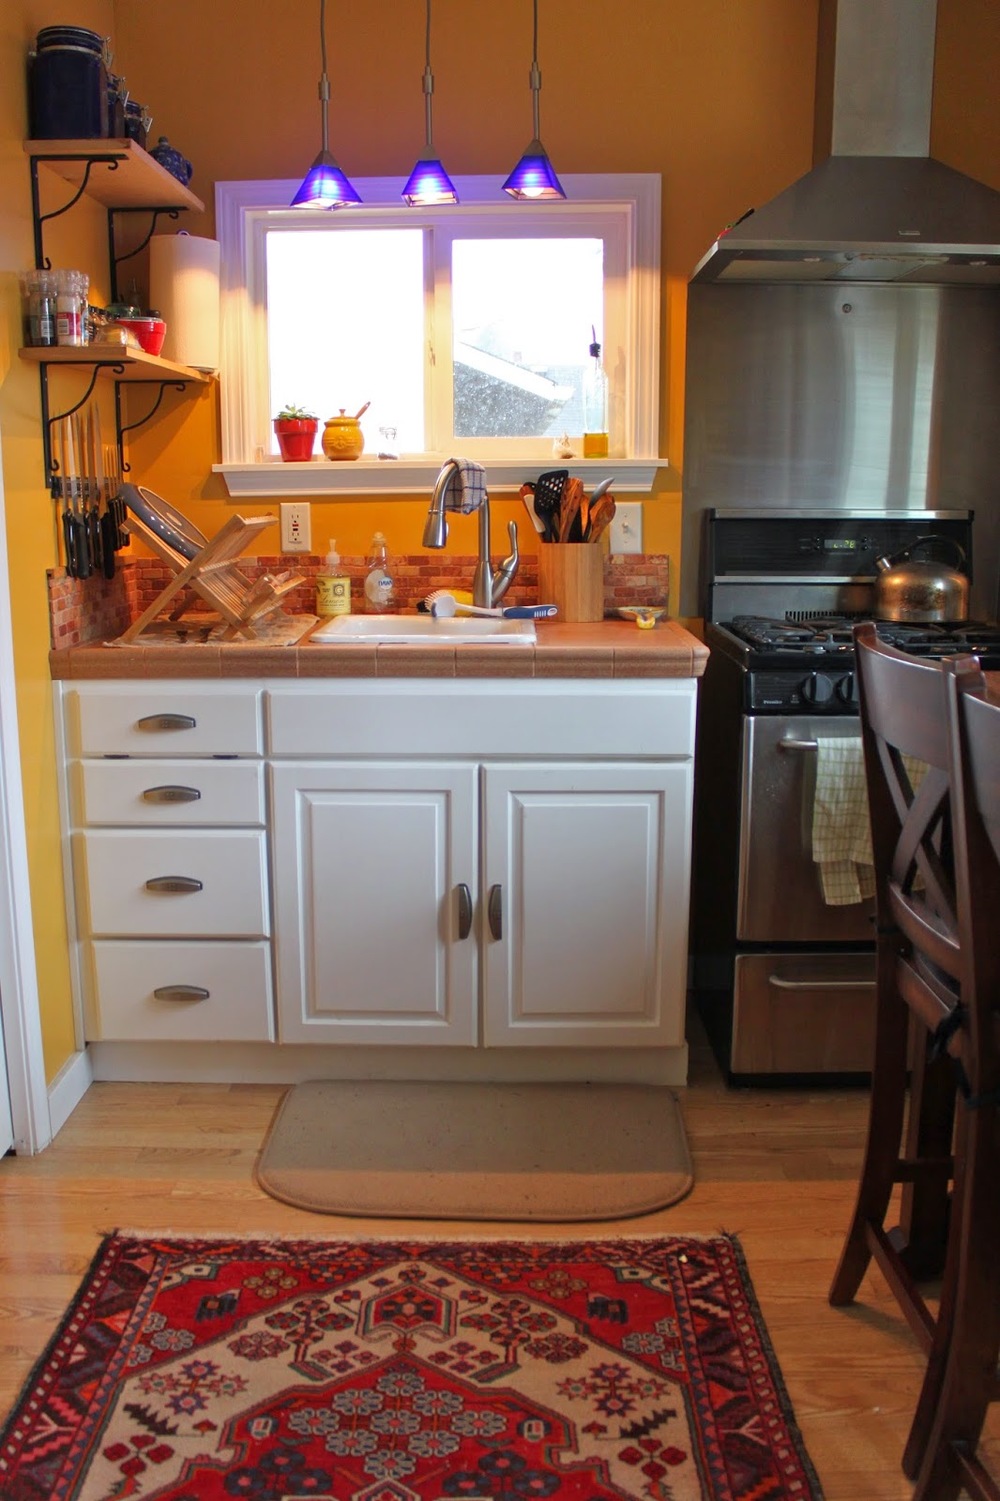
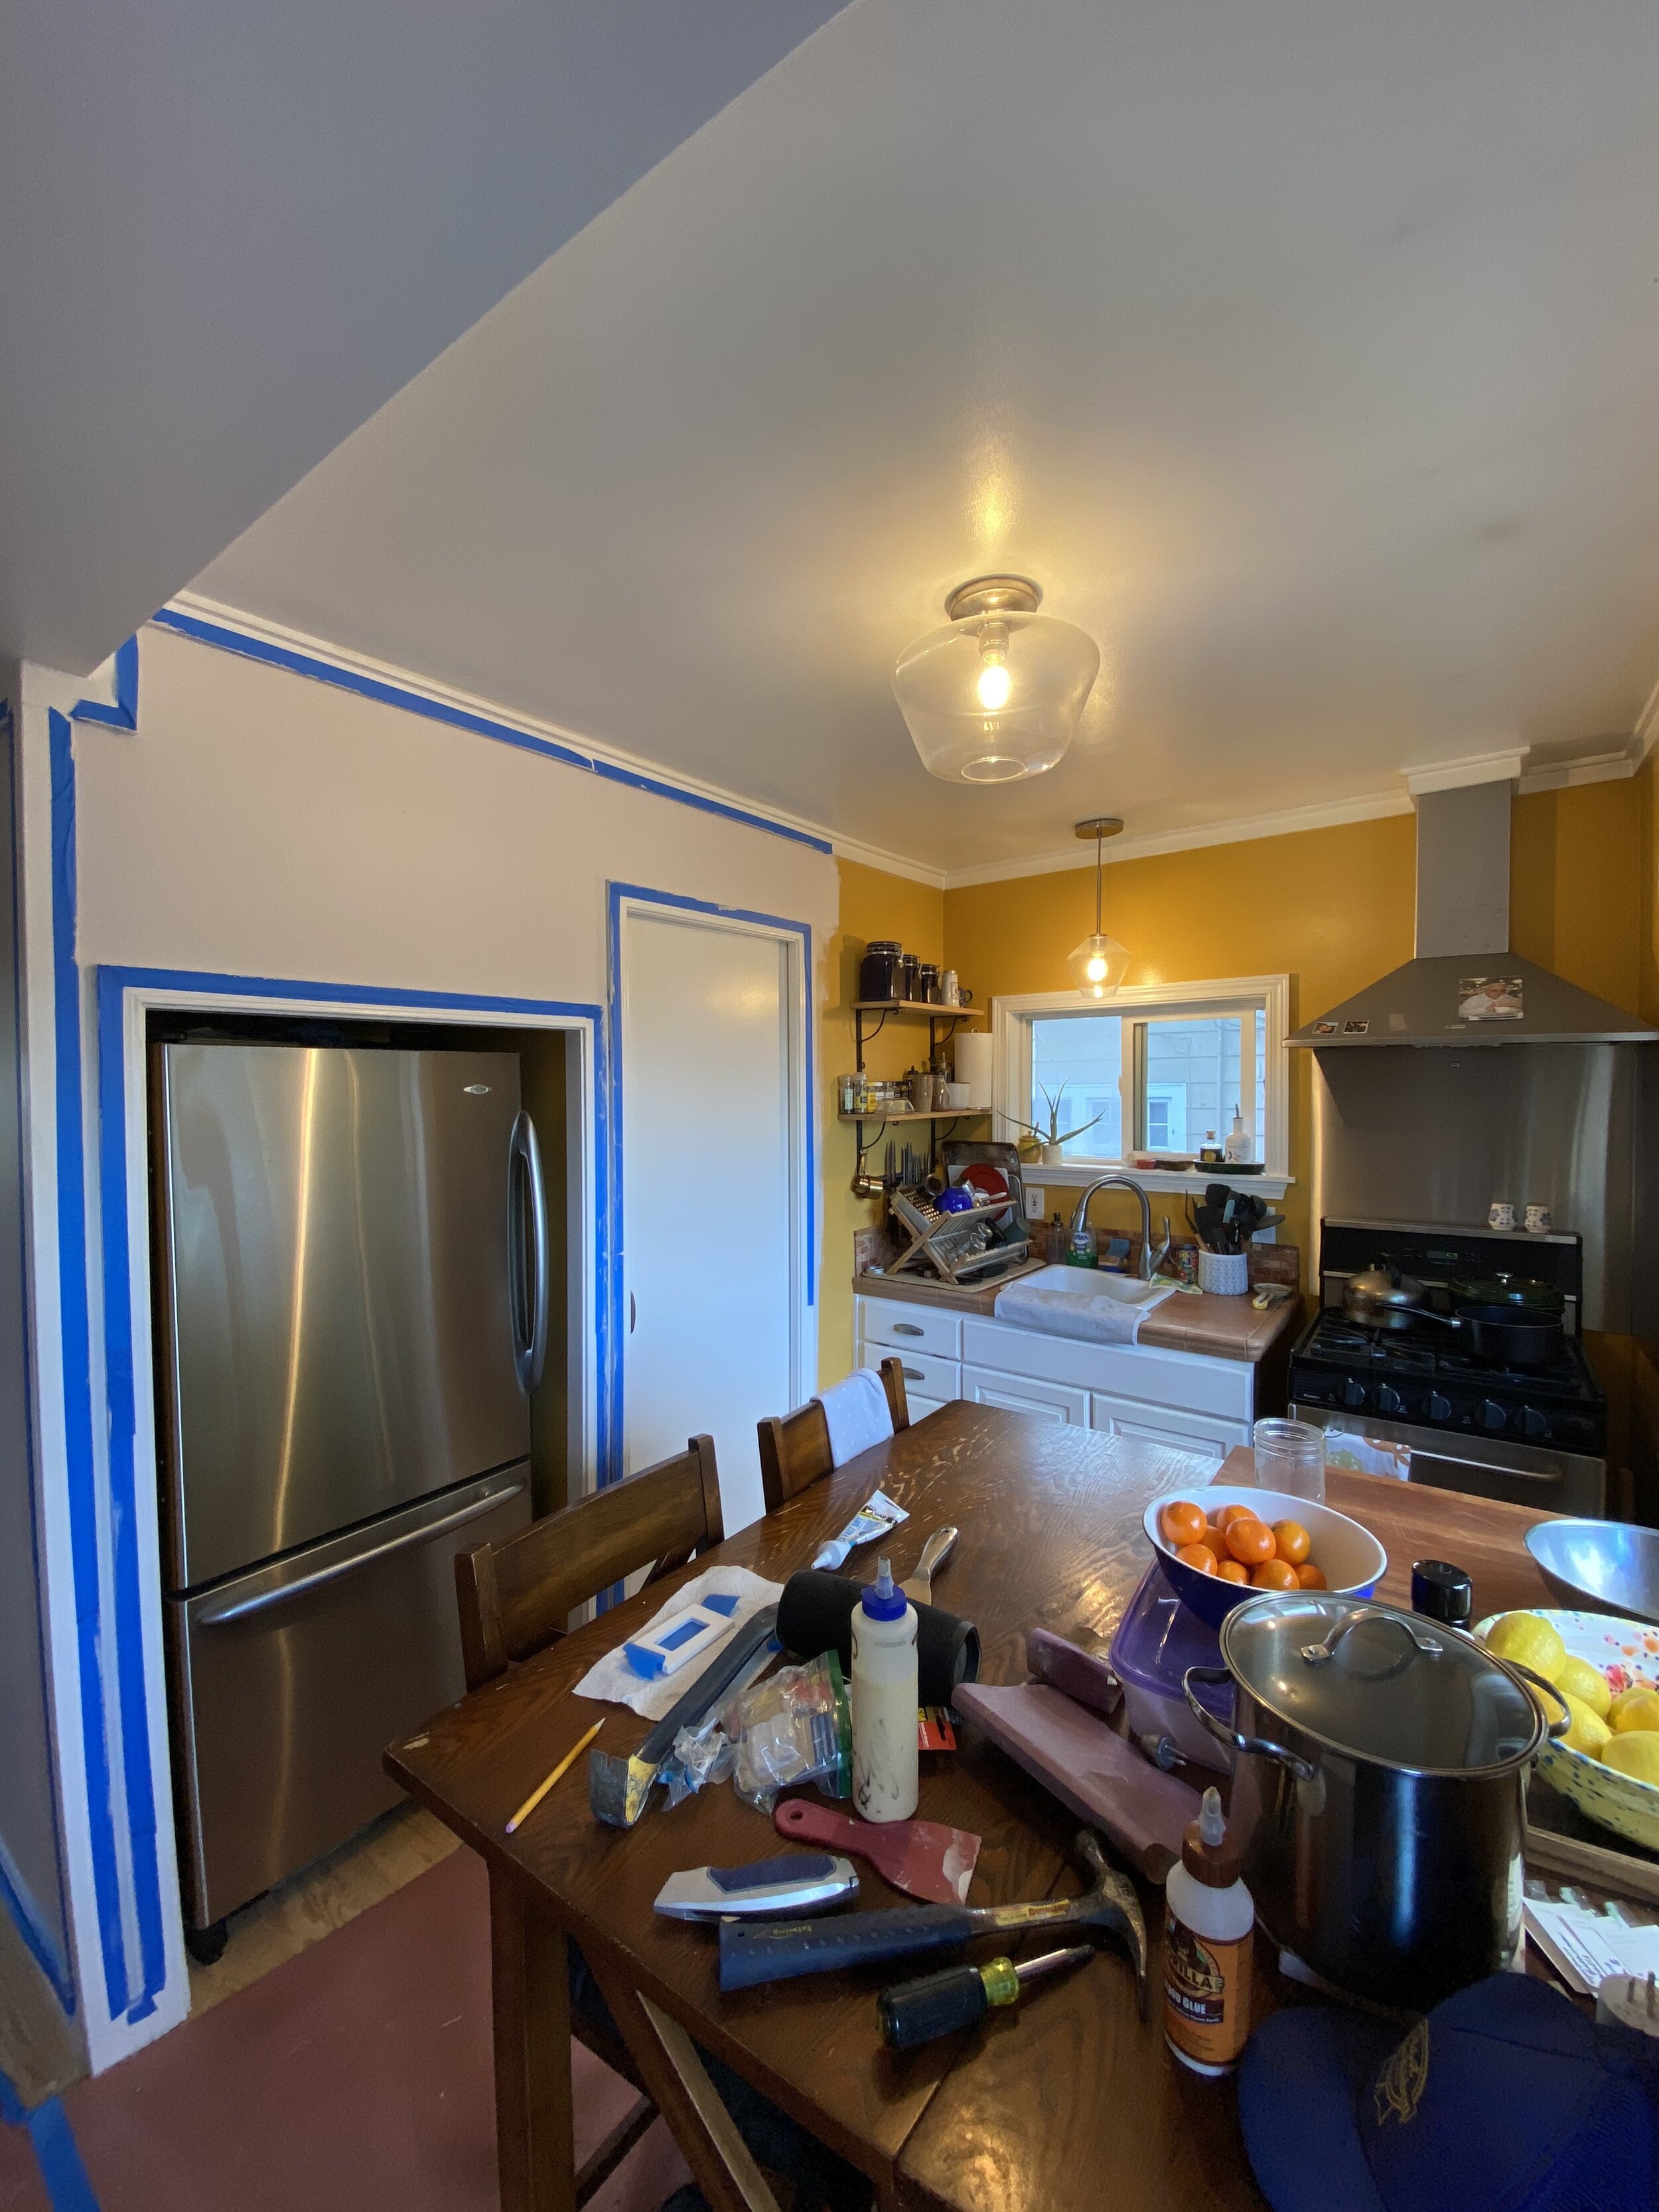
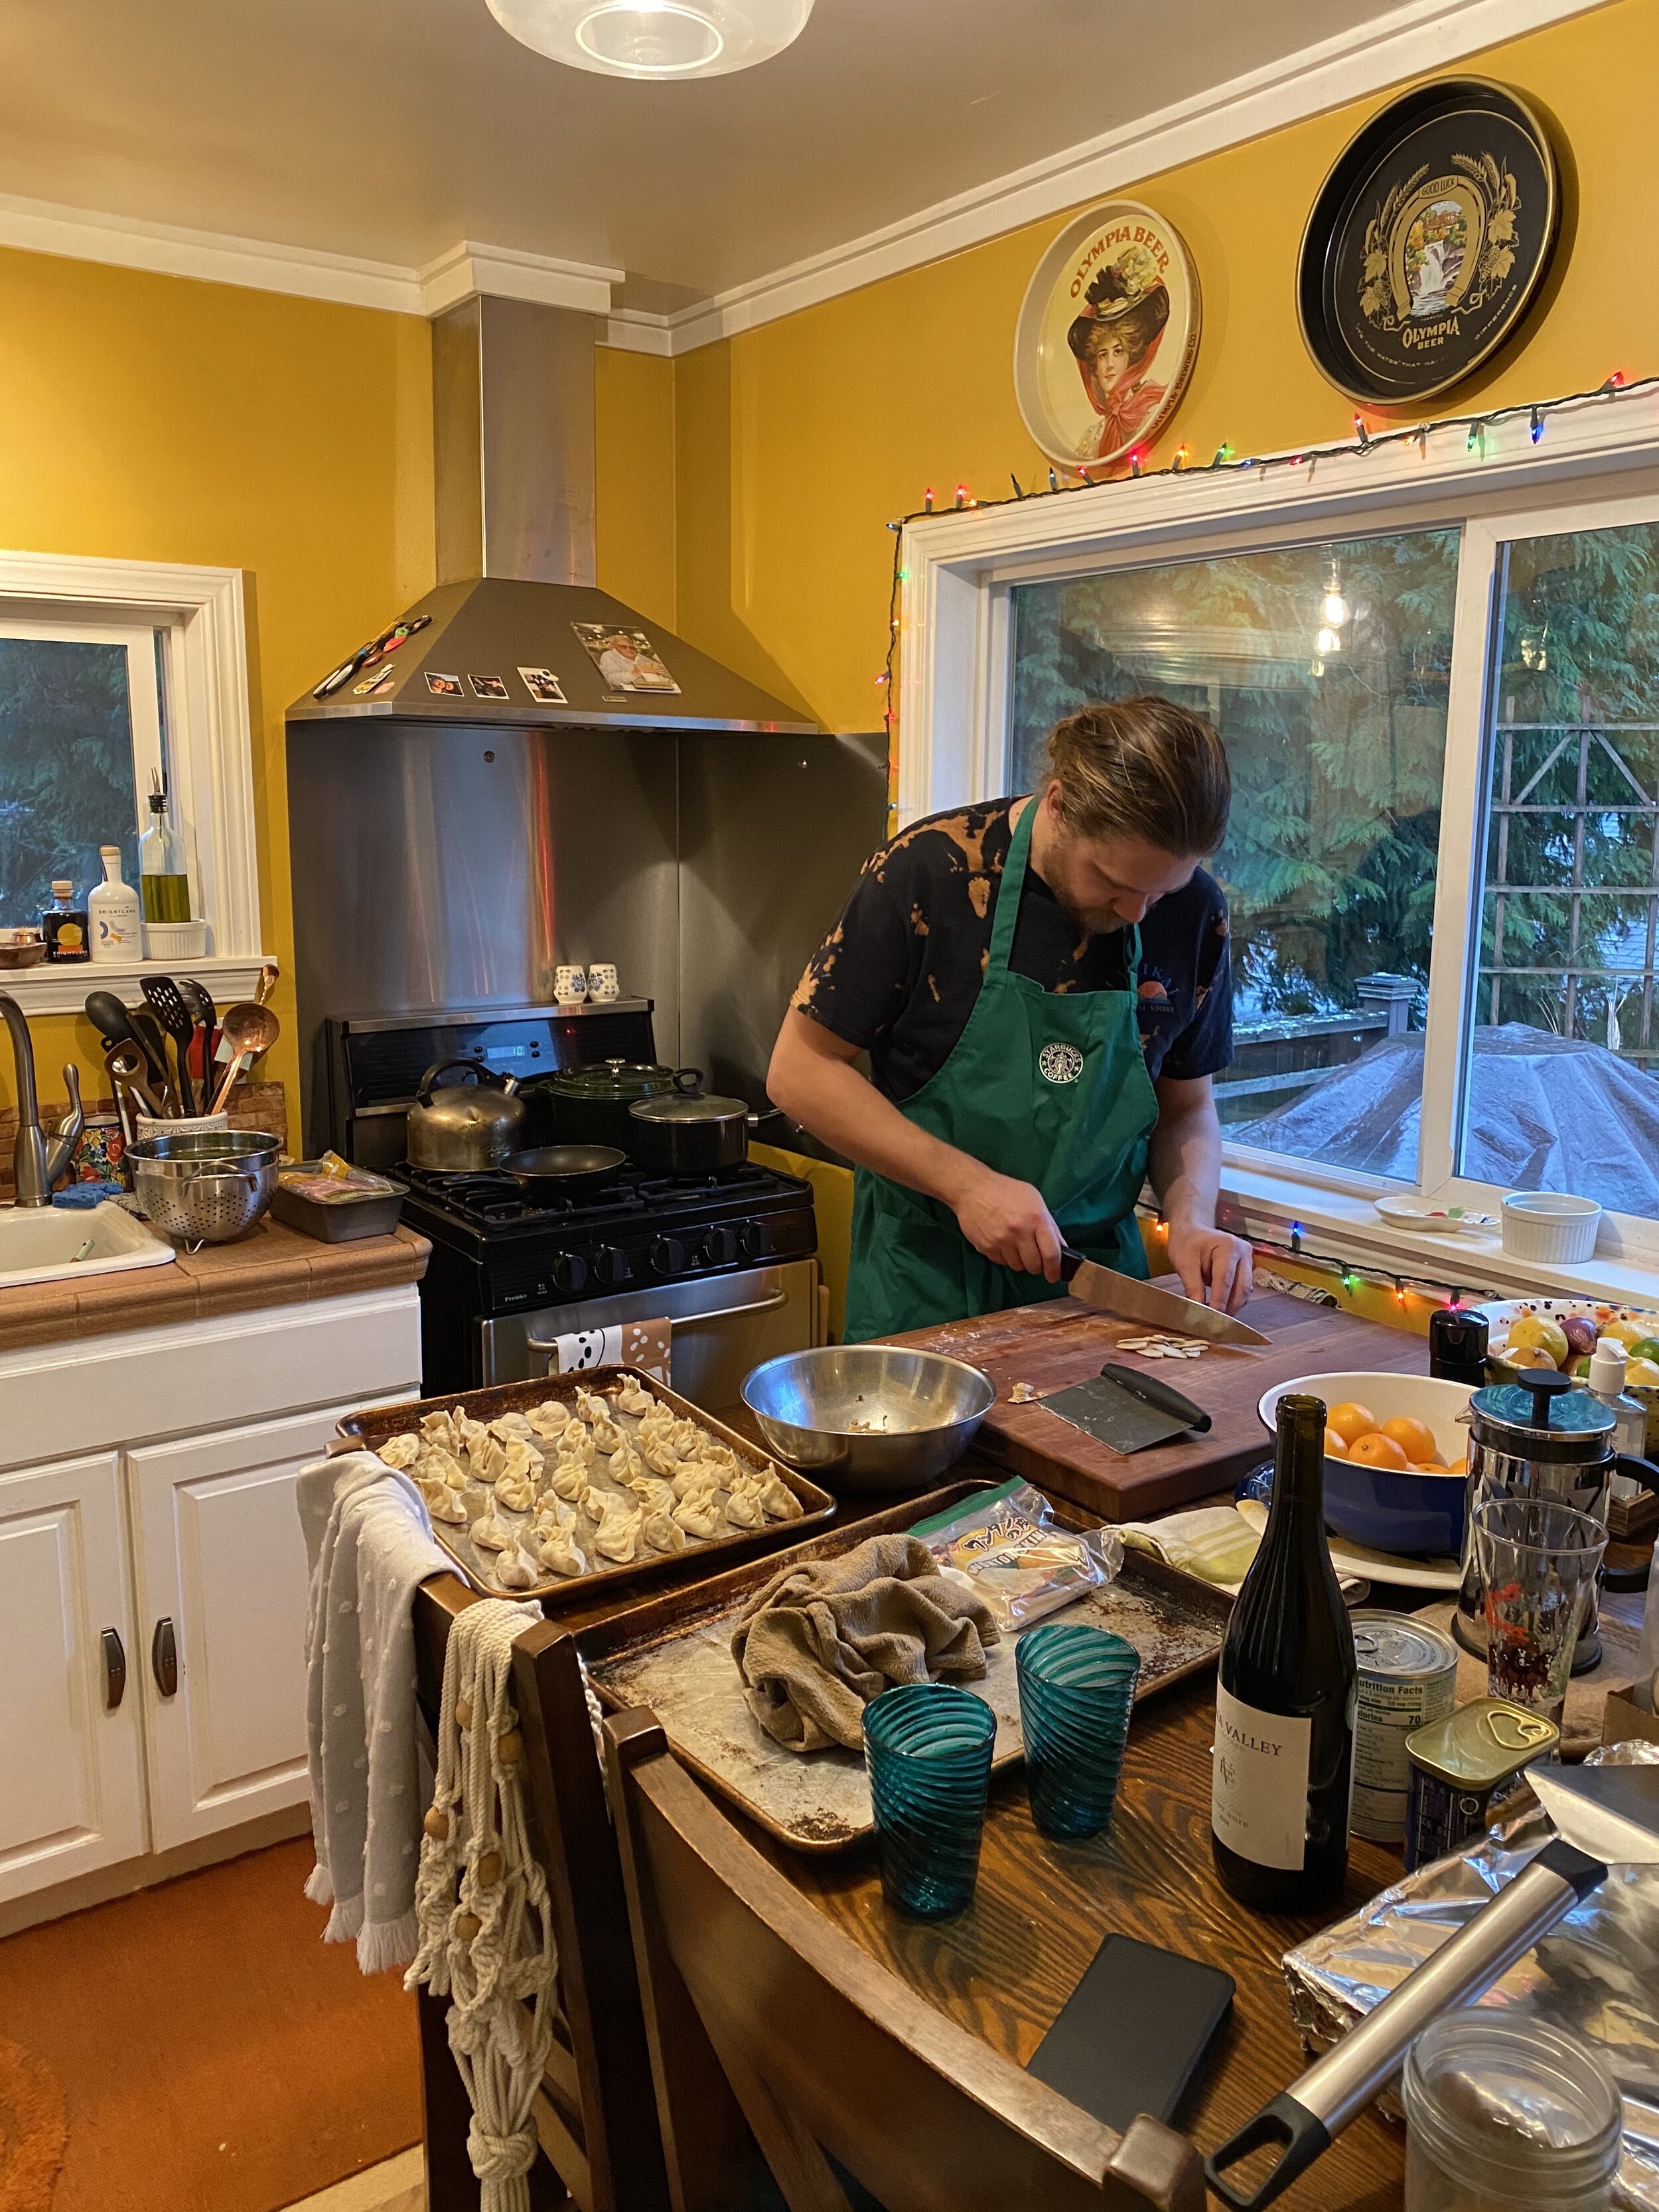
you’ll see when you scroll down through the “before” kitchen photos, but when we bought the house, the upstairs kitchen was painted school bus yellow. we honestly enjoyed that paint color for a long time and thought it made the kitchen feel cheery, so we left it as-is for basically the entire time we’d lived here (7 years).
toward the end, though, i couldn’t wait to get rid of the yellow walls - maybe that was a symptom of being cooped up in our house for all of 2020 and beyond, but i was so sick of looking at our regular stuff. 😂 at night, the yellow walls looked super dingy and almost green in a sickly way, ha. changing the lighting last summer was a HUGE positive change, though. we’re learning so many life lessons throughout all of this home improvement - one of them being, proper light fixtures are everything!

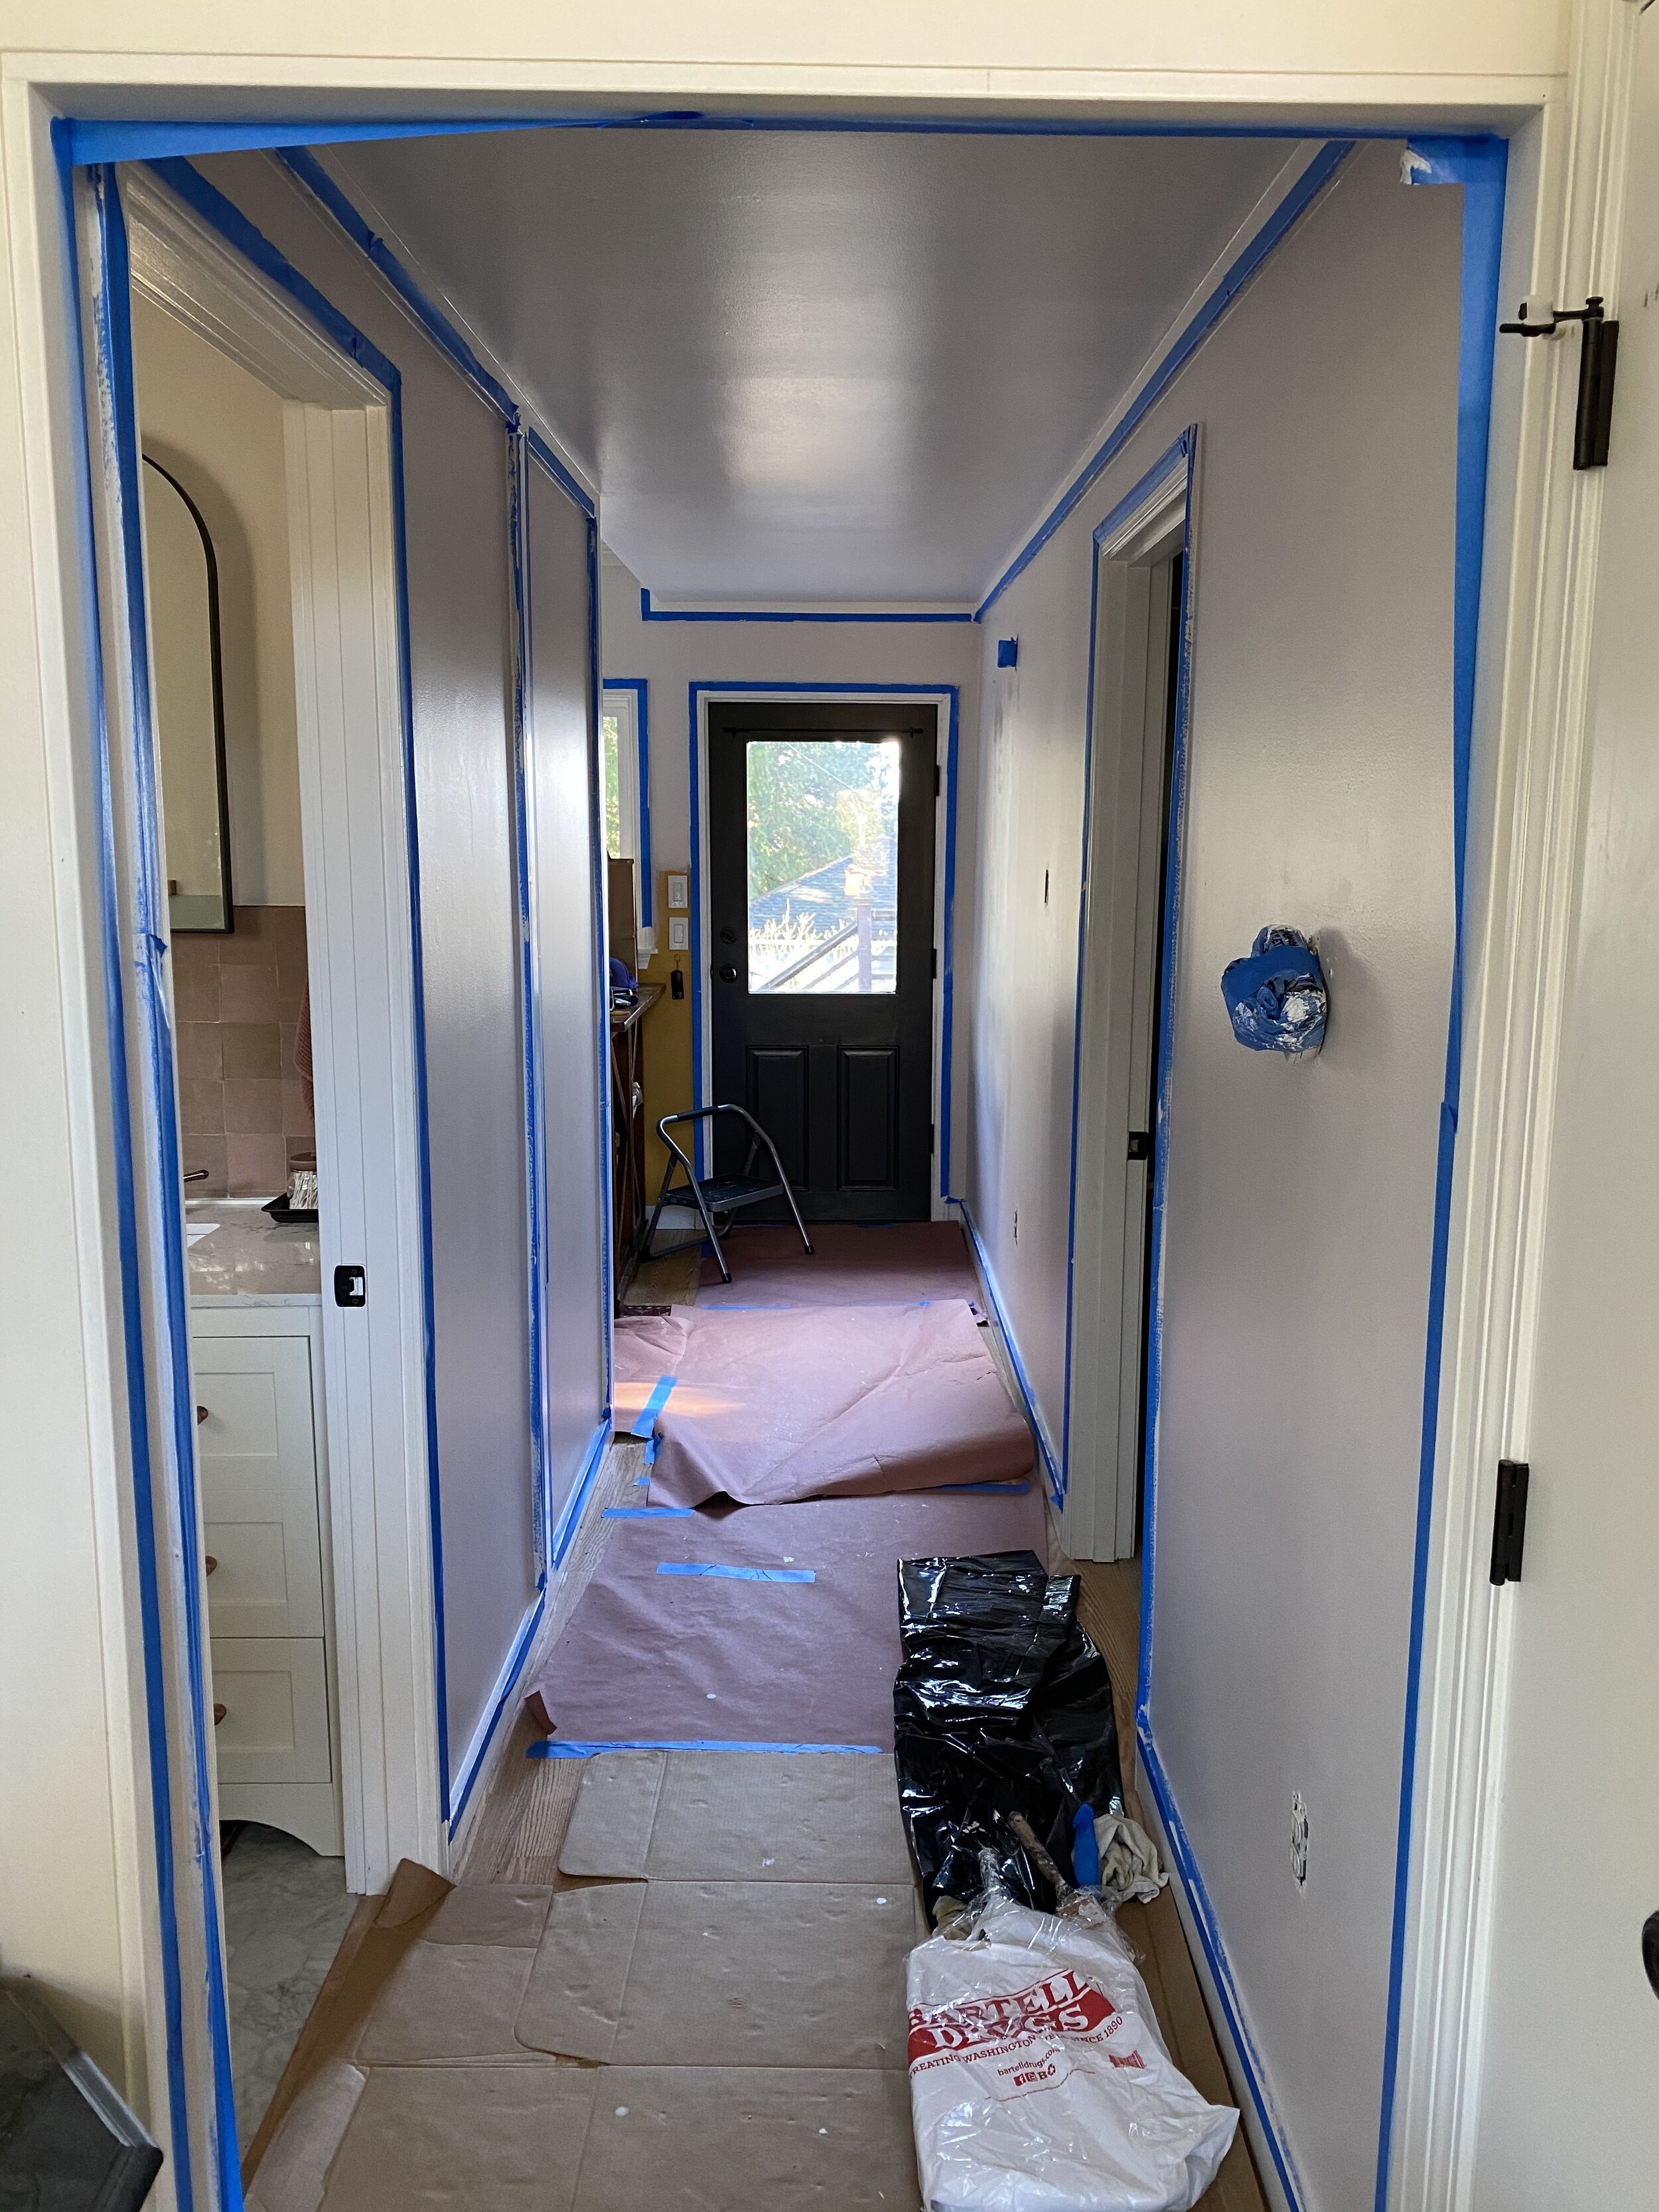
i slowly began chipping away at painting the kitchen hallway, ceilings, and kitchen walls as we’d shuffle furniture and tools around the absolute mess of a hallway that was all of this past january through march 2021. 😂 i am so glad i approached the kitchen paint job this way, because once i got to painting the final walls in the kitchen, the job seemed far less daunting since the majority of painting had already been already done.
for the walls, i used a shade of white with subtle grey and purply tones - ‘cultured pearl’ by sherwin williams. it took on lots of different feelings and shades throughout the day, in different weather or daylight, feeling very warm & cozy, but clean and bright at the same time.
for the ceiling and trim, i used a very dependable white - ‘snowbound’ by sherwin williams.

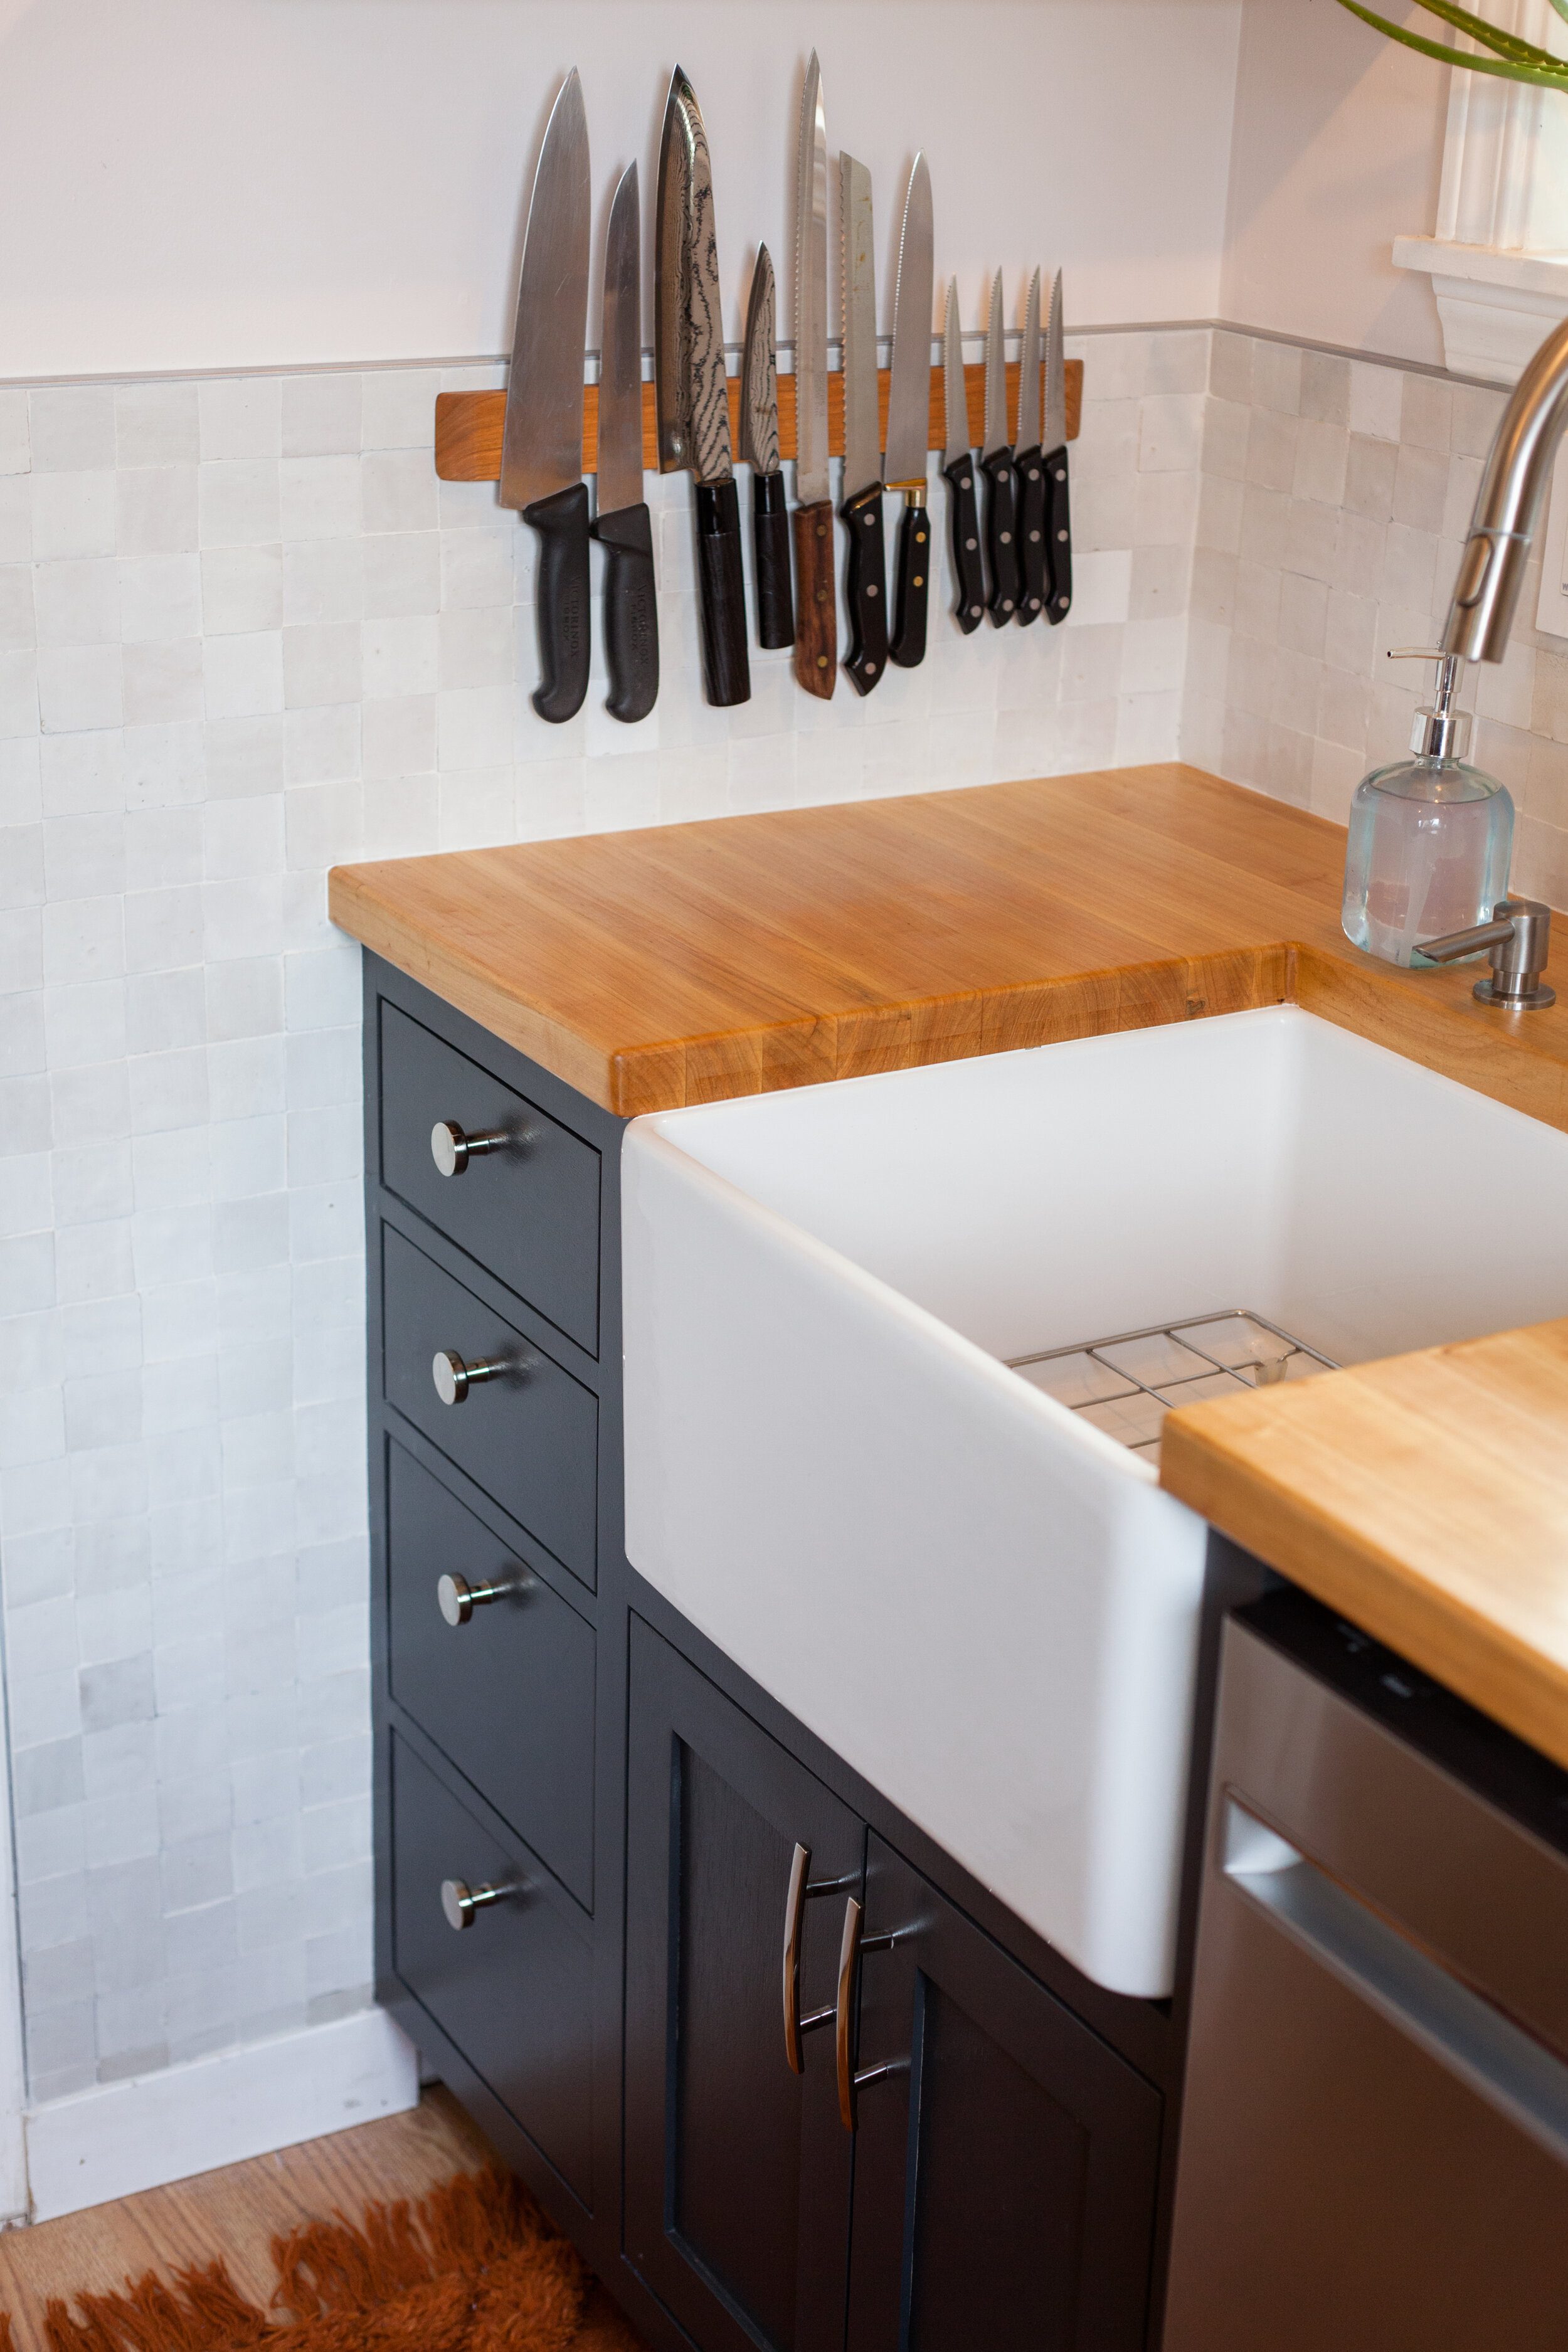
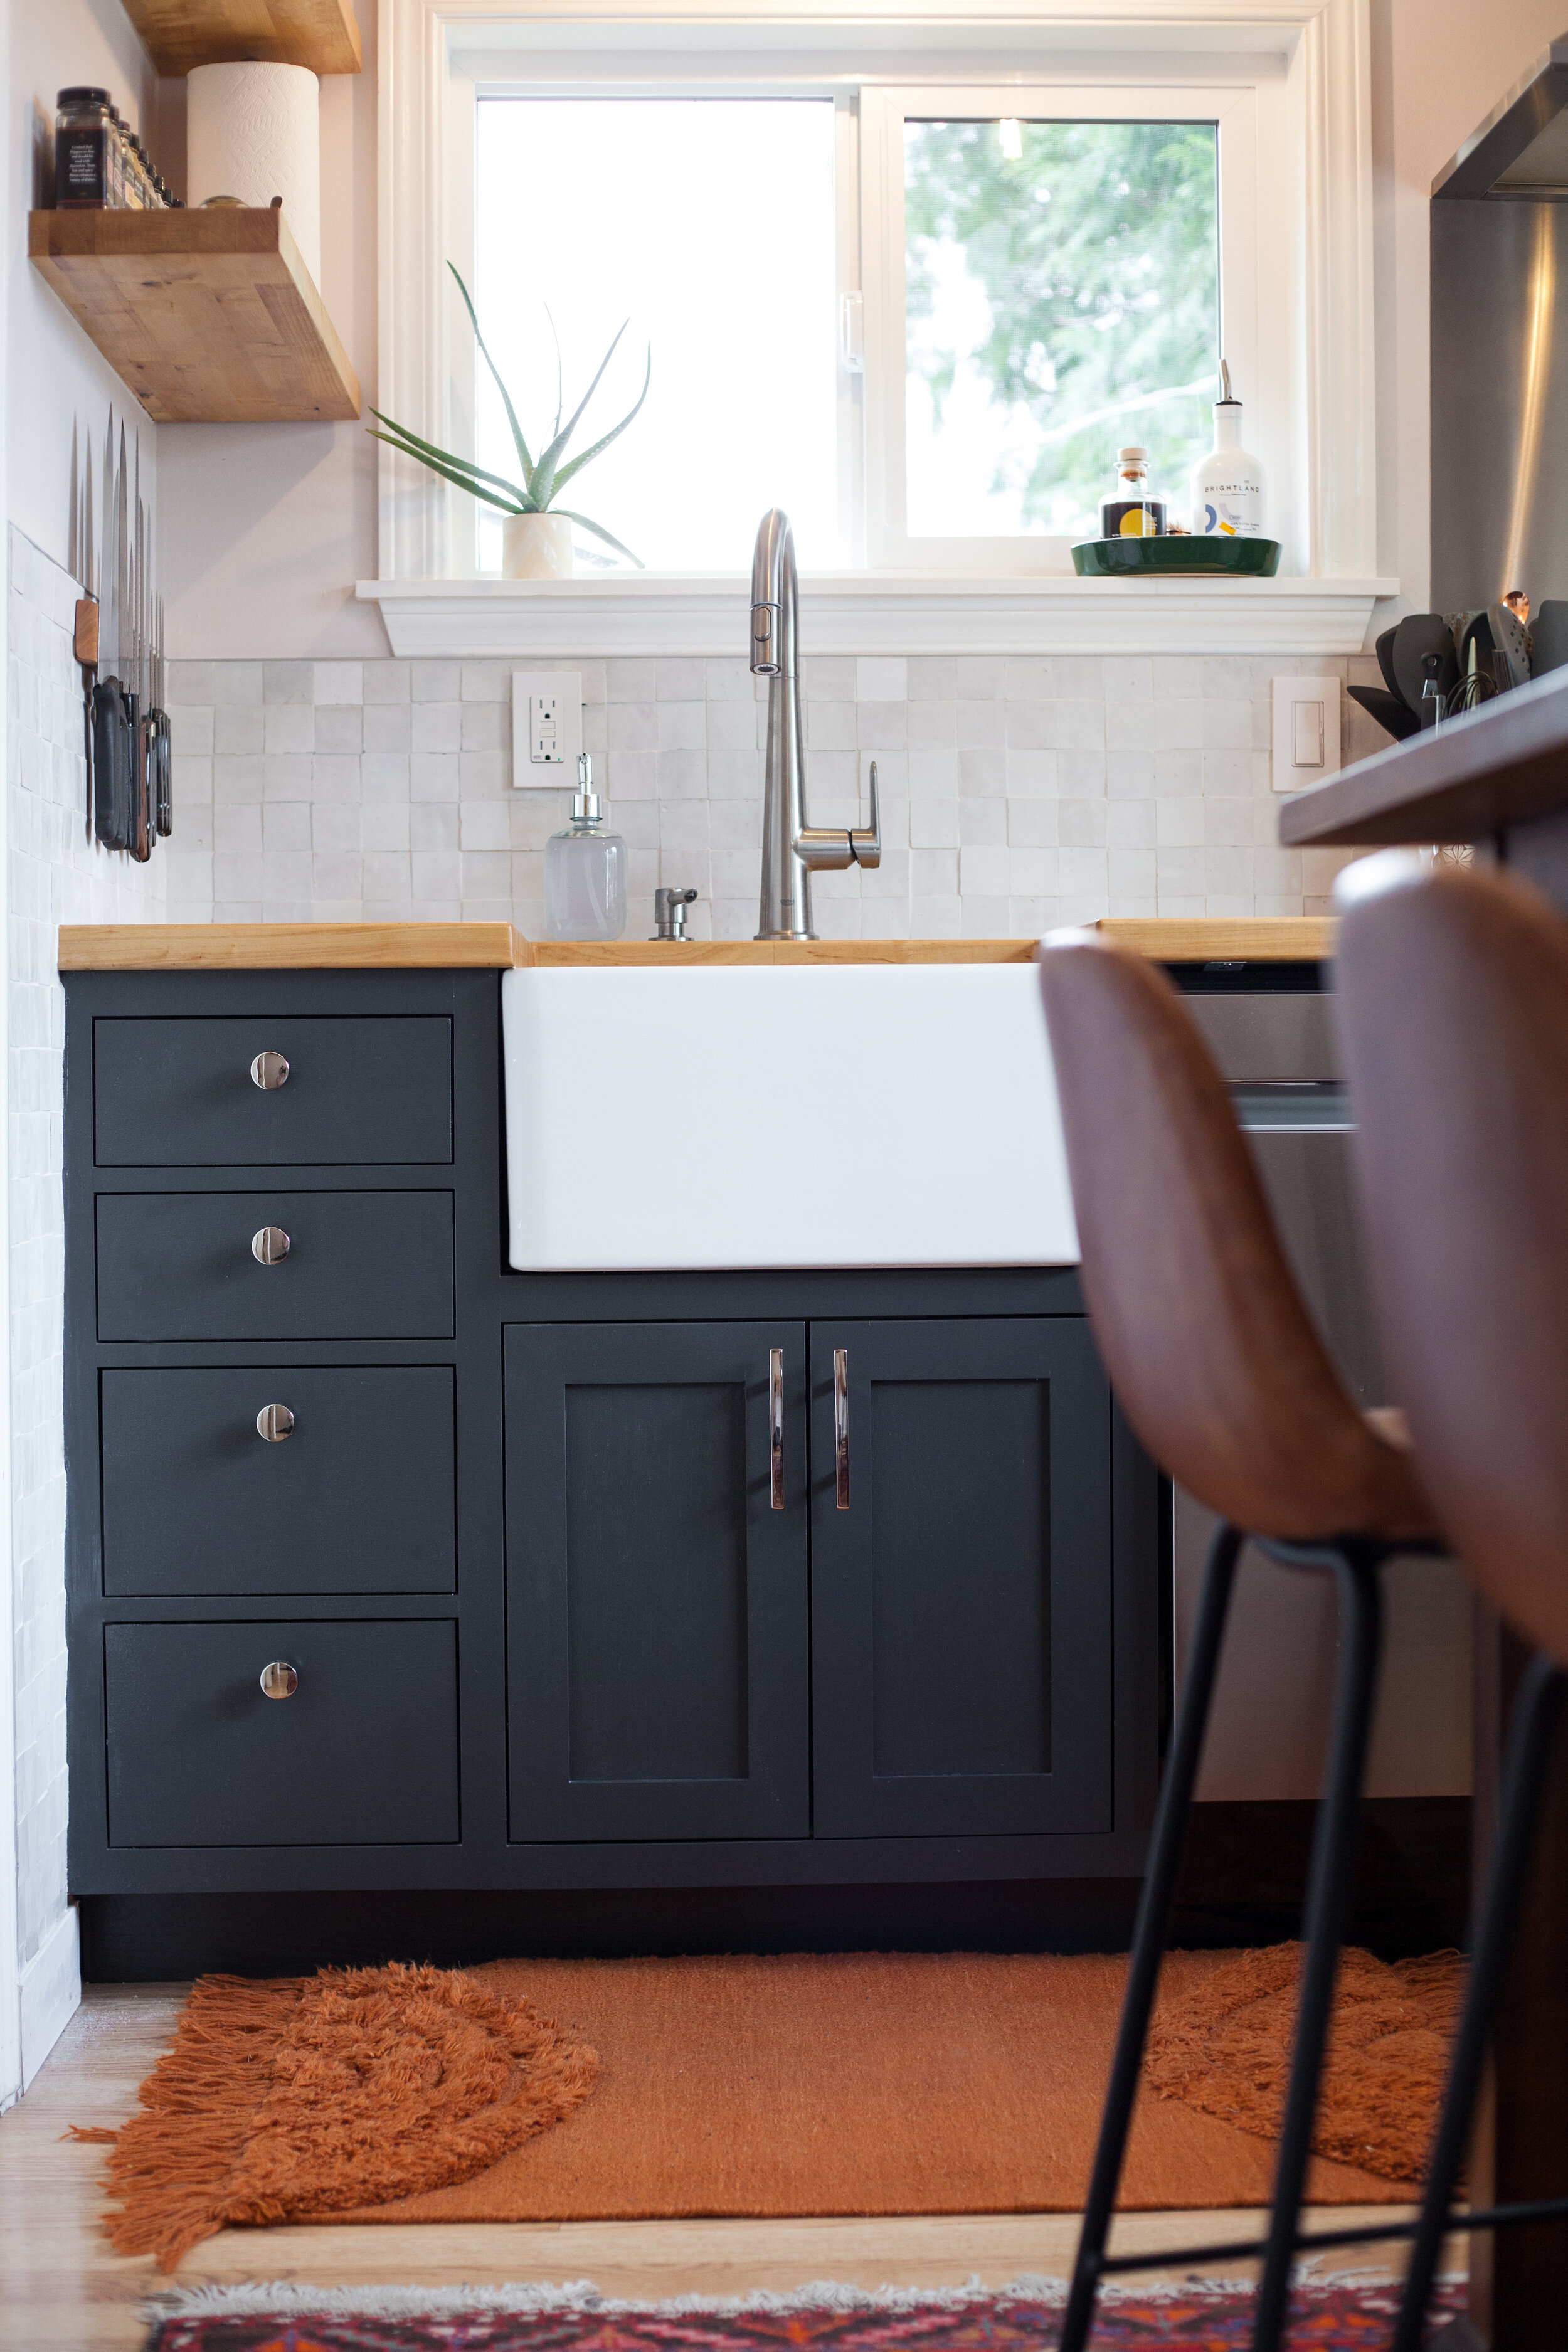
our contractor & friend, sam, helped us a bunch with the kitchen update as well. his friend built us a custom sink cabinet that would perfectly house the new farm sink and a small DISHWASHER!
another life lesson learned - do at least some updates when you move into a new home and don’t wait 7 years to make all of the best changes. 😂 i really could have used that dang dishwasher in my years of food blogging and all of the recipe/food photography work that i did in that tiny kitchen. i guess we didn’t mind hand washing all of our dishes too much since it was just the two of us - but once the dishwasher went in, i was like, “wow to all the free time i suddenly have, not having to wash every dish under this roof!” a major timesaver and convenience, that’s for sure.

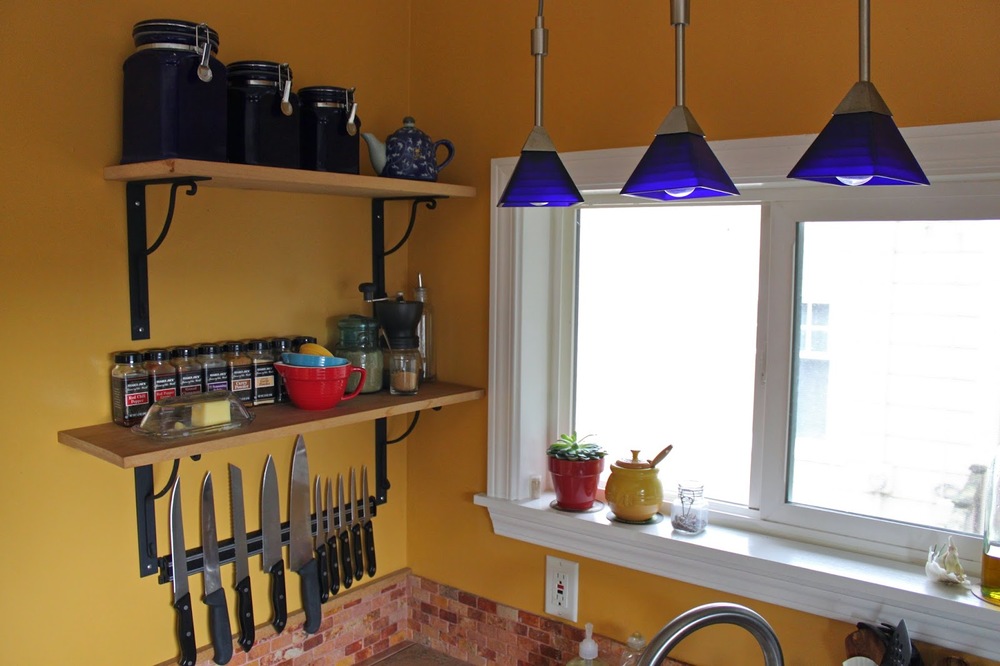
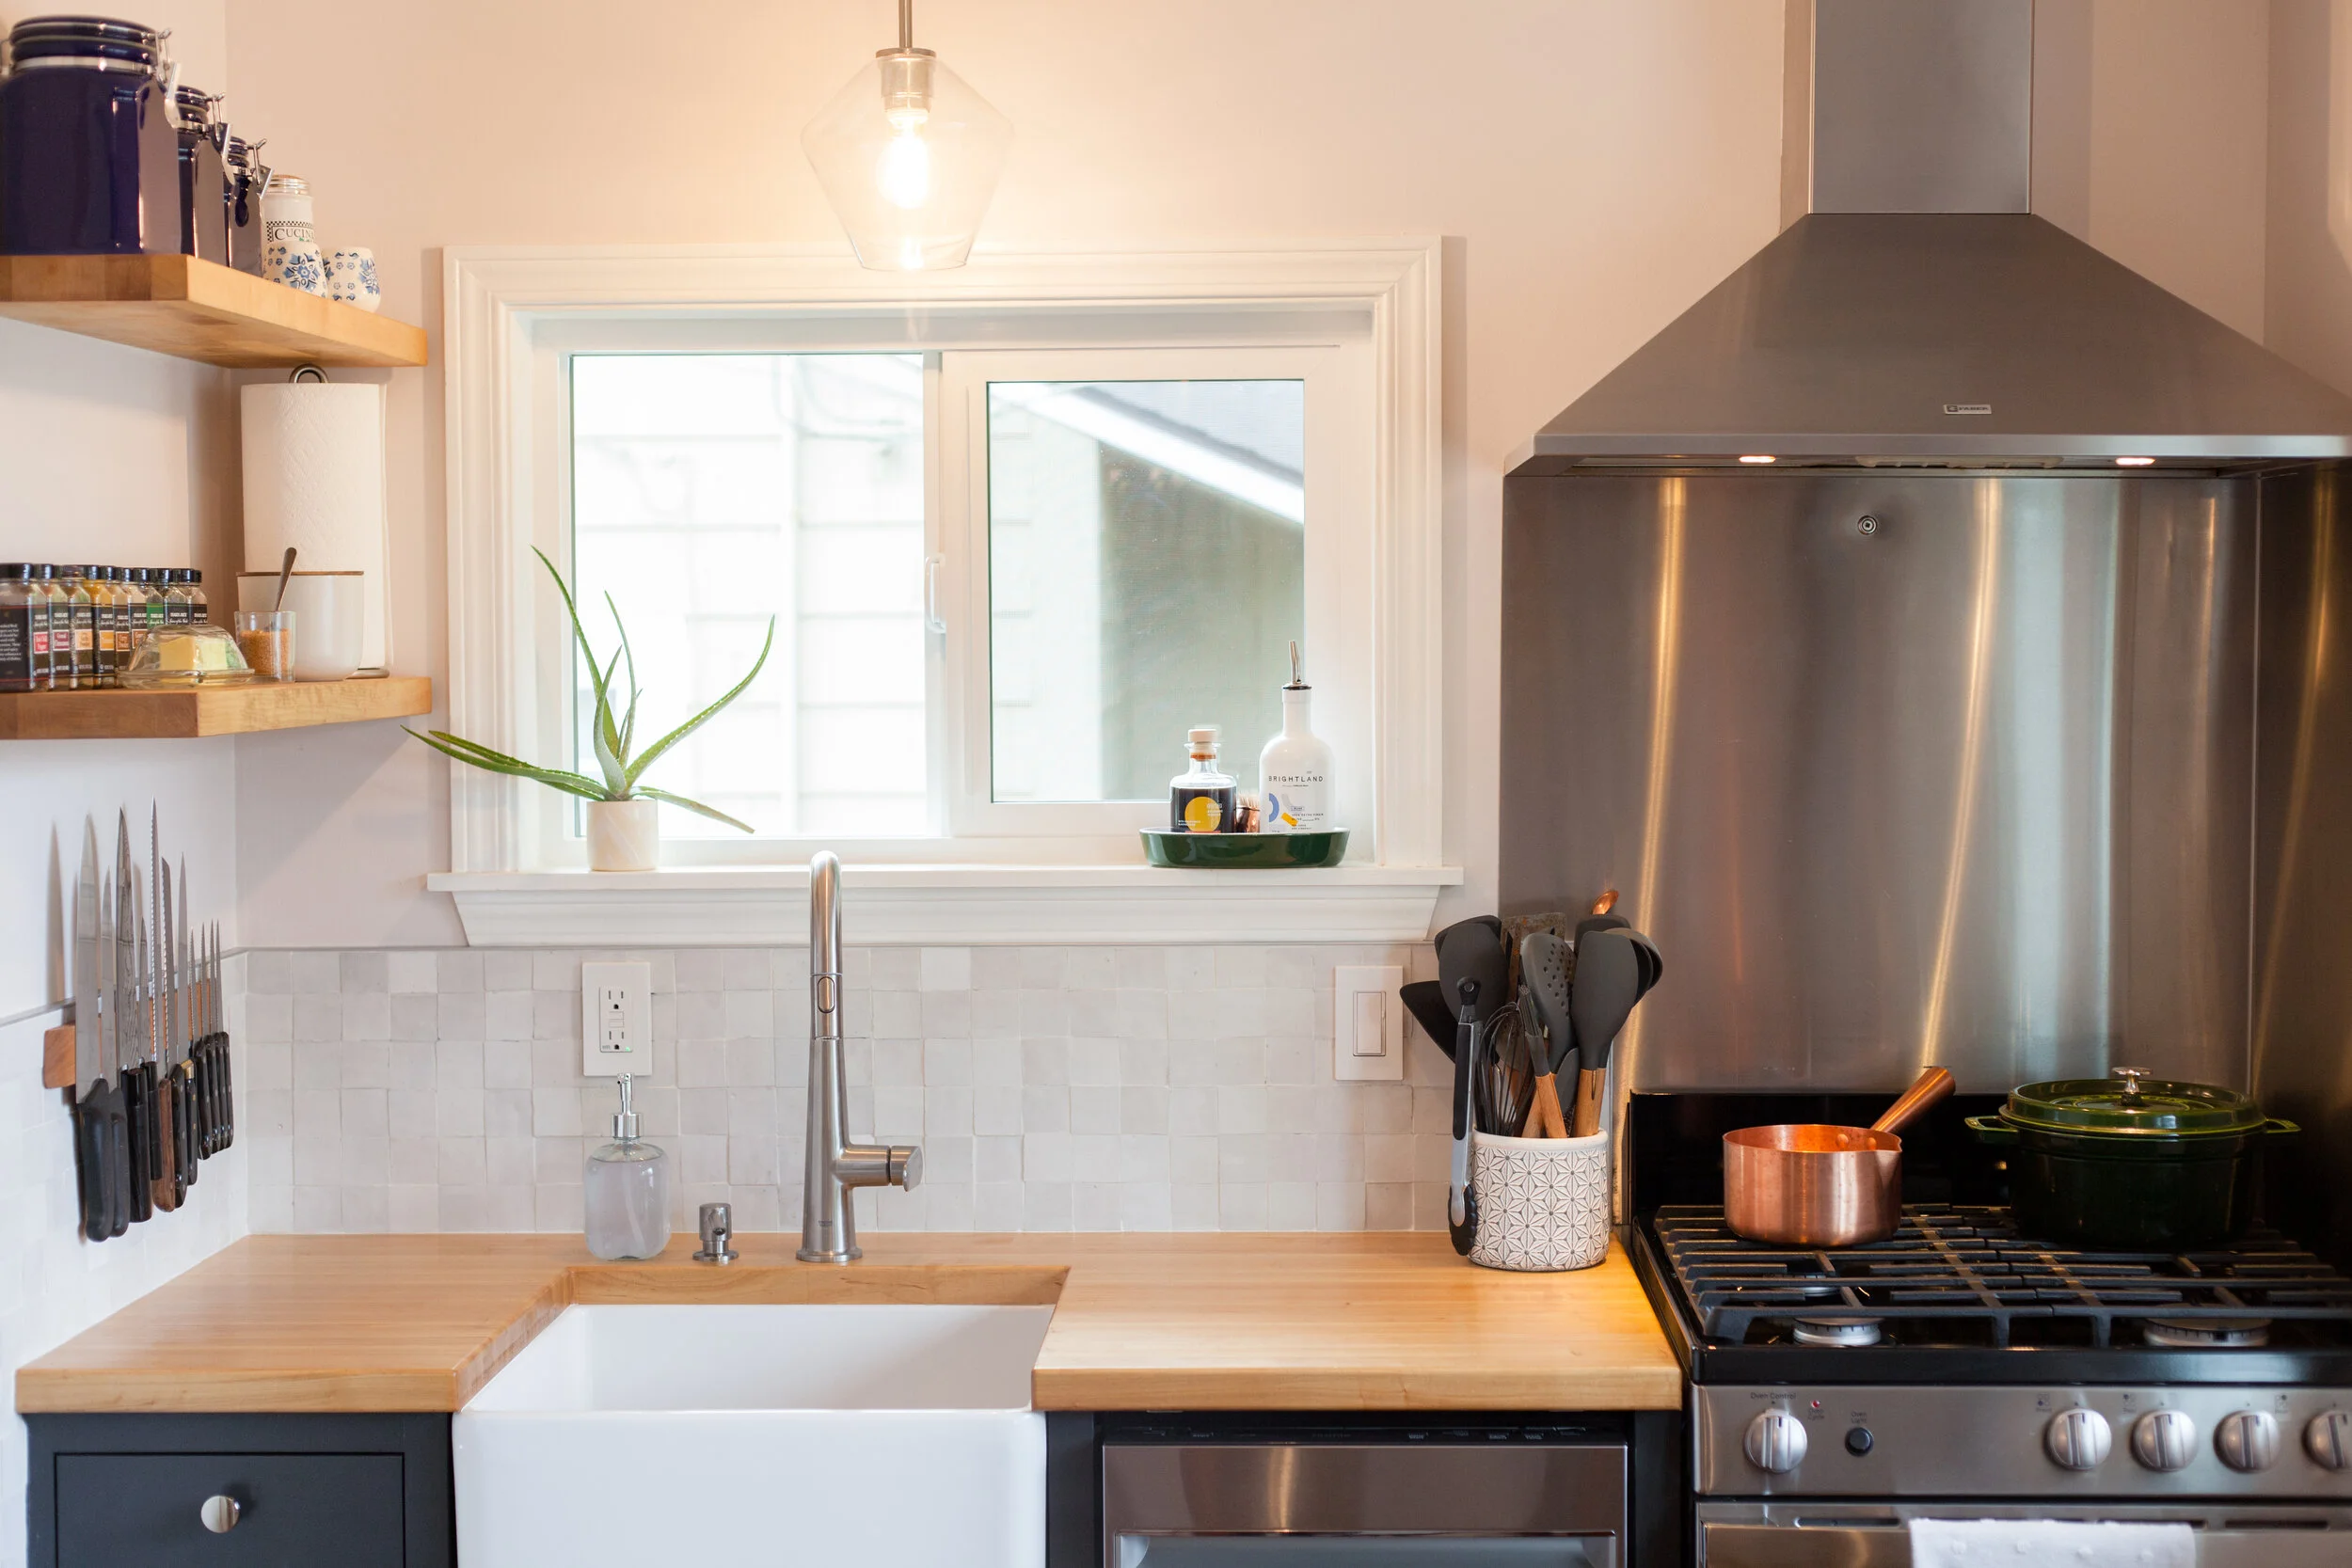
our original kitchen came with two wonky shelves to the left of the sink, which were perfect for open storage. we wanted to replicate the floating shelves that we’d done in the bathroom remodel, so that the tile & shelving textures throughout the house felt more cohesive.

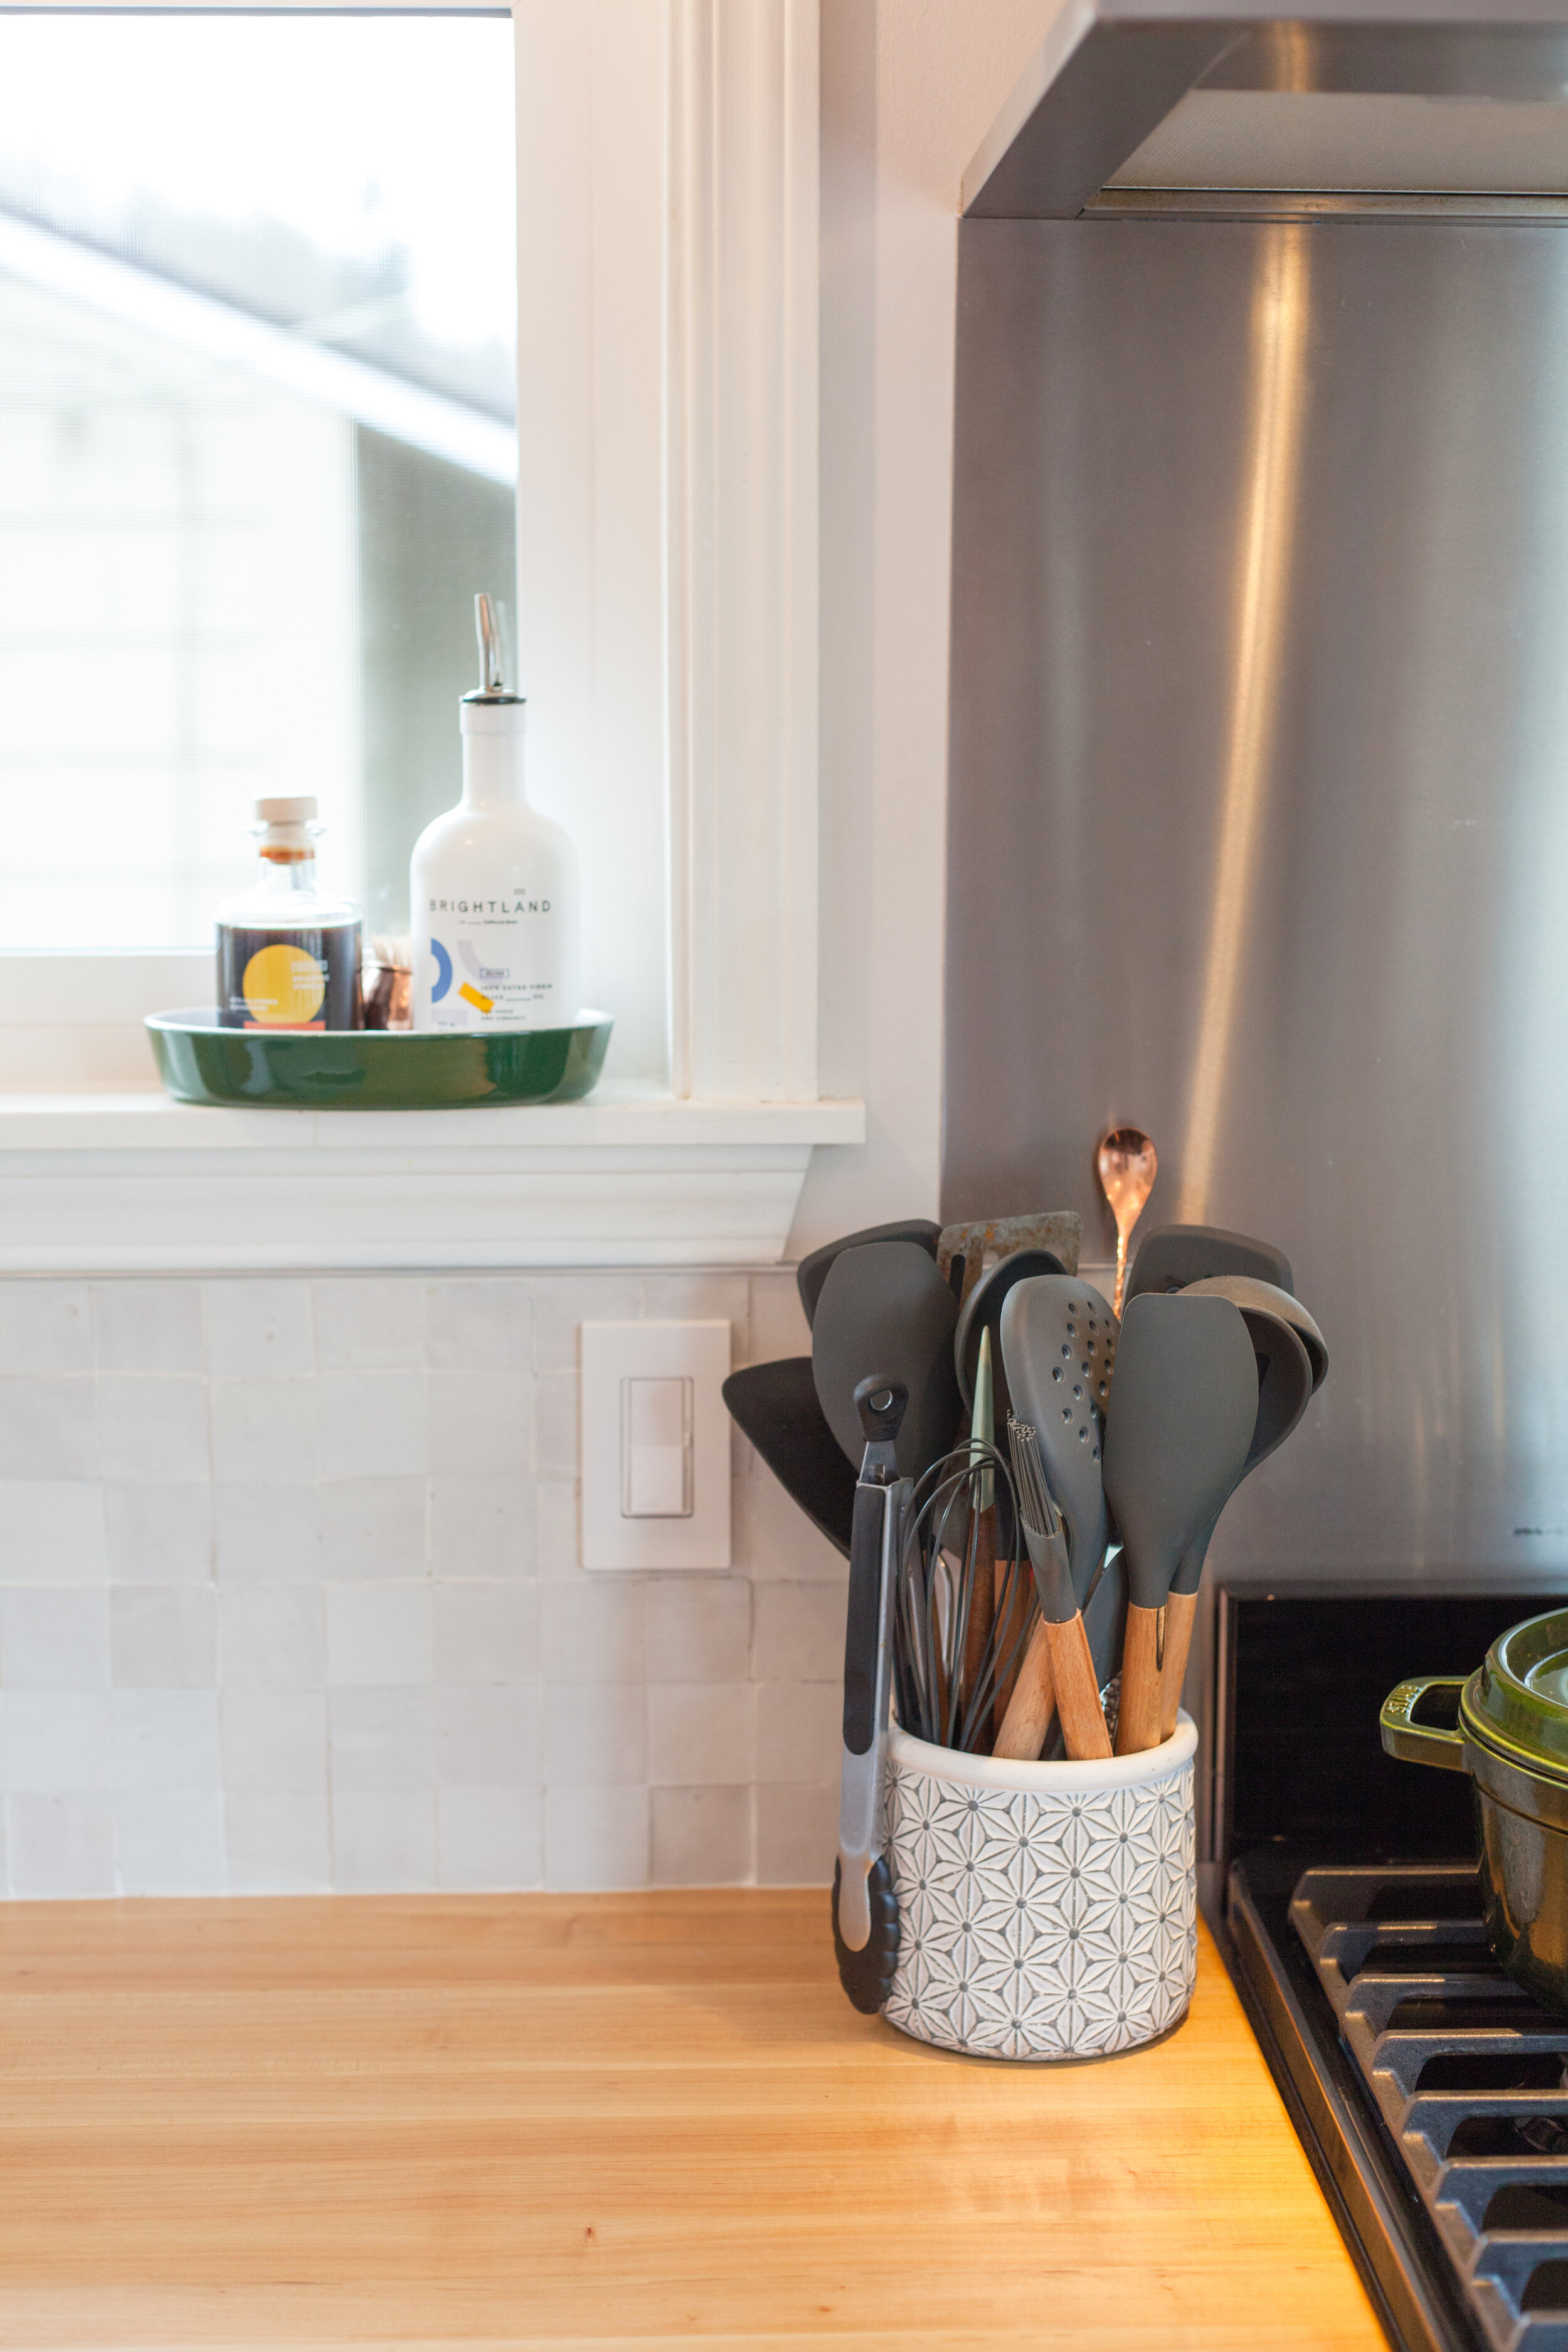
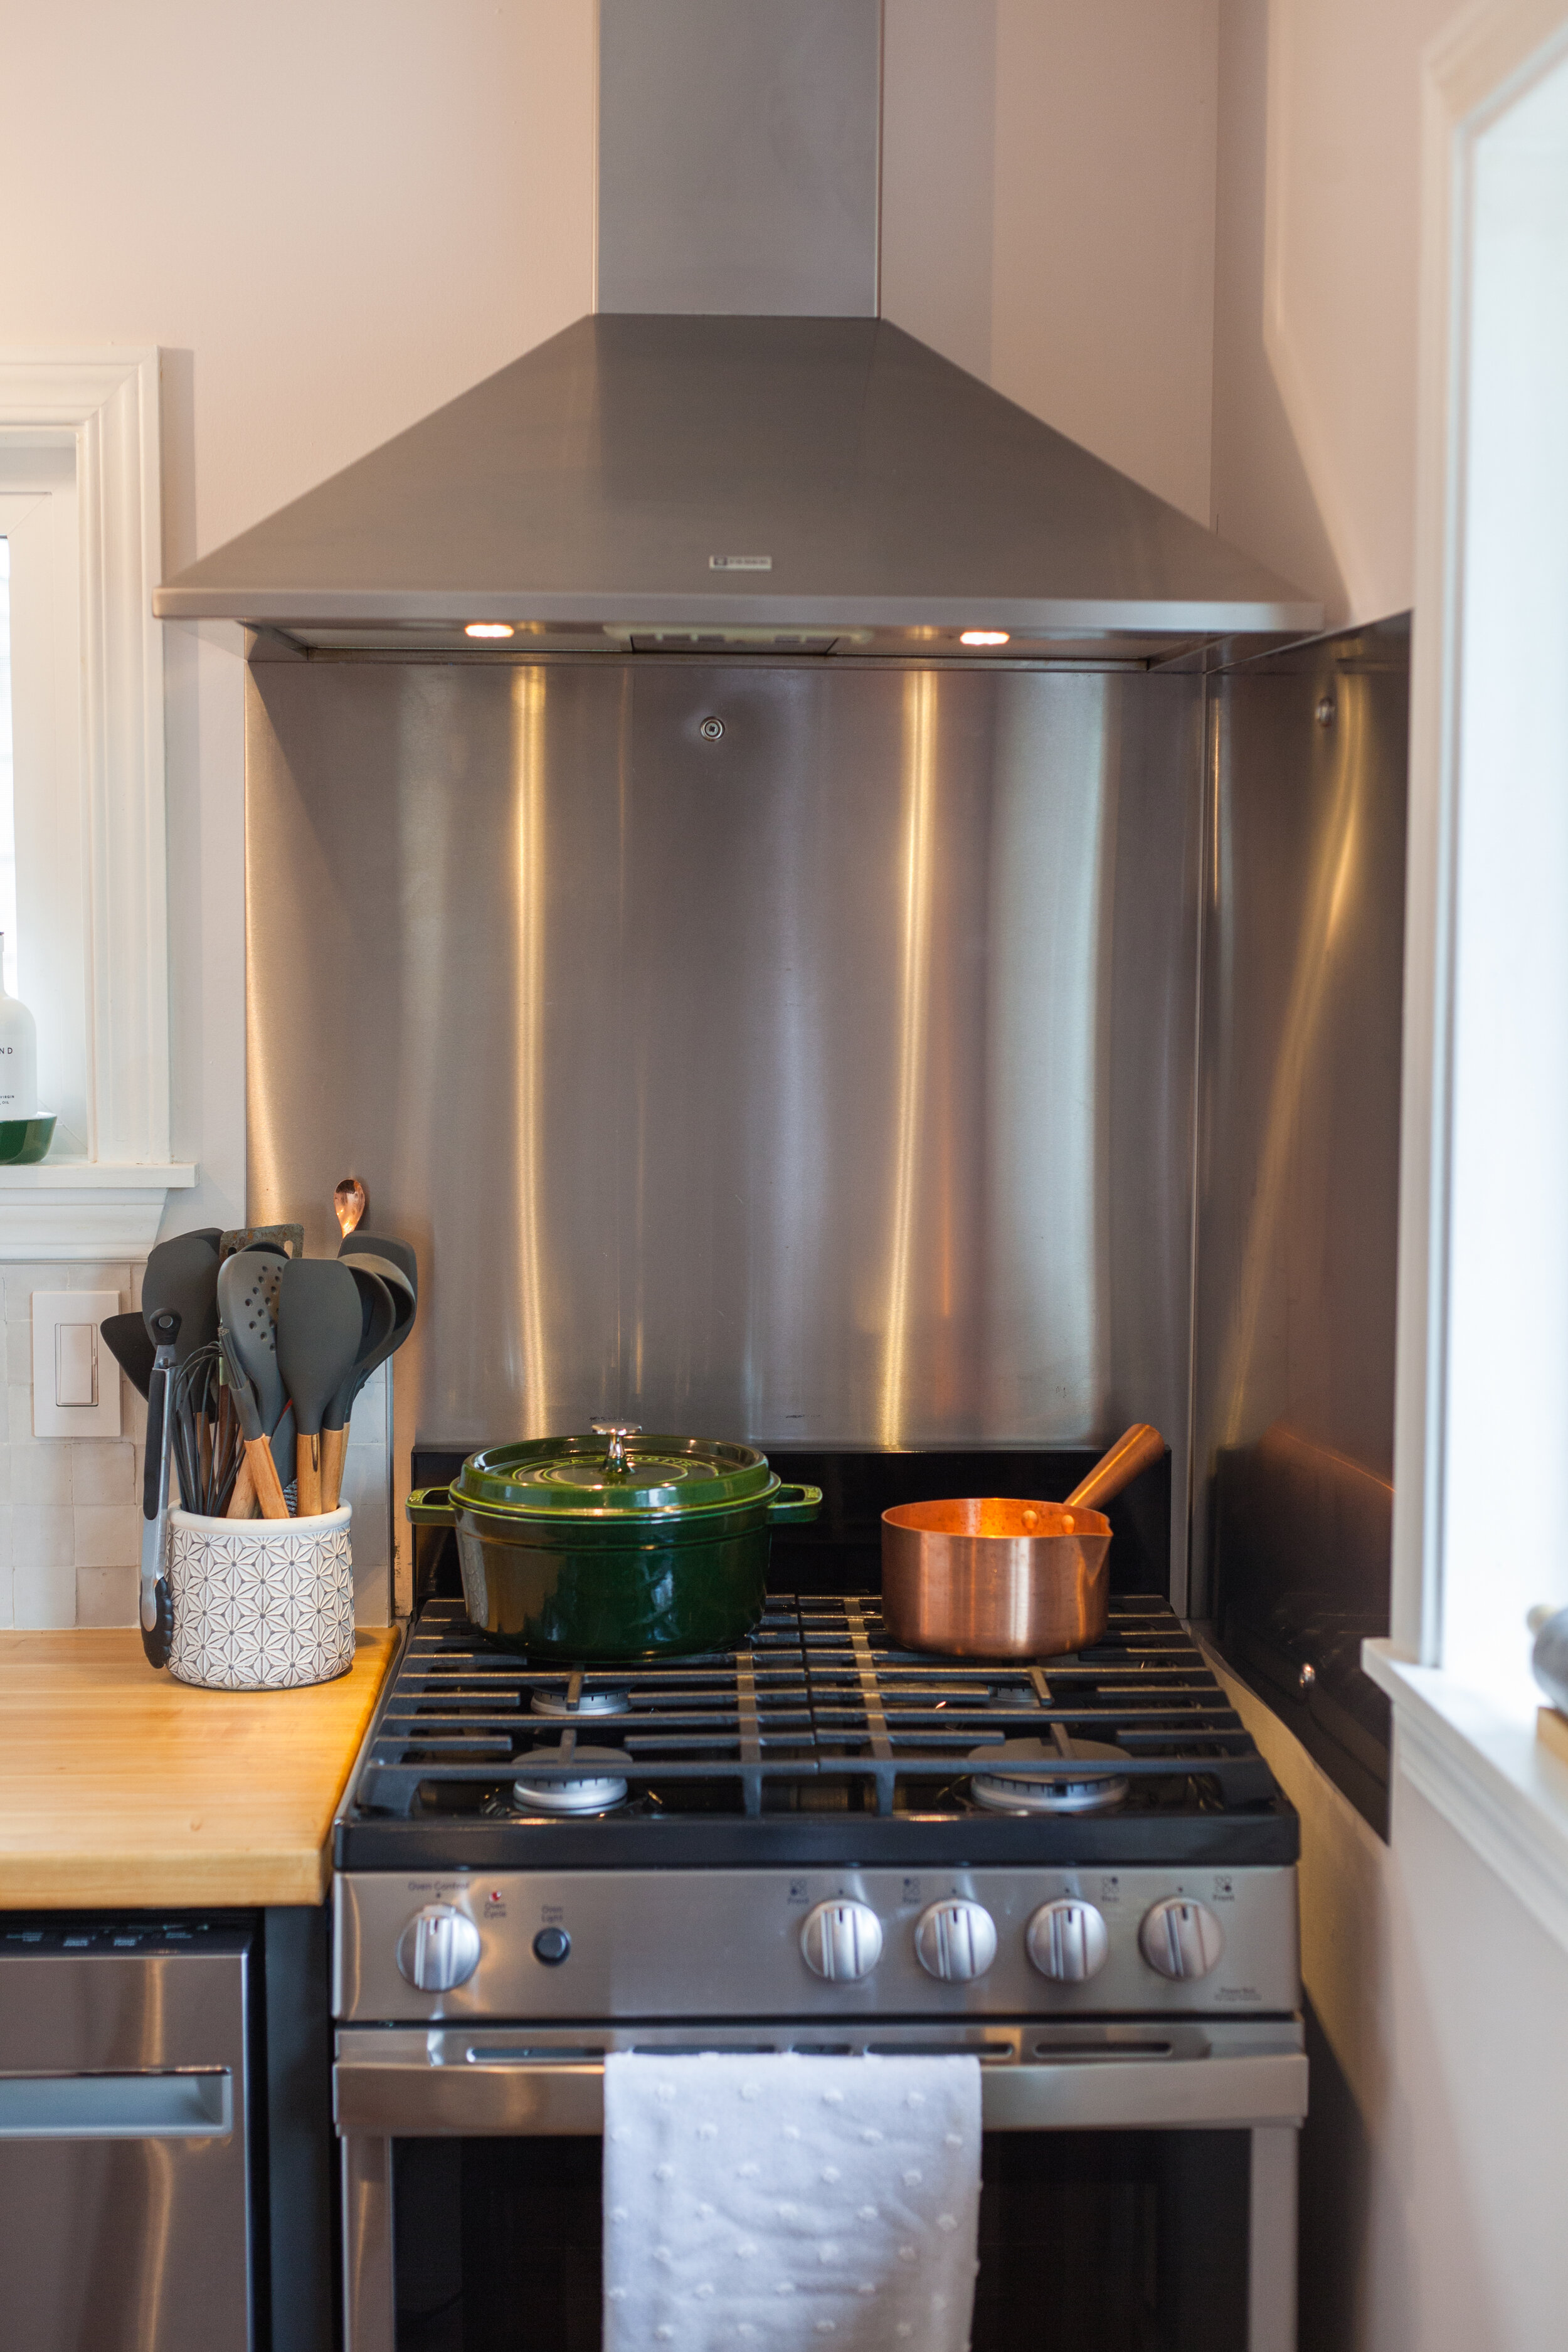
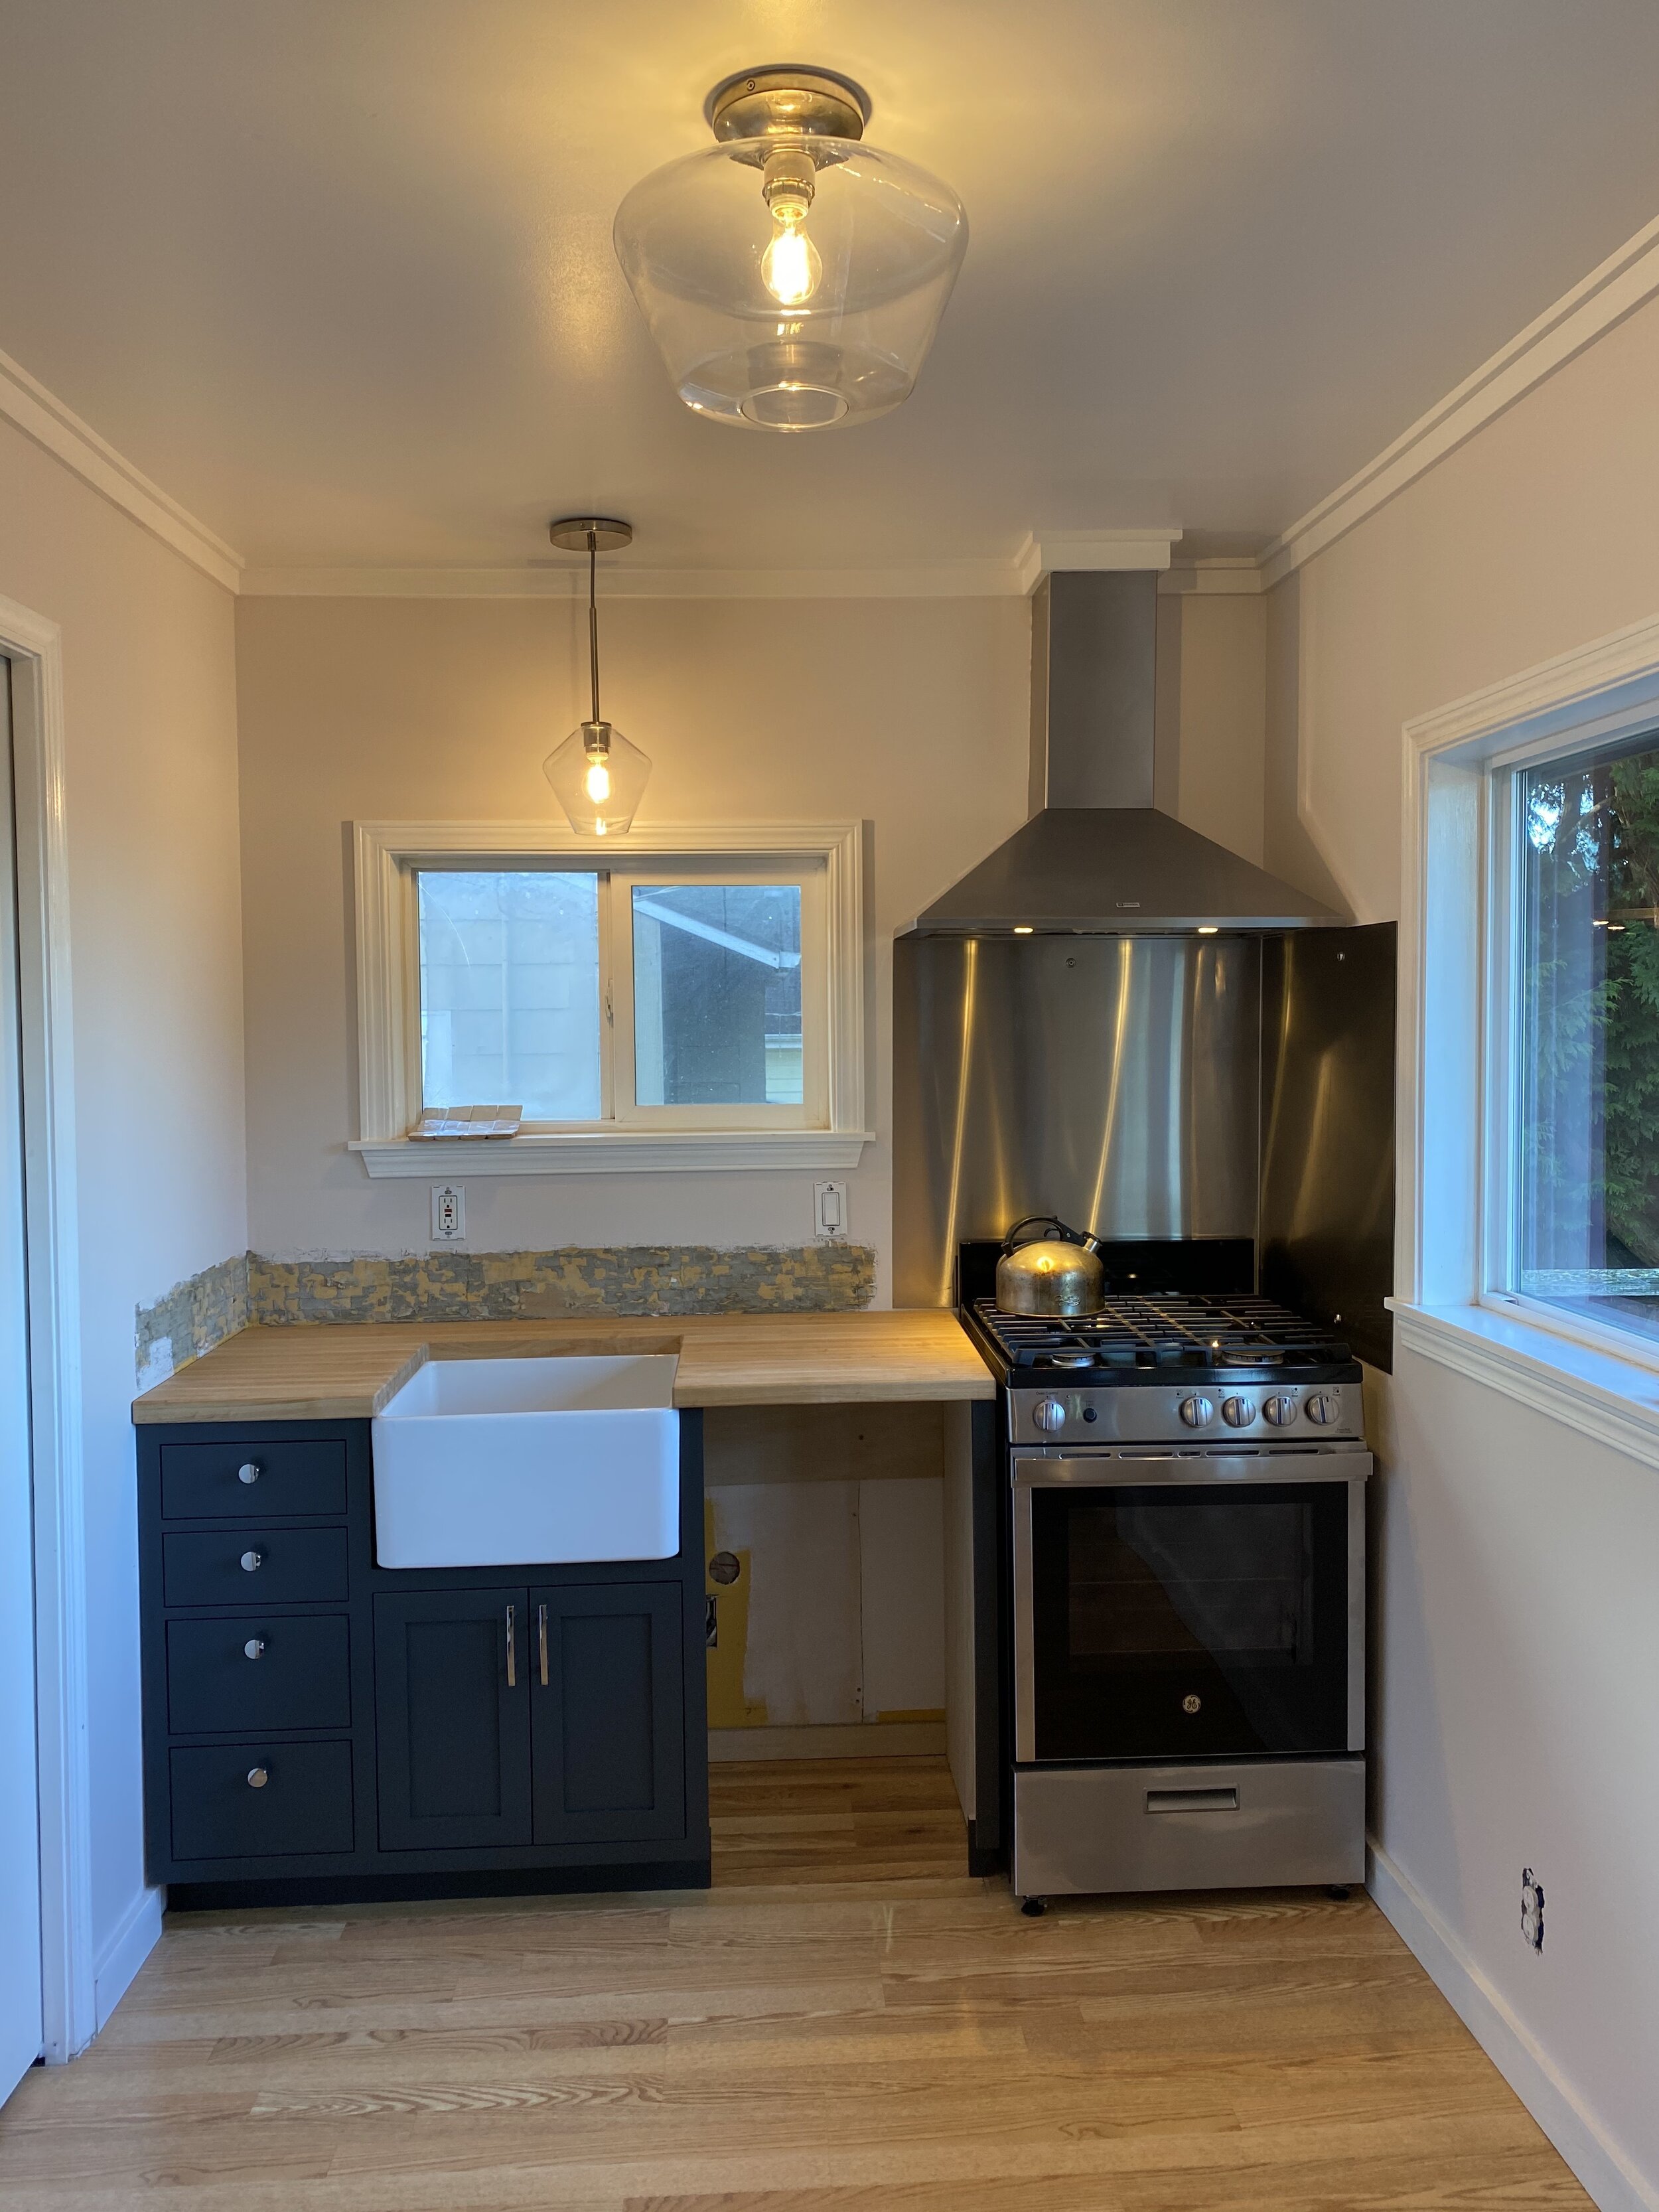
we kept the same range hood and stainless backsplash in that corner that came with our house. cooking on the stovetop in these tight quarters was really splashy and got soo messy, so the stainless steel on the walls was definitely a functional design that needed to stay.
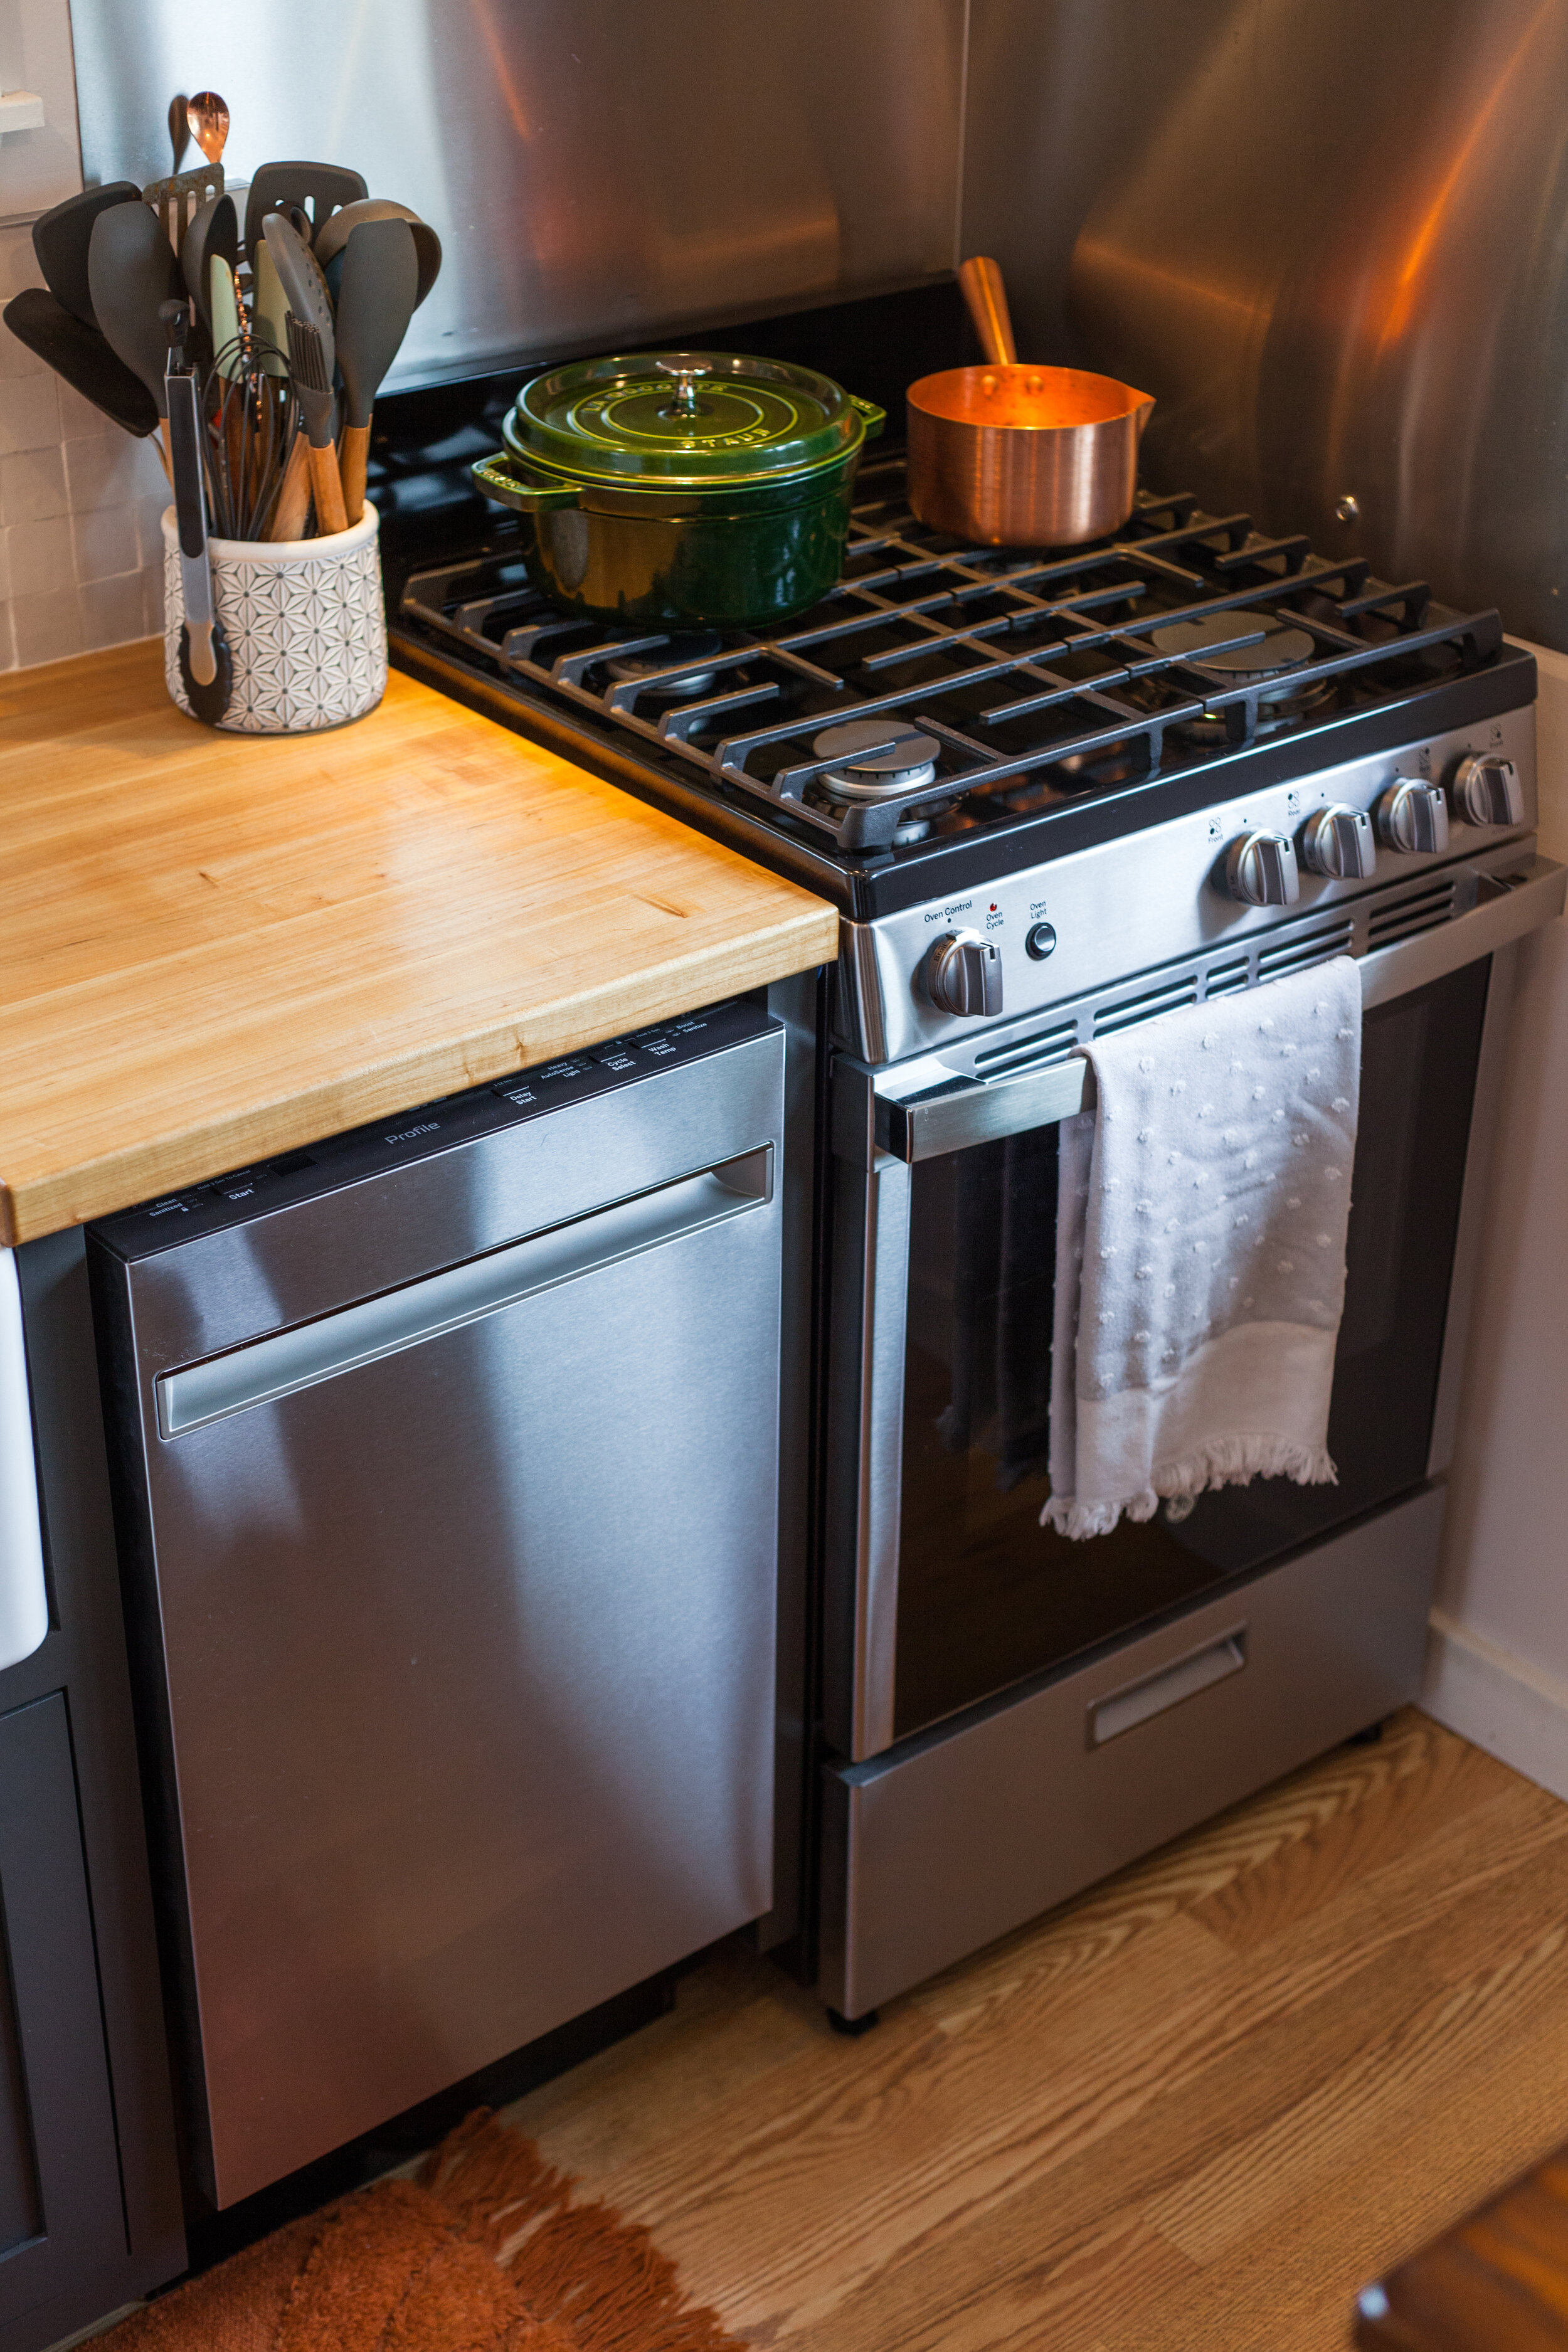
we did get ourselves a new gas range to replace the old one and that matched the new dishwasher as well!

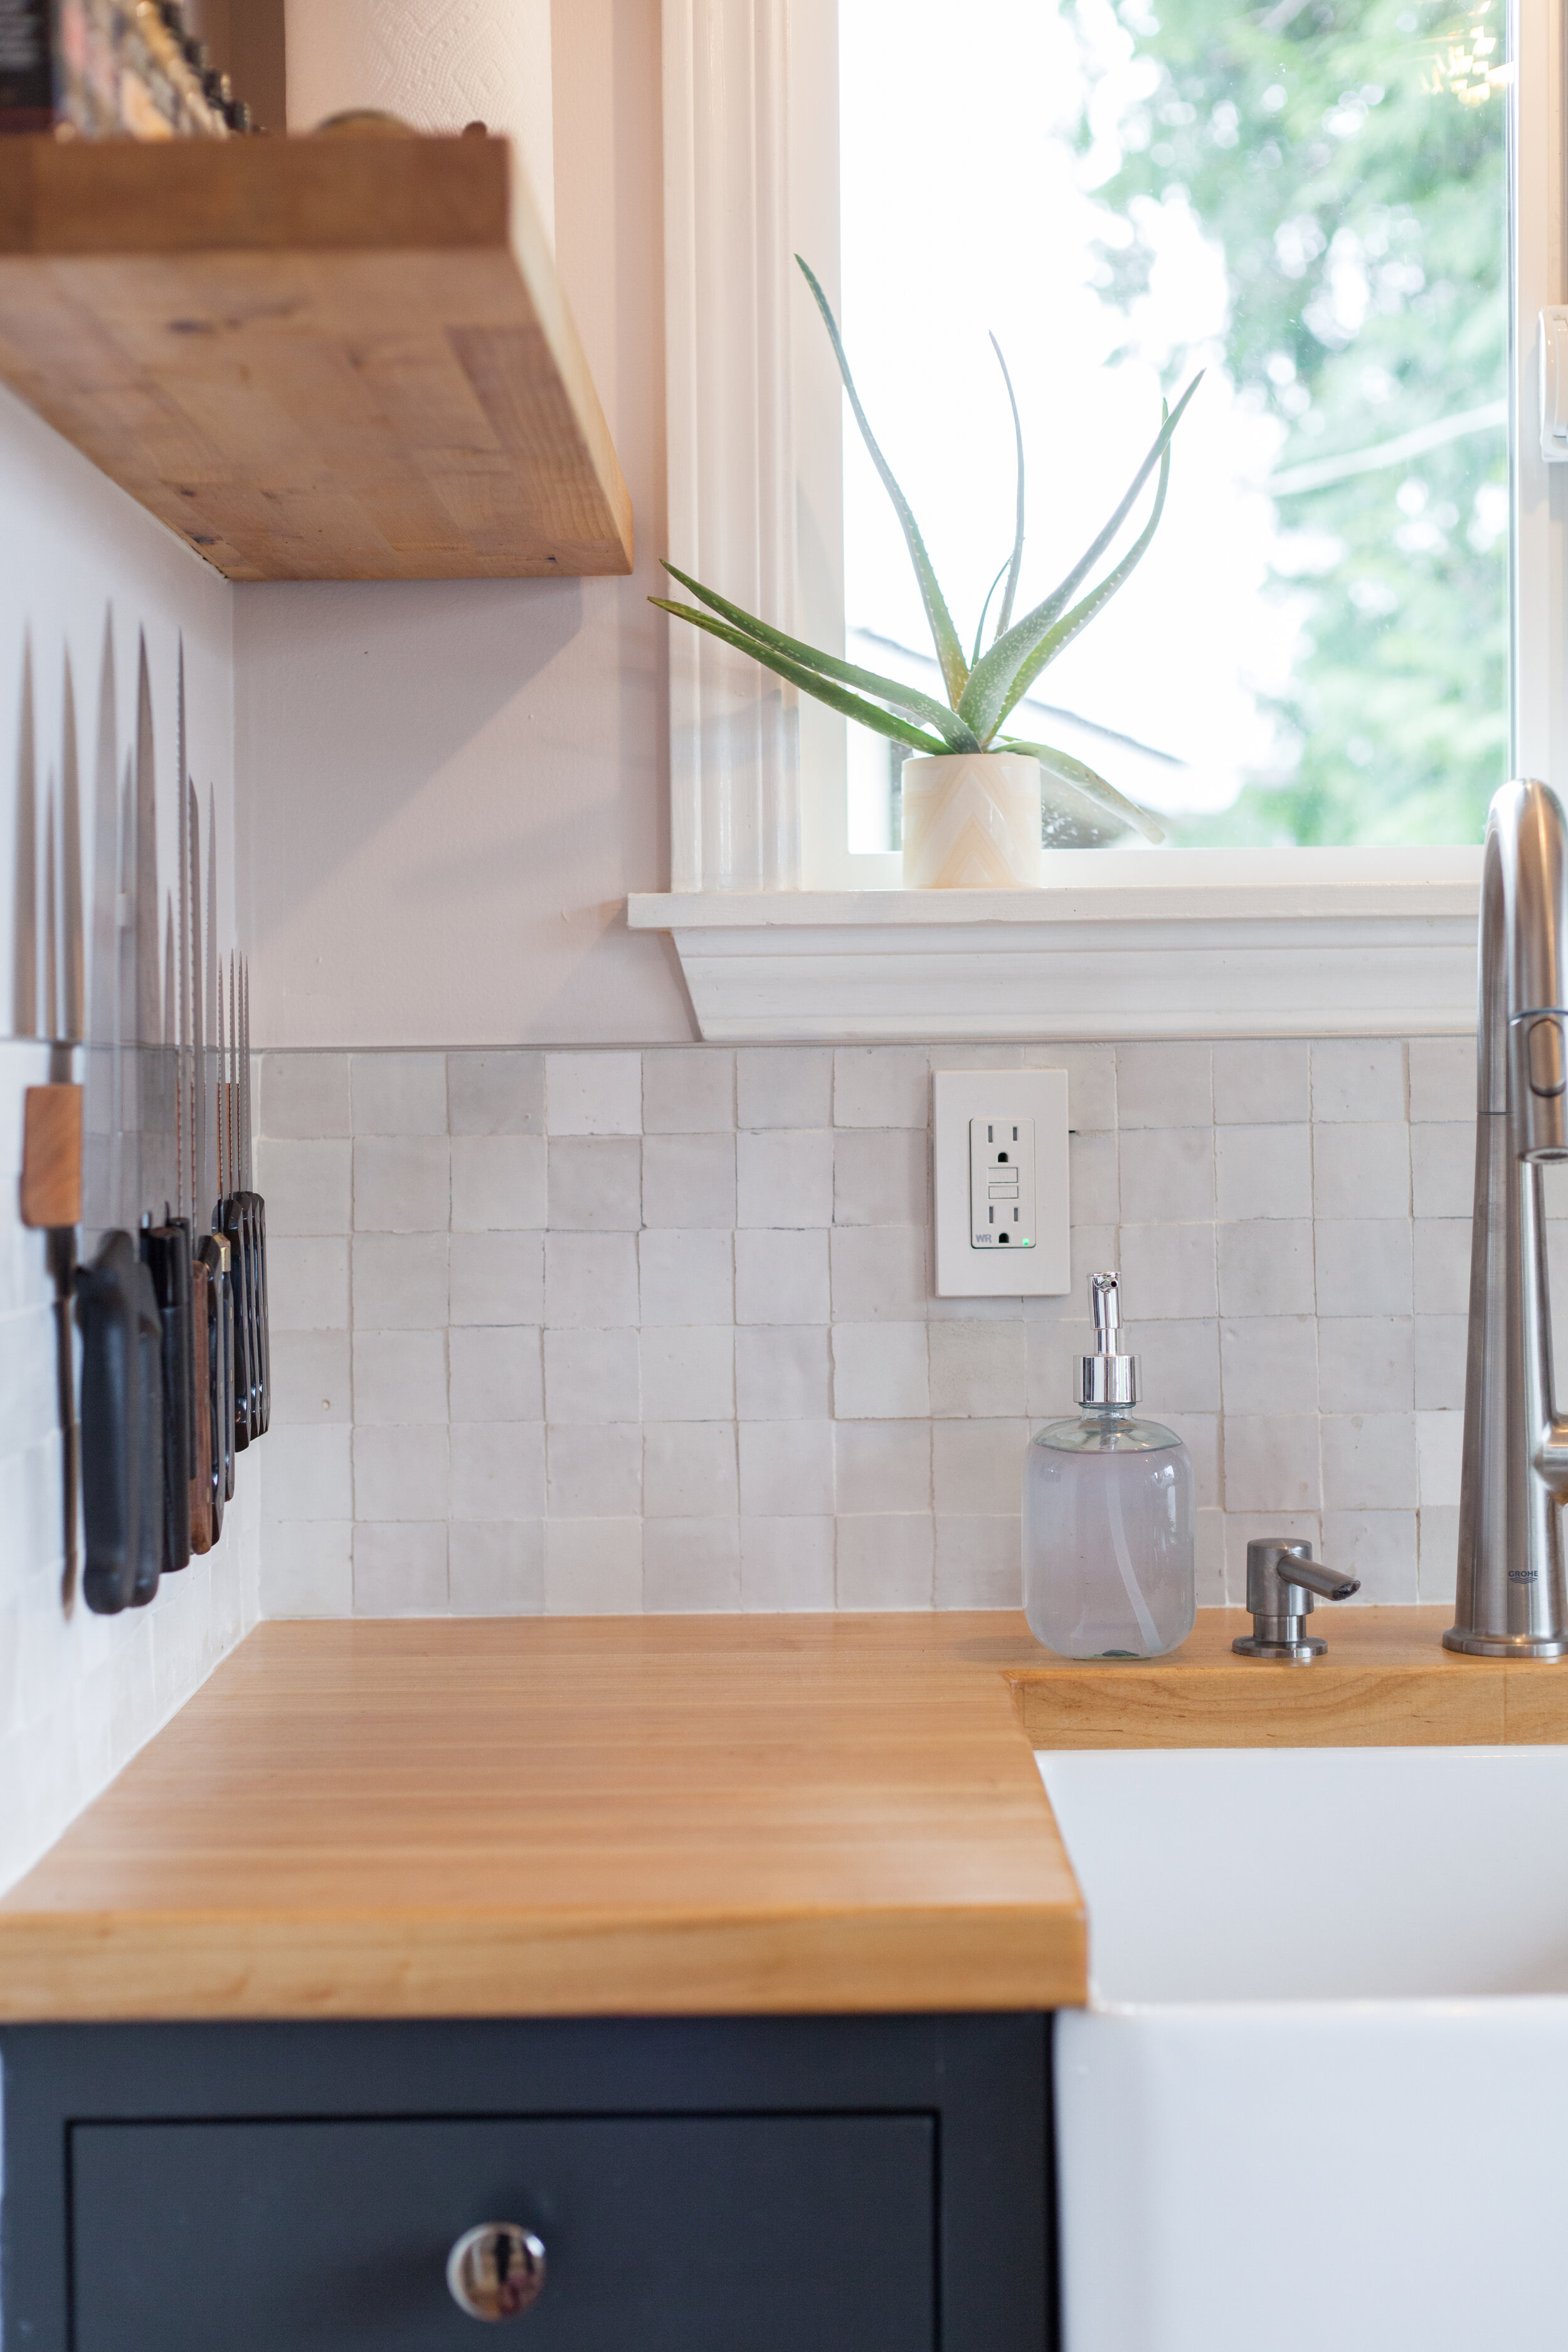
we loved the idea of the magnetic knife block that came with the house and what a space-saver it was. to update it, we found this natural wood magnetic knife block made by a local guy on etsy. we were able to drill through the tile to mount the new knife block. it matched the butcher block countertop and floating shelves quite nicely.
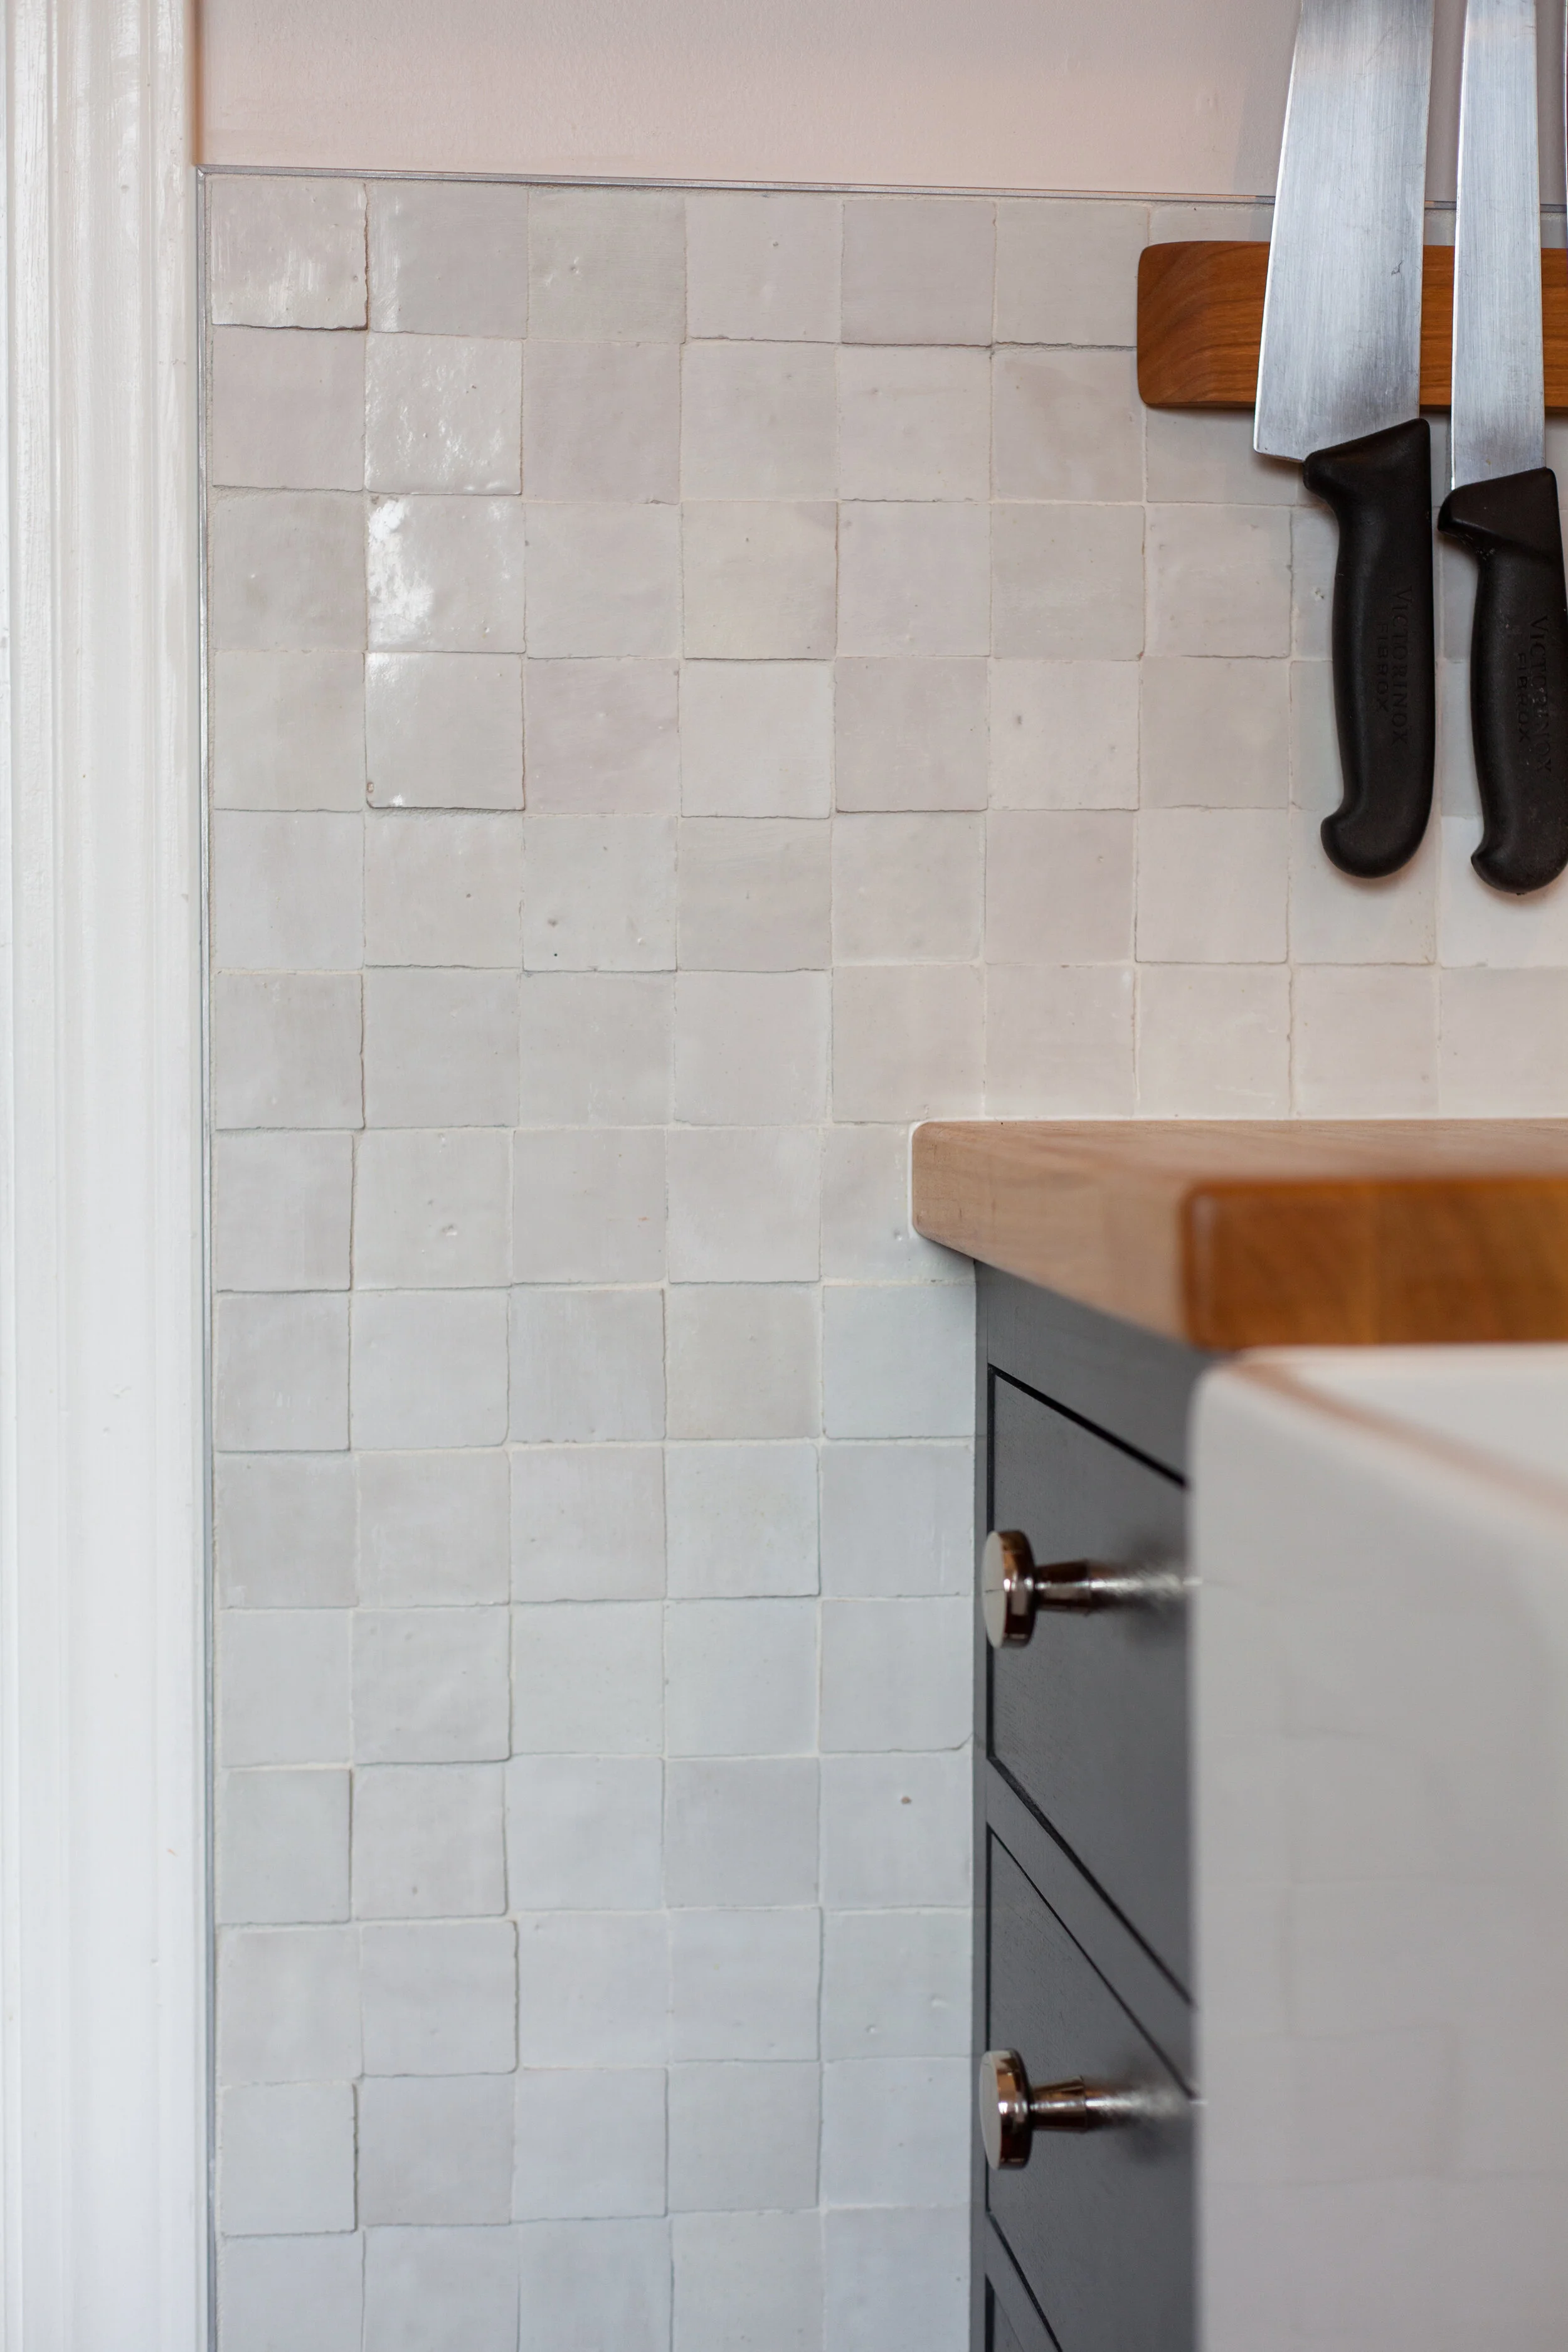
as we’d done in the bathroom, pete and i installed the zellige tile here in the kitchen ourselves. we’d gained a bit of confidence having done it once already, and spent a couple of evenings tiling up the wall and across the backsplash area. i grouted on the 3rd night, and she was all nice & new!
i really love the irregularity and imperfection of the zellige tile, and how every piece is slightly different & beautiful.

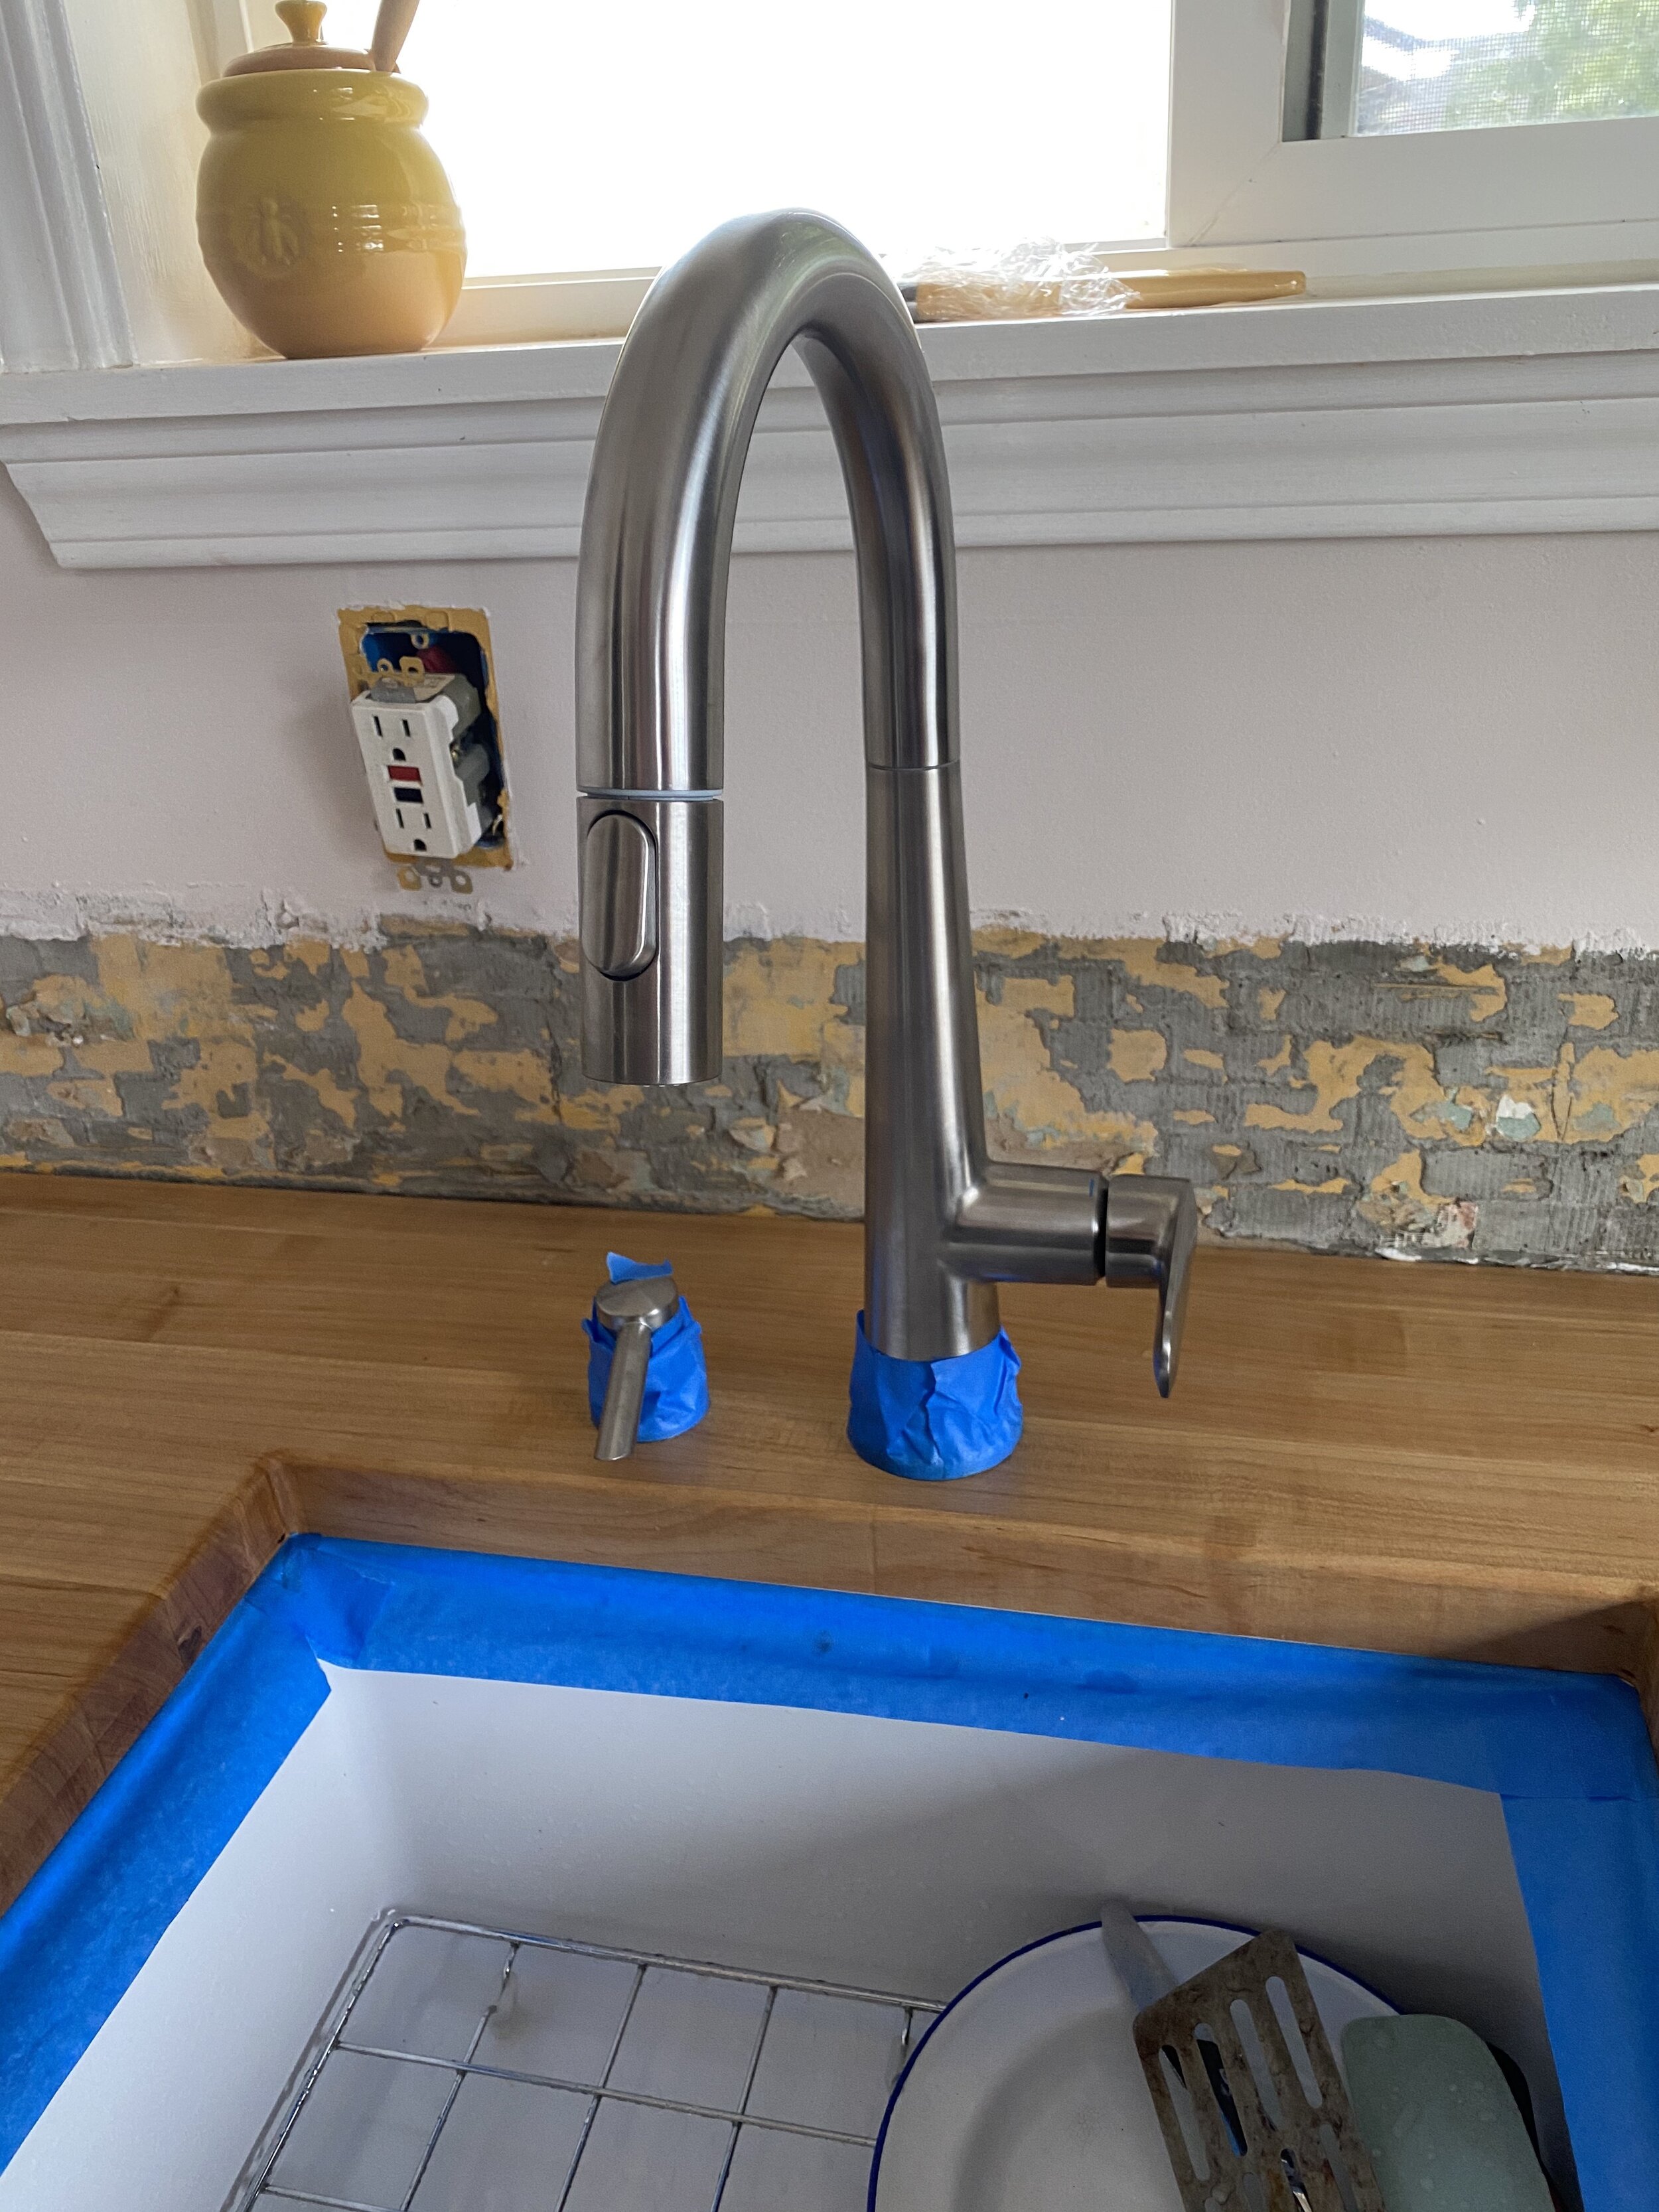
new faucet for our new farmhouse style sink! our previous sink was SO ridiculously SMALL and stupid. i hated it so much. i honestly cannot believe we went 7 years with that tiny sink. even this 20-inch farmhouse sink (which is small compared to other farmhouse sinks) felt massive to us after replacing the old tiny sink!


the amount of wasted space in the original kitchen sink to stove layout was insane. there were 6-inch gaps on either side of the old range, where all fallen spaghetti noodles went to die and left the dirtiest, hard to reach, crusty dustbowl area of absolute wasted kitchen real estate - which was the most precious commodity in this house!
we measured a zillion times to figure out how to replace mostly everything on this side of the kitchen and squeeze in a new 30” gas range, 18” dishwasher, 20” sink, and still keep the drawers and some cabinet storage for cleaning products.
we figured it out, AND...the counter space became significantly greater when we had the cabinet built to house the dishwasher, and fit a piece of butcher block on top of the cabinet unit. what a true joy it was to have even 8 more inches of counter space, lol.
we’d wanted to install some type of white quartz countertop here, but decided on the butcher block as a more affordable and “replaceable” countertop for the next owners to come. it would be really simple for them to pop out the butcher block and replace with their desired countertops of choice!
i was so proud of our skillz in maximizing this space to its fullest capacity!
it is a small kitchen, but as someone who loves to cook & bake and ran their own food photography business from said tiny kitchen - anything is possible, folks.


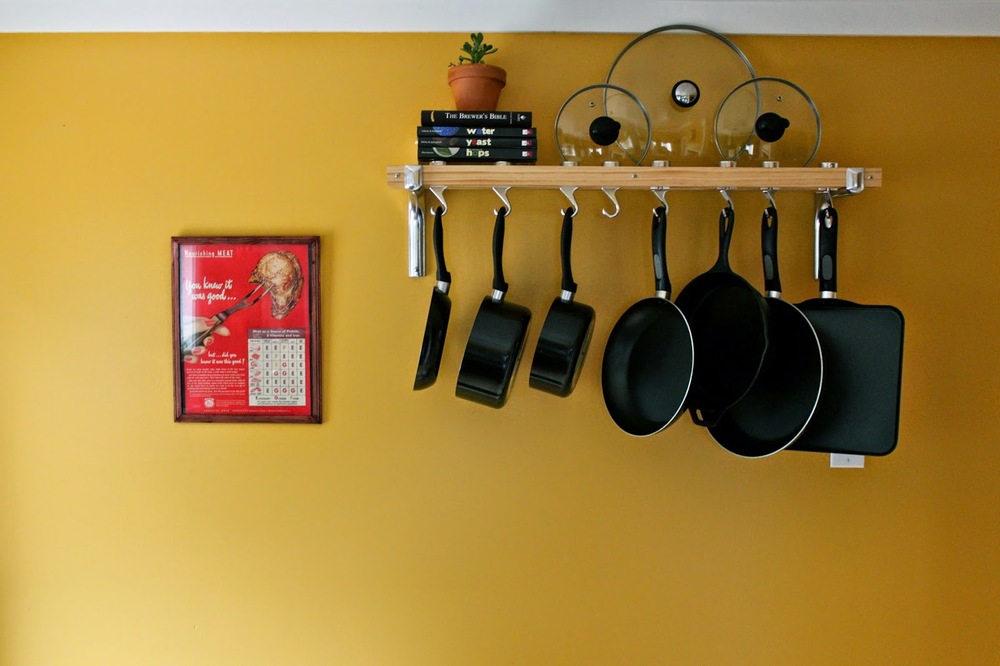
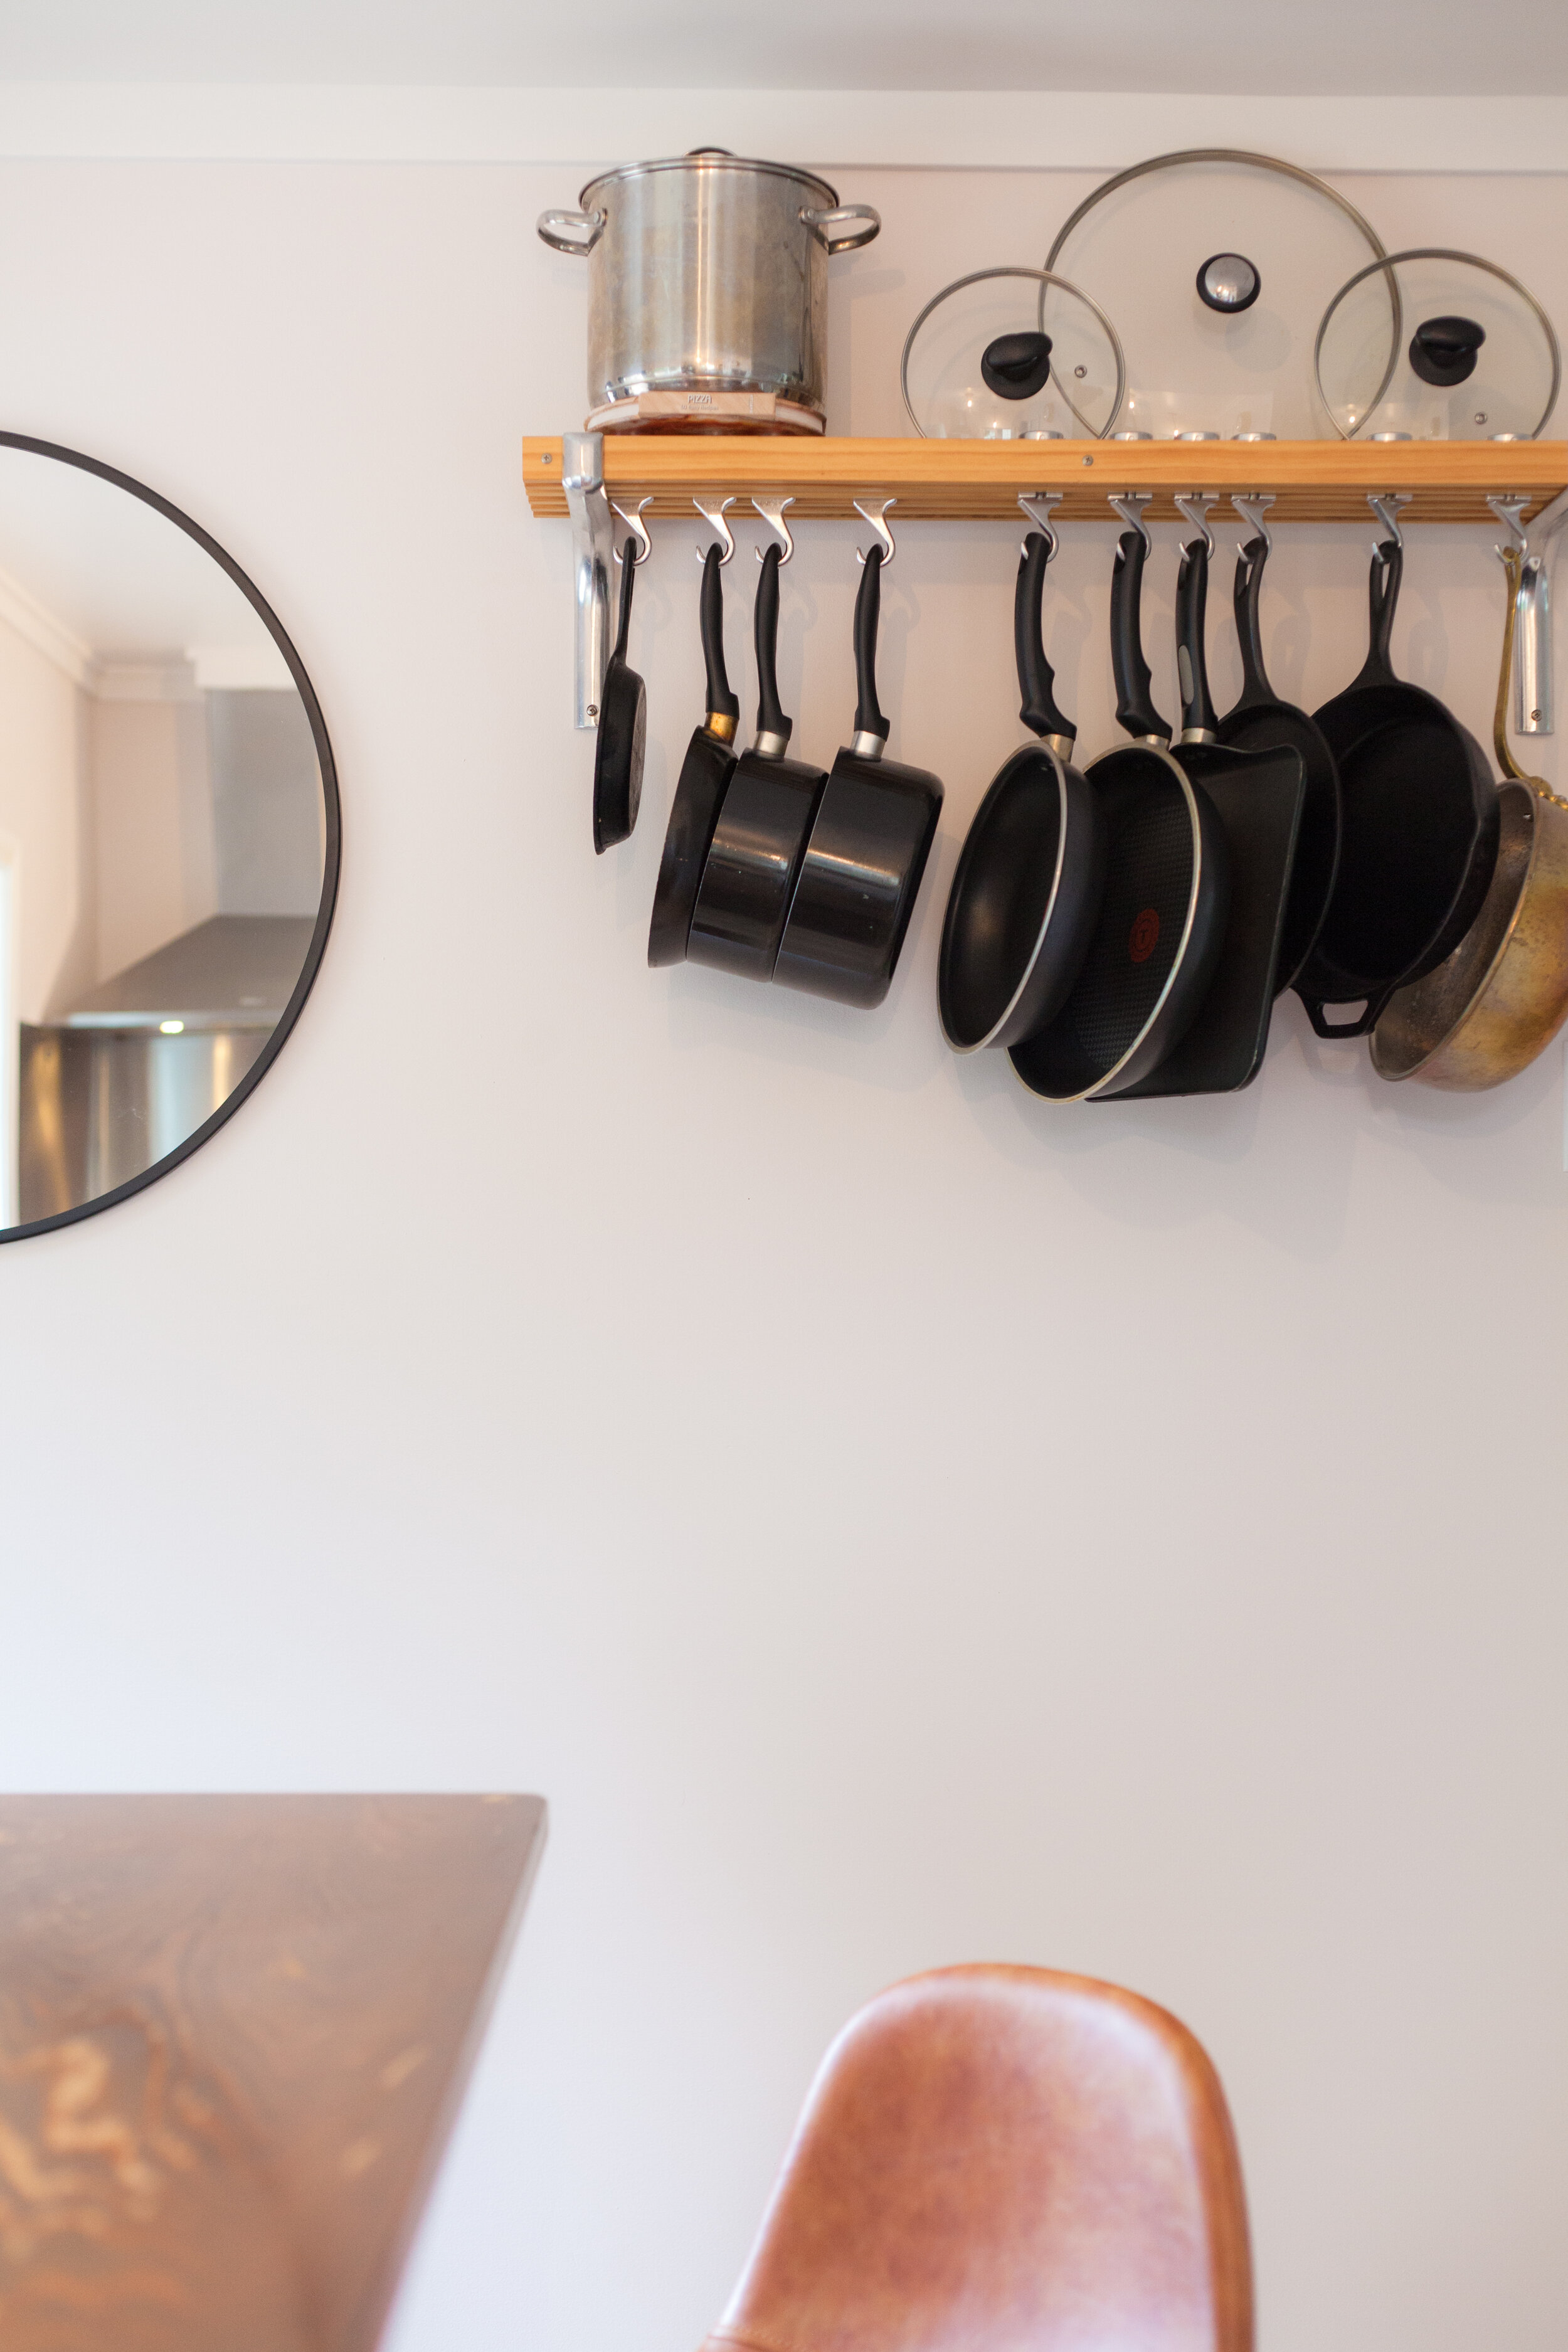
the wall-mounted pot & pan rack was one of the first things we added when moving into that house in 2014. the kitchen has essentially zero cabinets, but a deep pantry space behind a pocket door. the pots & pans simply had to hang from the wall space that was available.

i added a round mirror to make the kitchen feel a bit larger. mirrors are magical things!
i love how the tile backsplash and sink area look in the reflection :)

another simple upgrade were these leather stools from all modern. we’d been silently suffering with the clunkiest wooden chairs that came with the kitchen table - they were so big and always in the way. i loved that these stools were more modern, comfortable, and could tuck perfectly under the table, and were still the same seat height as the old chairs. 👍

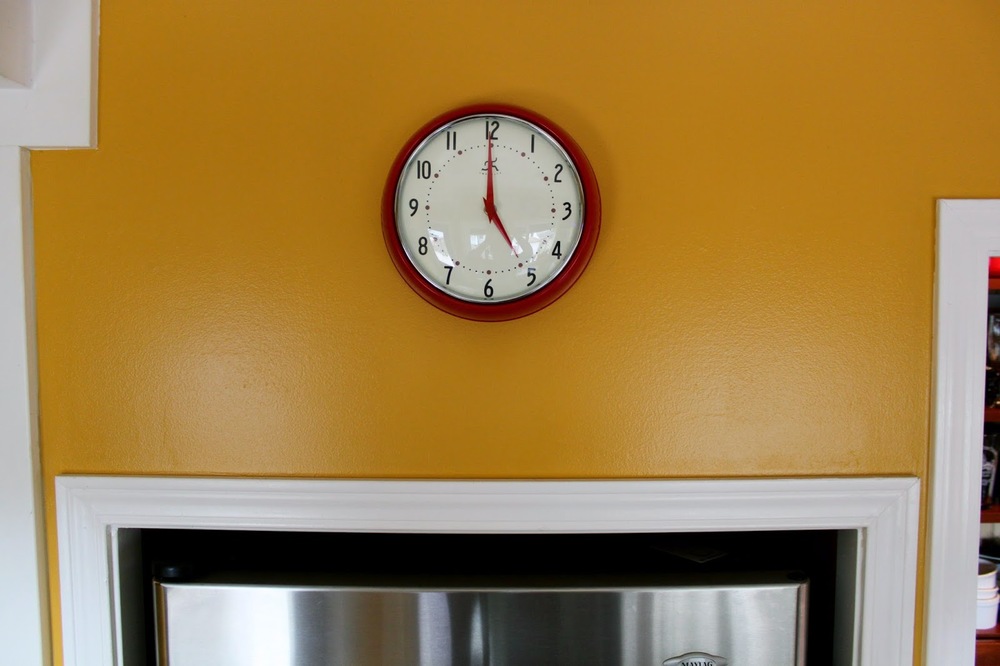
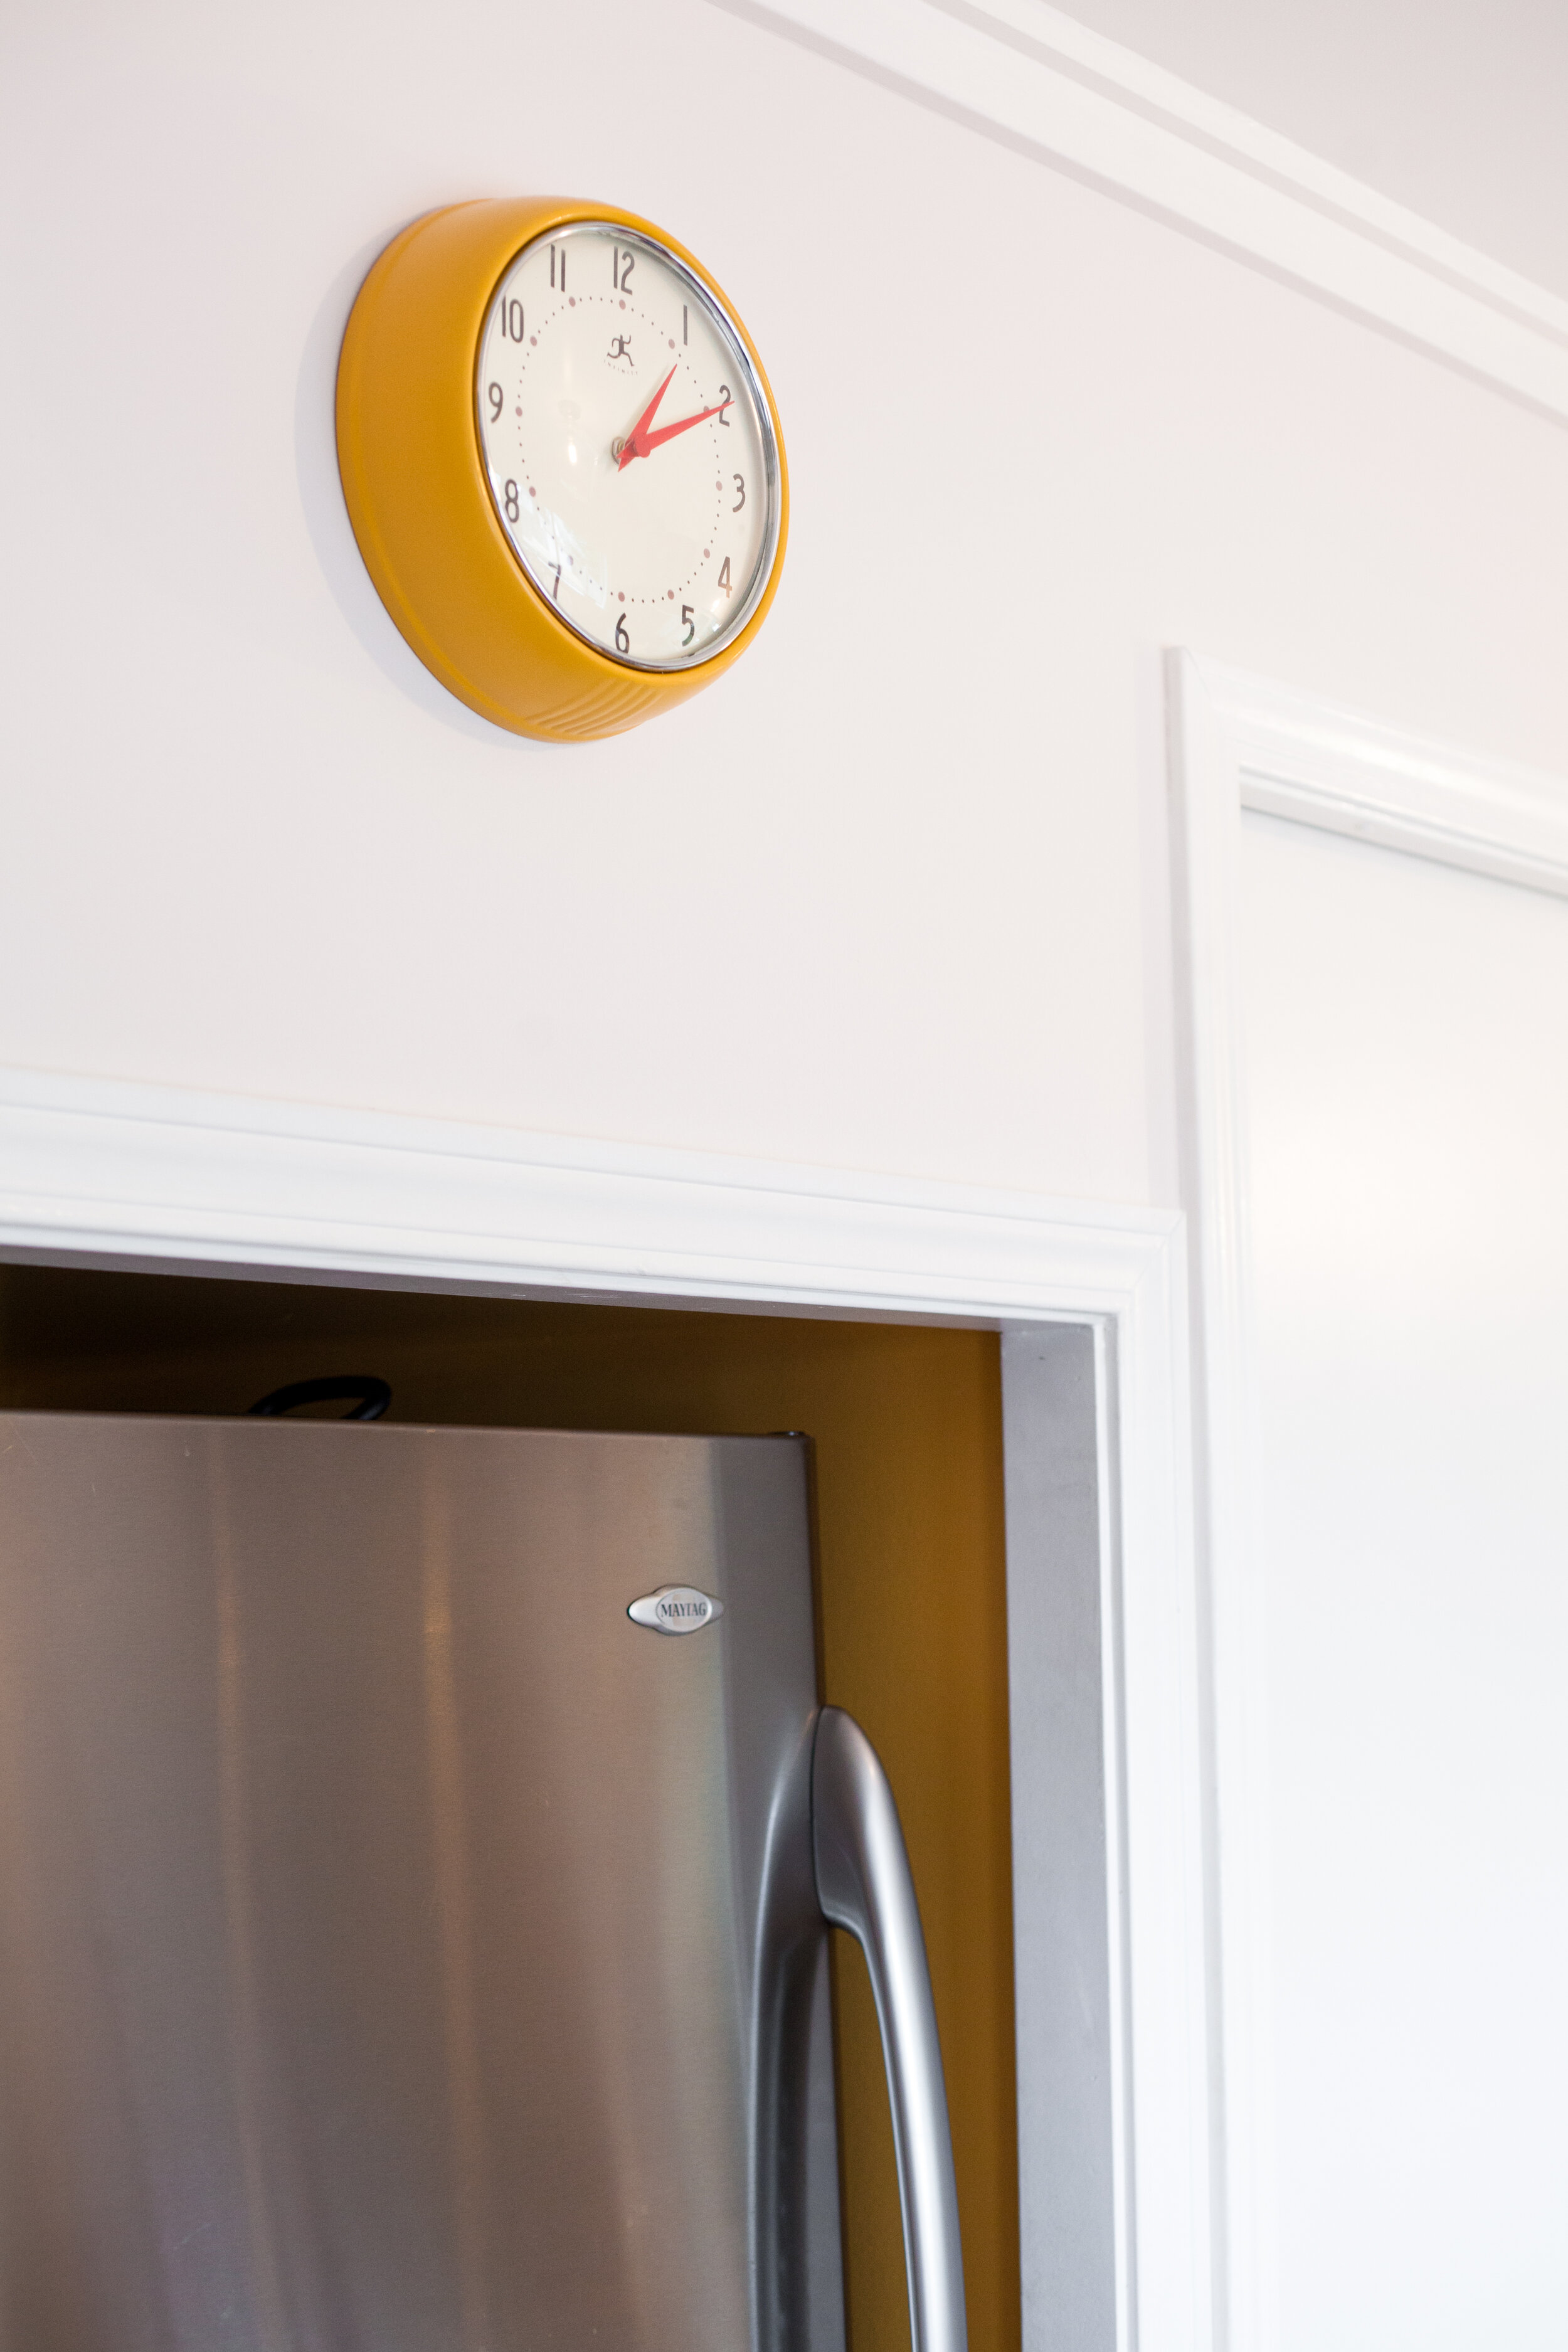
pete was a bit more reluctant about painting over the cheery cheddar cheese/school bus yellow walls - so our initial compromise was that we’d leave the fridge pocket yellow. 😂 HA!!! that was a win-win for me since i didn’t have to move the fridge out. and we painted our old clock to match the yellow pocket for the time being.
[i’ve since painted the fridge pocket to match the other walls - much cleaner looking. i got away with not moving the fridge out of there for at least a little while, and pete got to see the remains of his cheery yellow walls for a little bit longer 😉. ]
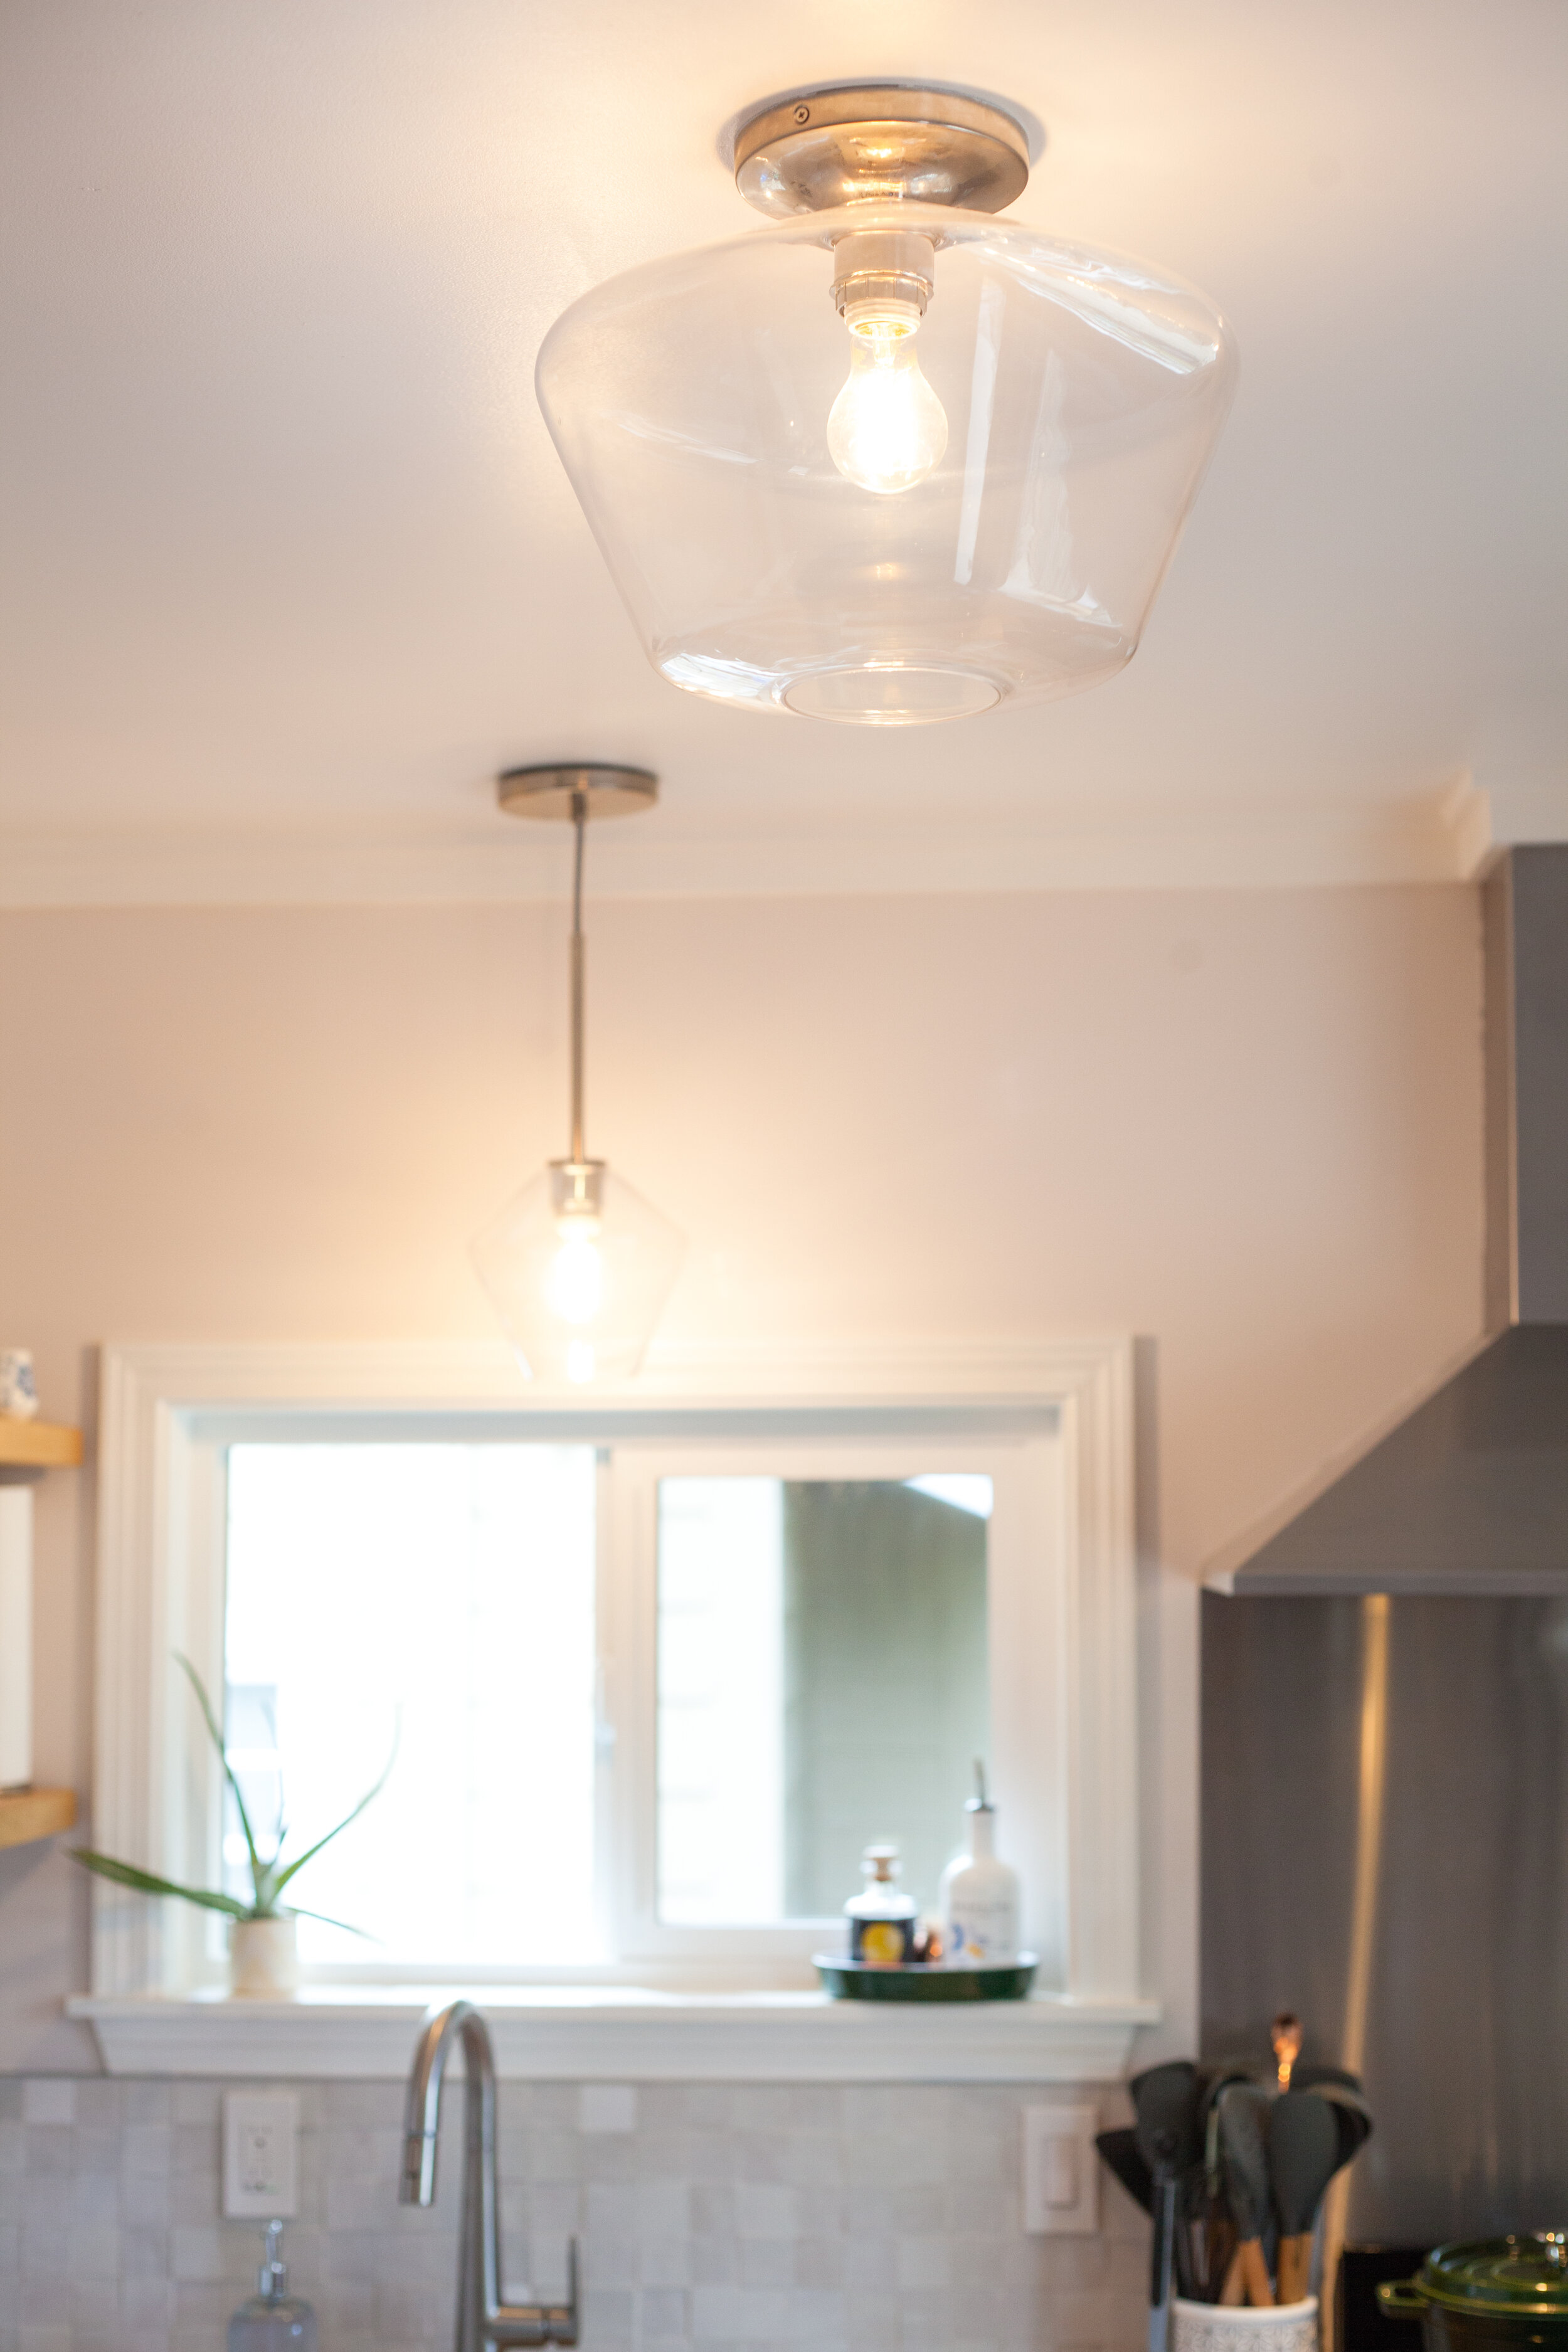
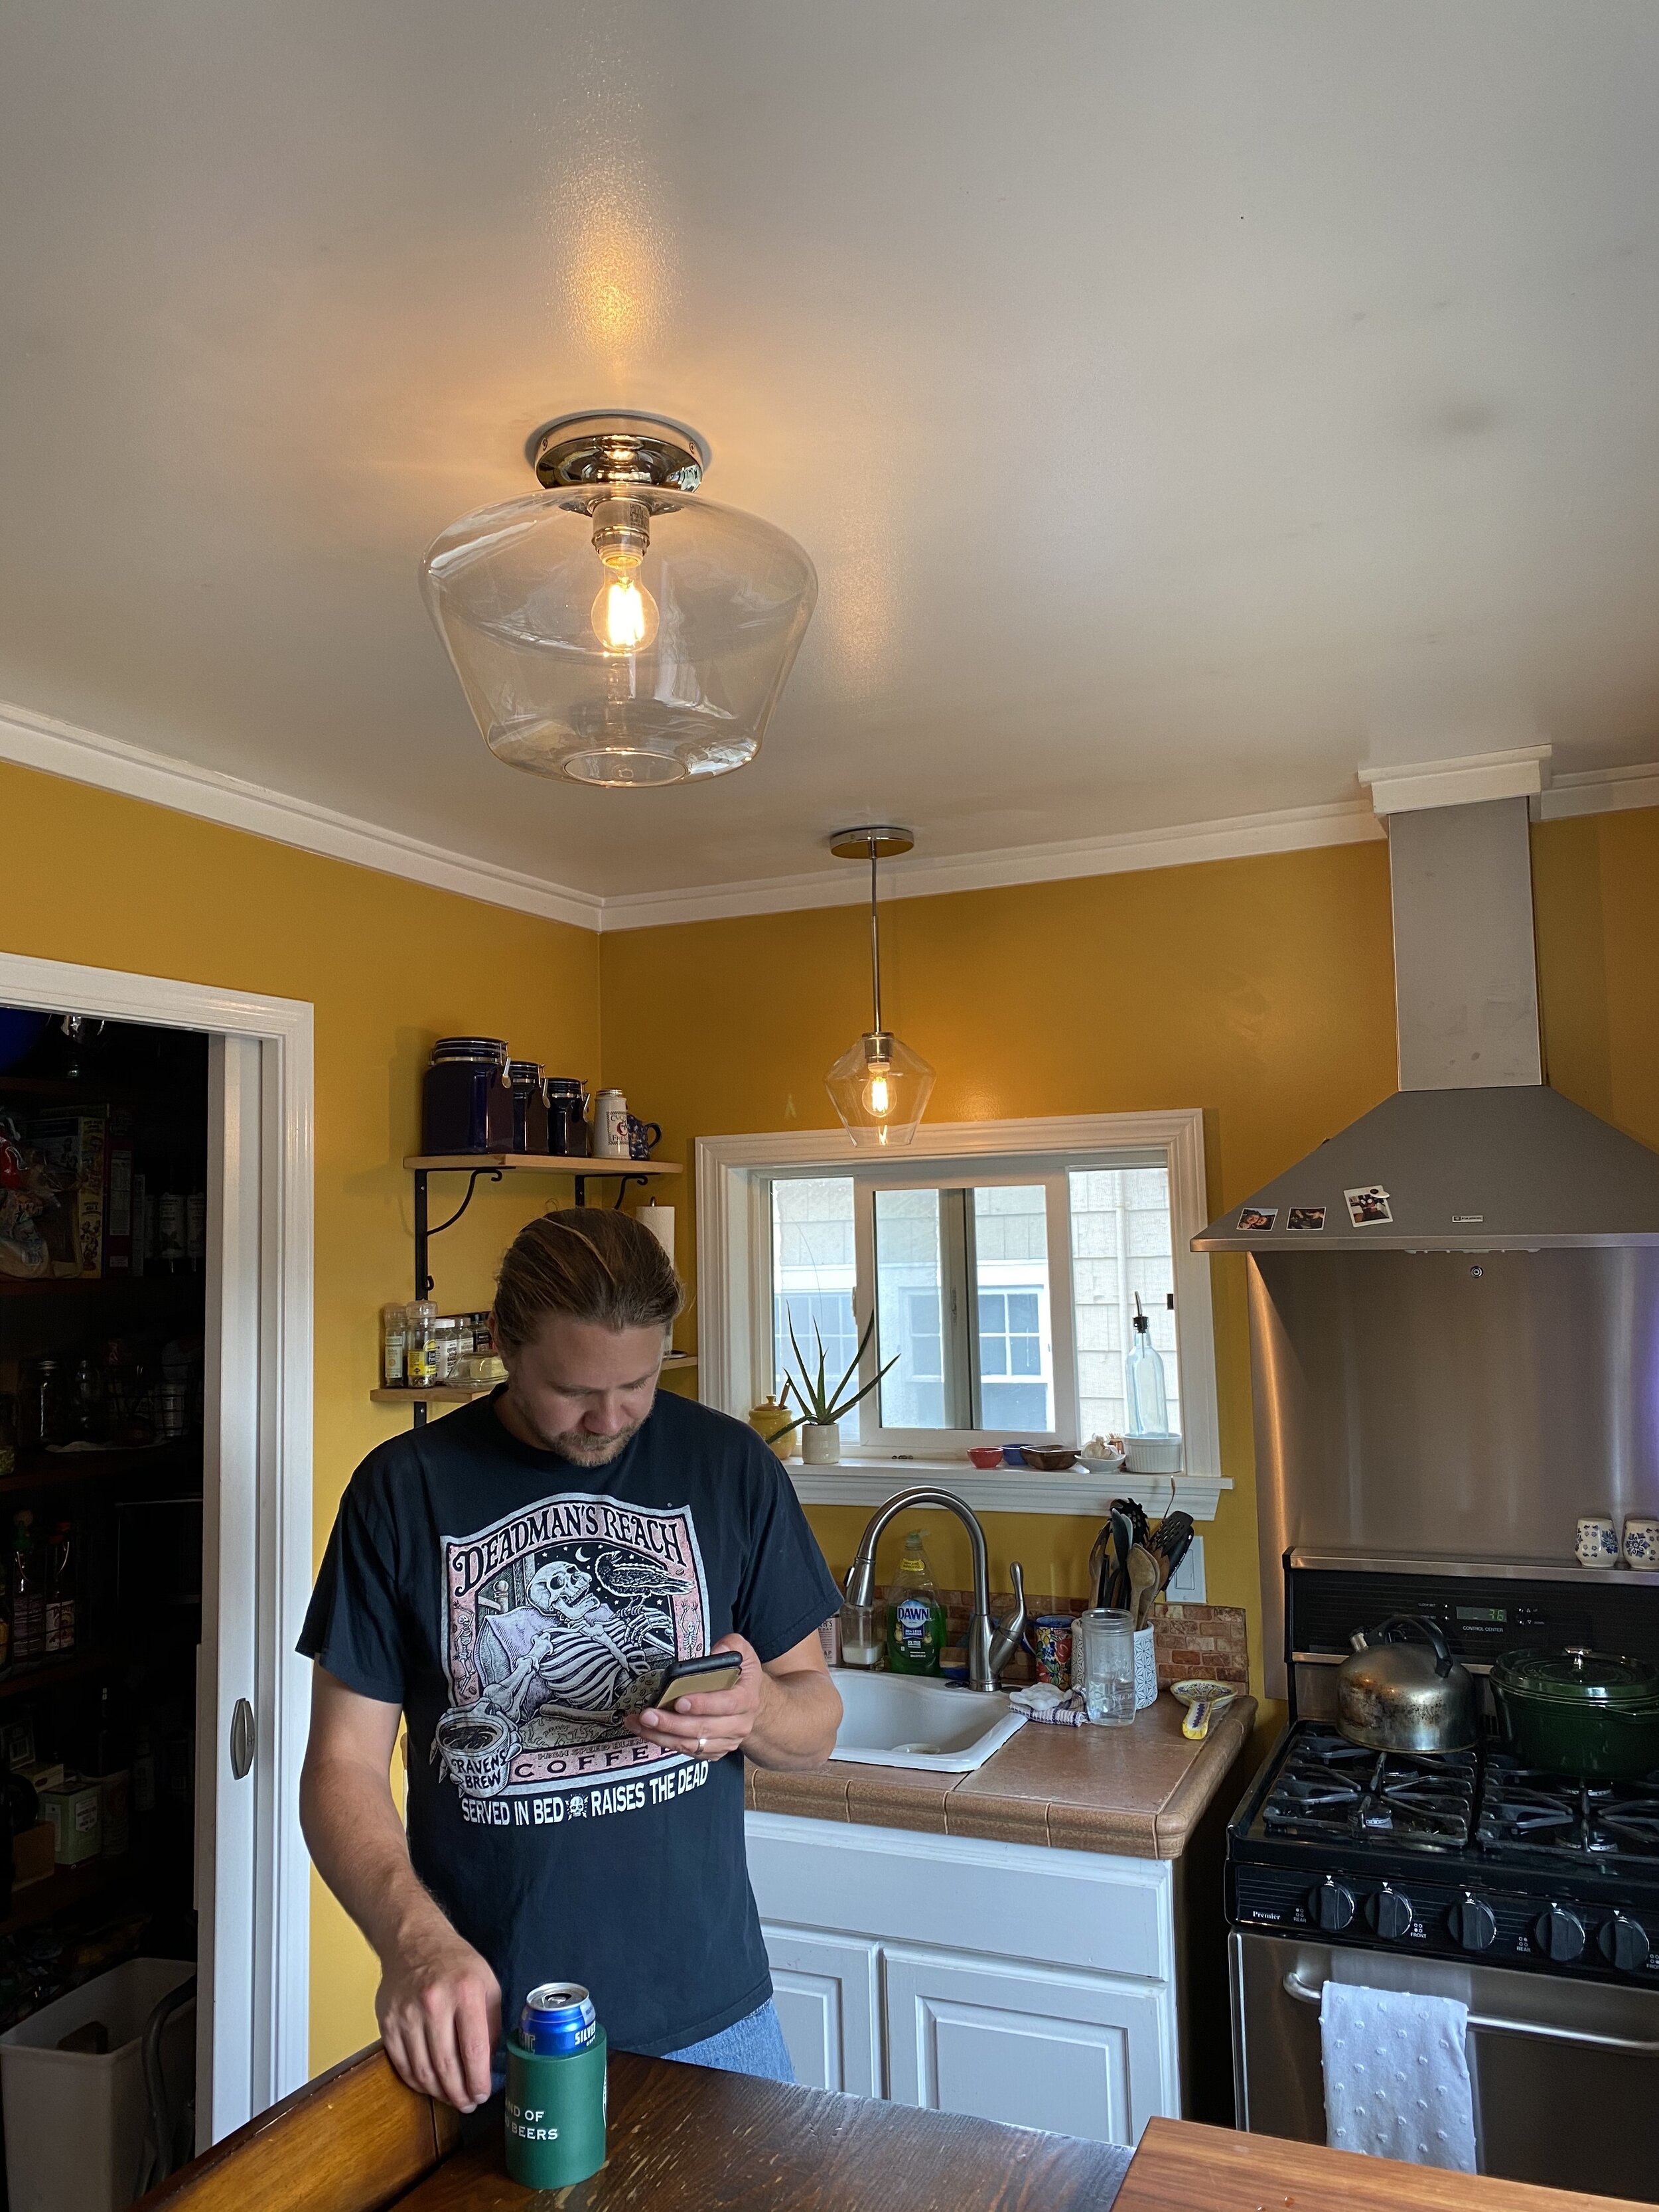
last summer, we went ahead and replaced the three blue dangling over-the-sink lights and the main overhead light fixture with these pretty glass ones from west elm - and WHAT A CHANGE. if you can only afford to make a couple changes in a room, let it be the light fixtures and the paint. those 2 changes will take the look and FEEL of the room to a whole new level. that was another thing i could not believe we’d waited so long to change. the original kitchen lights were so fugly.
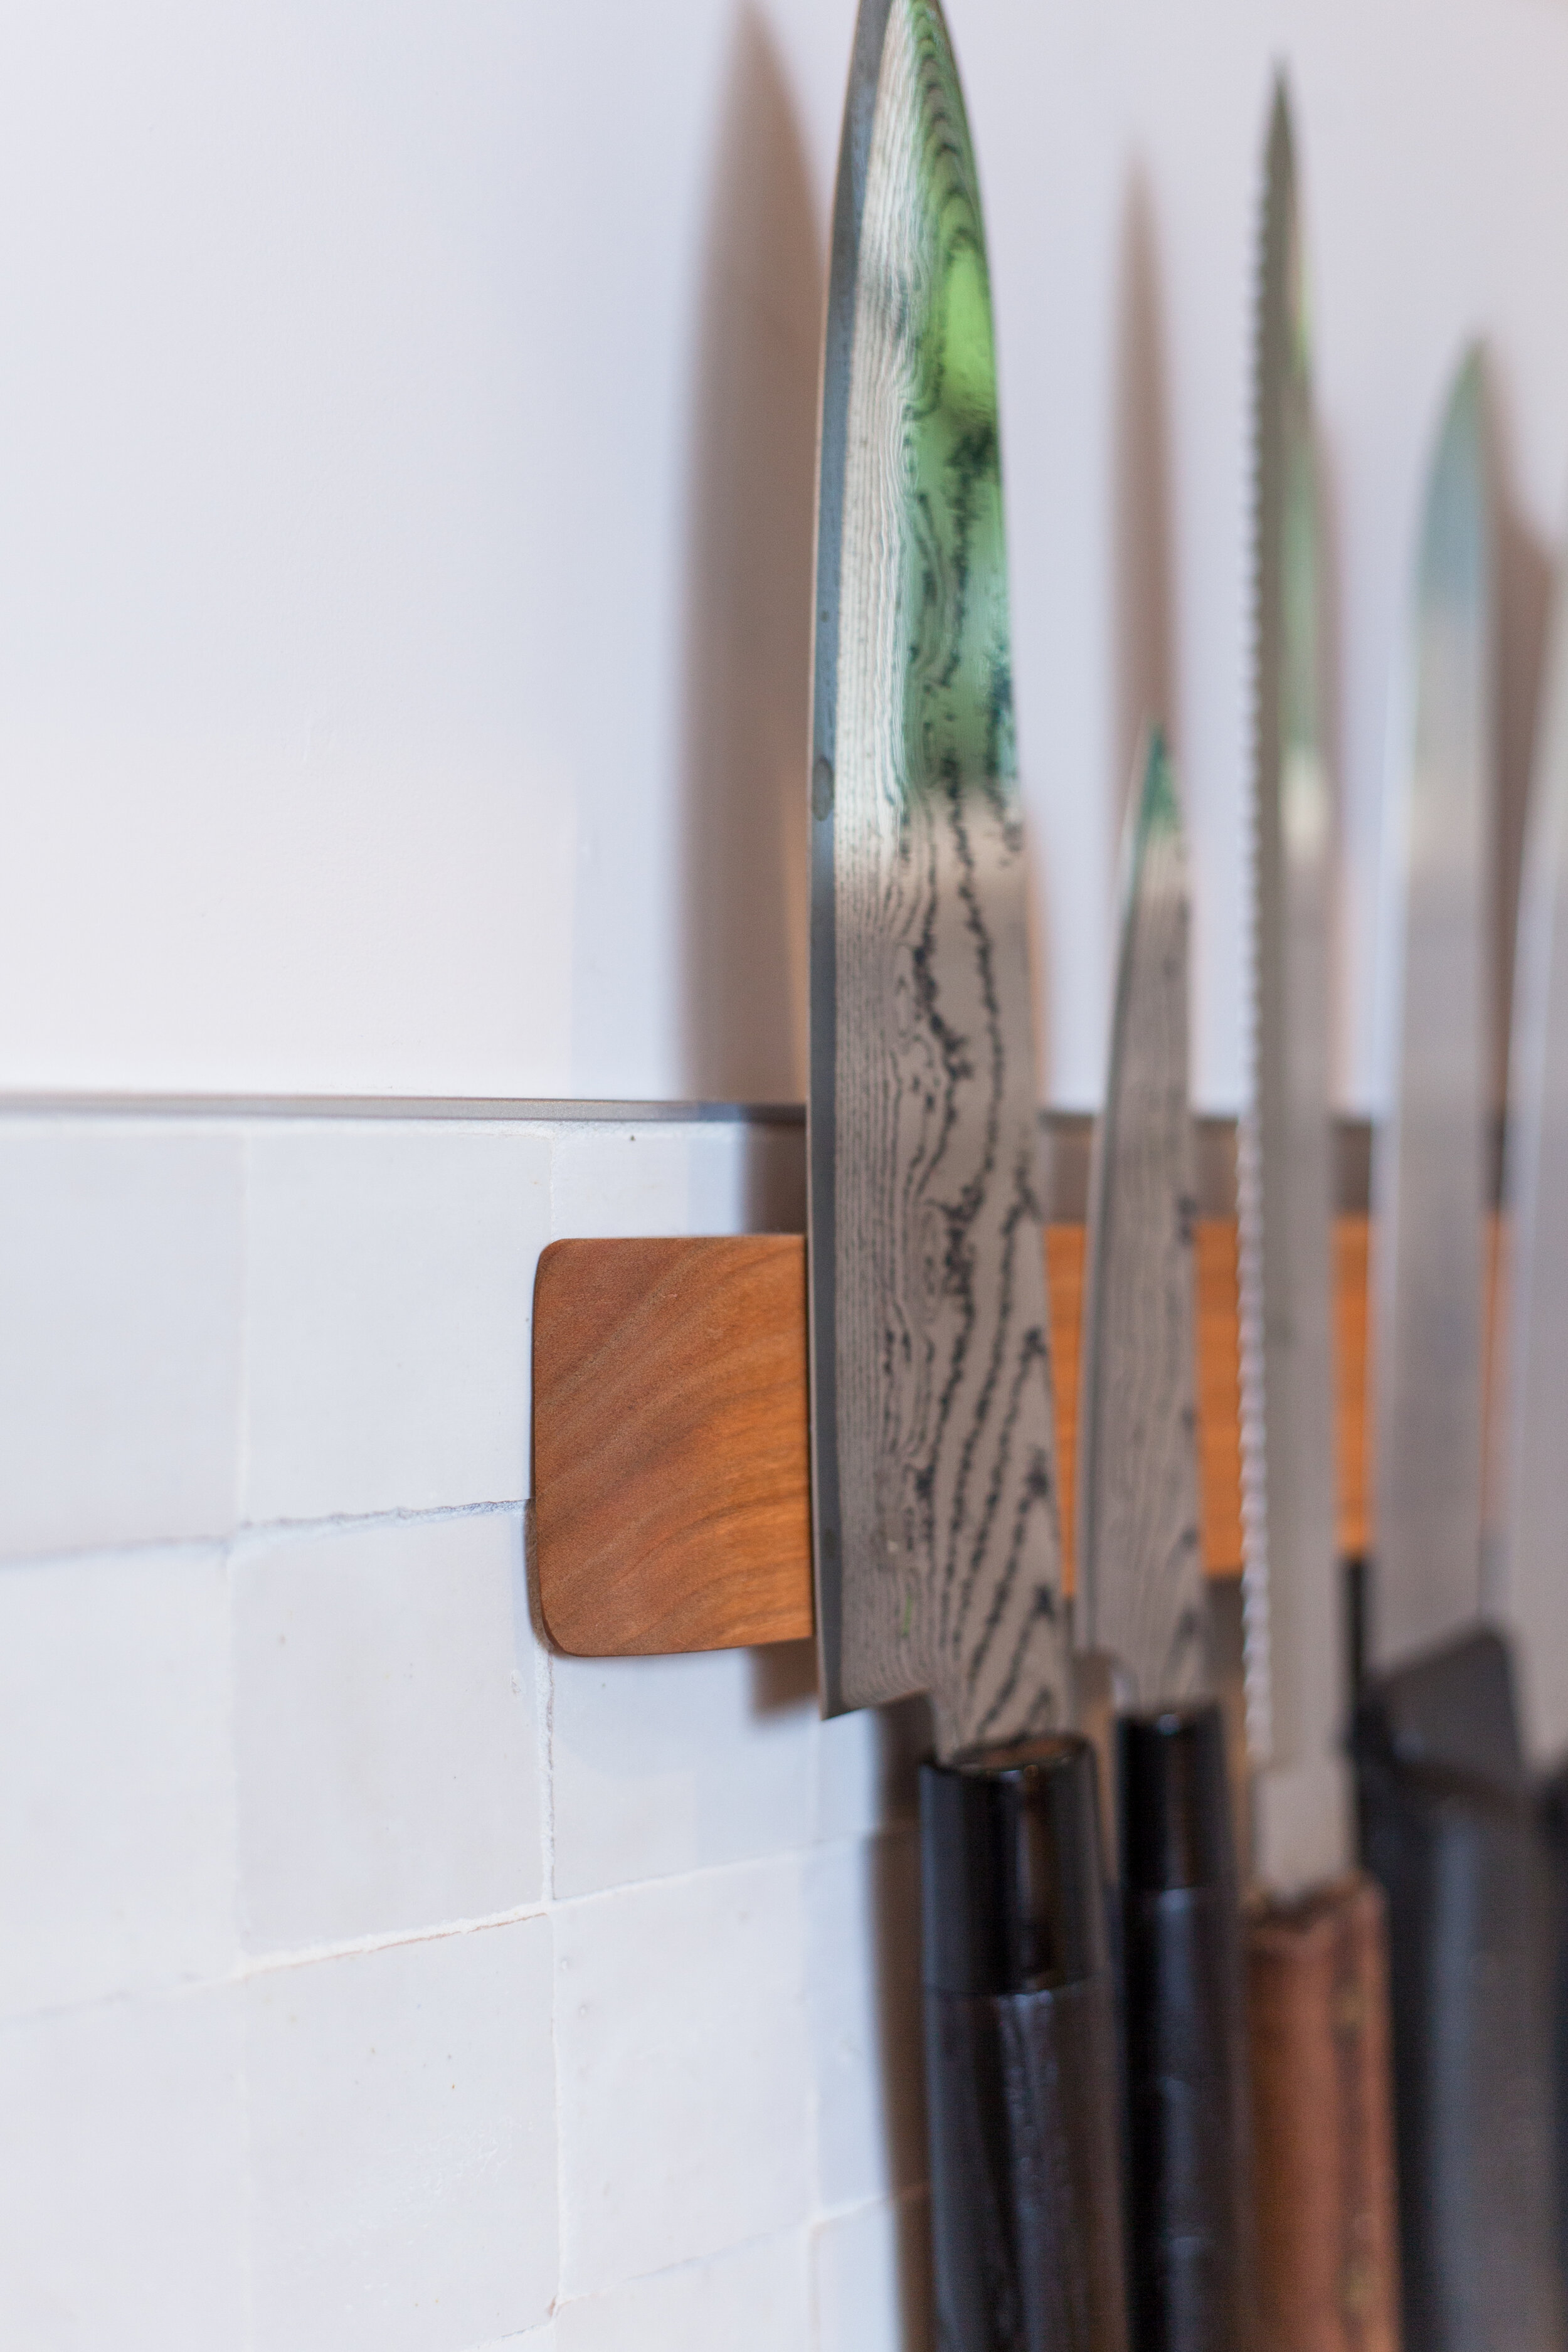
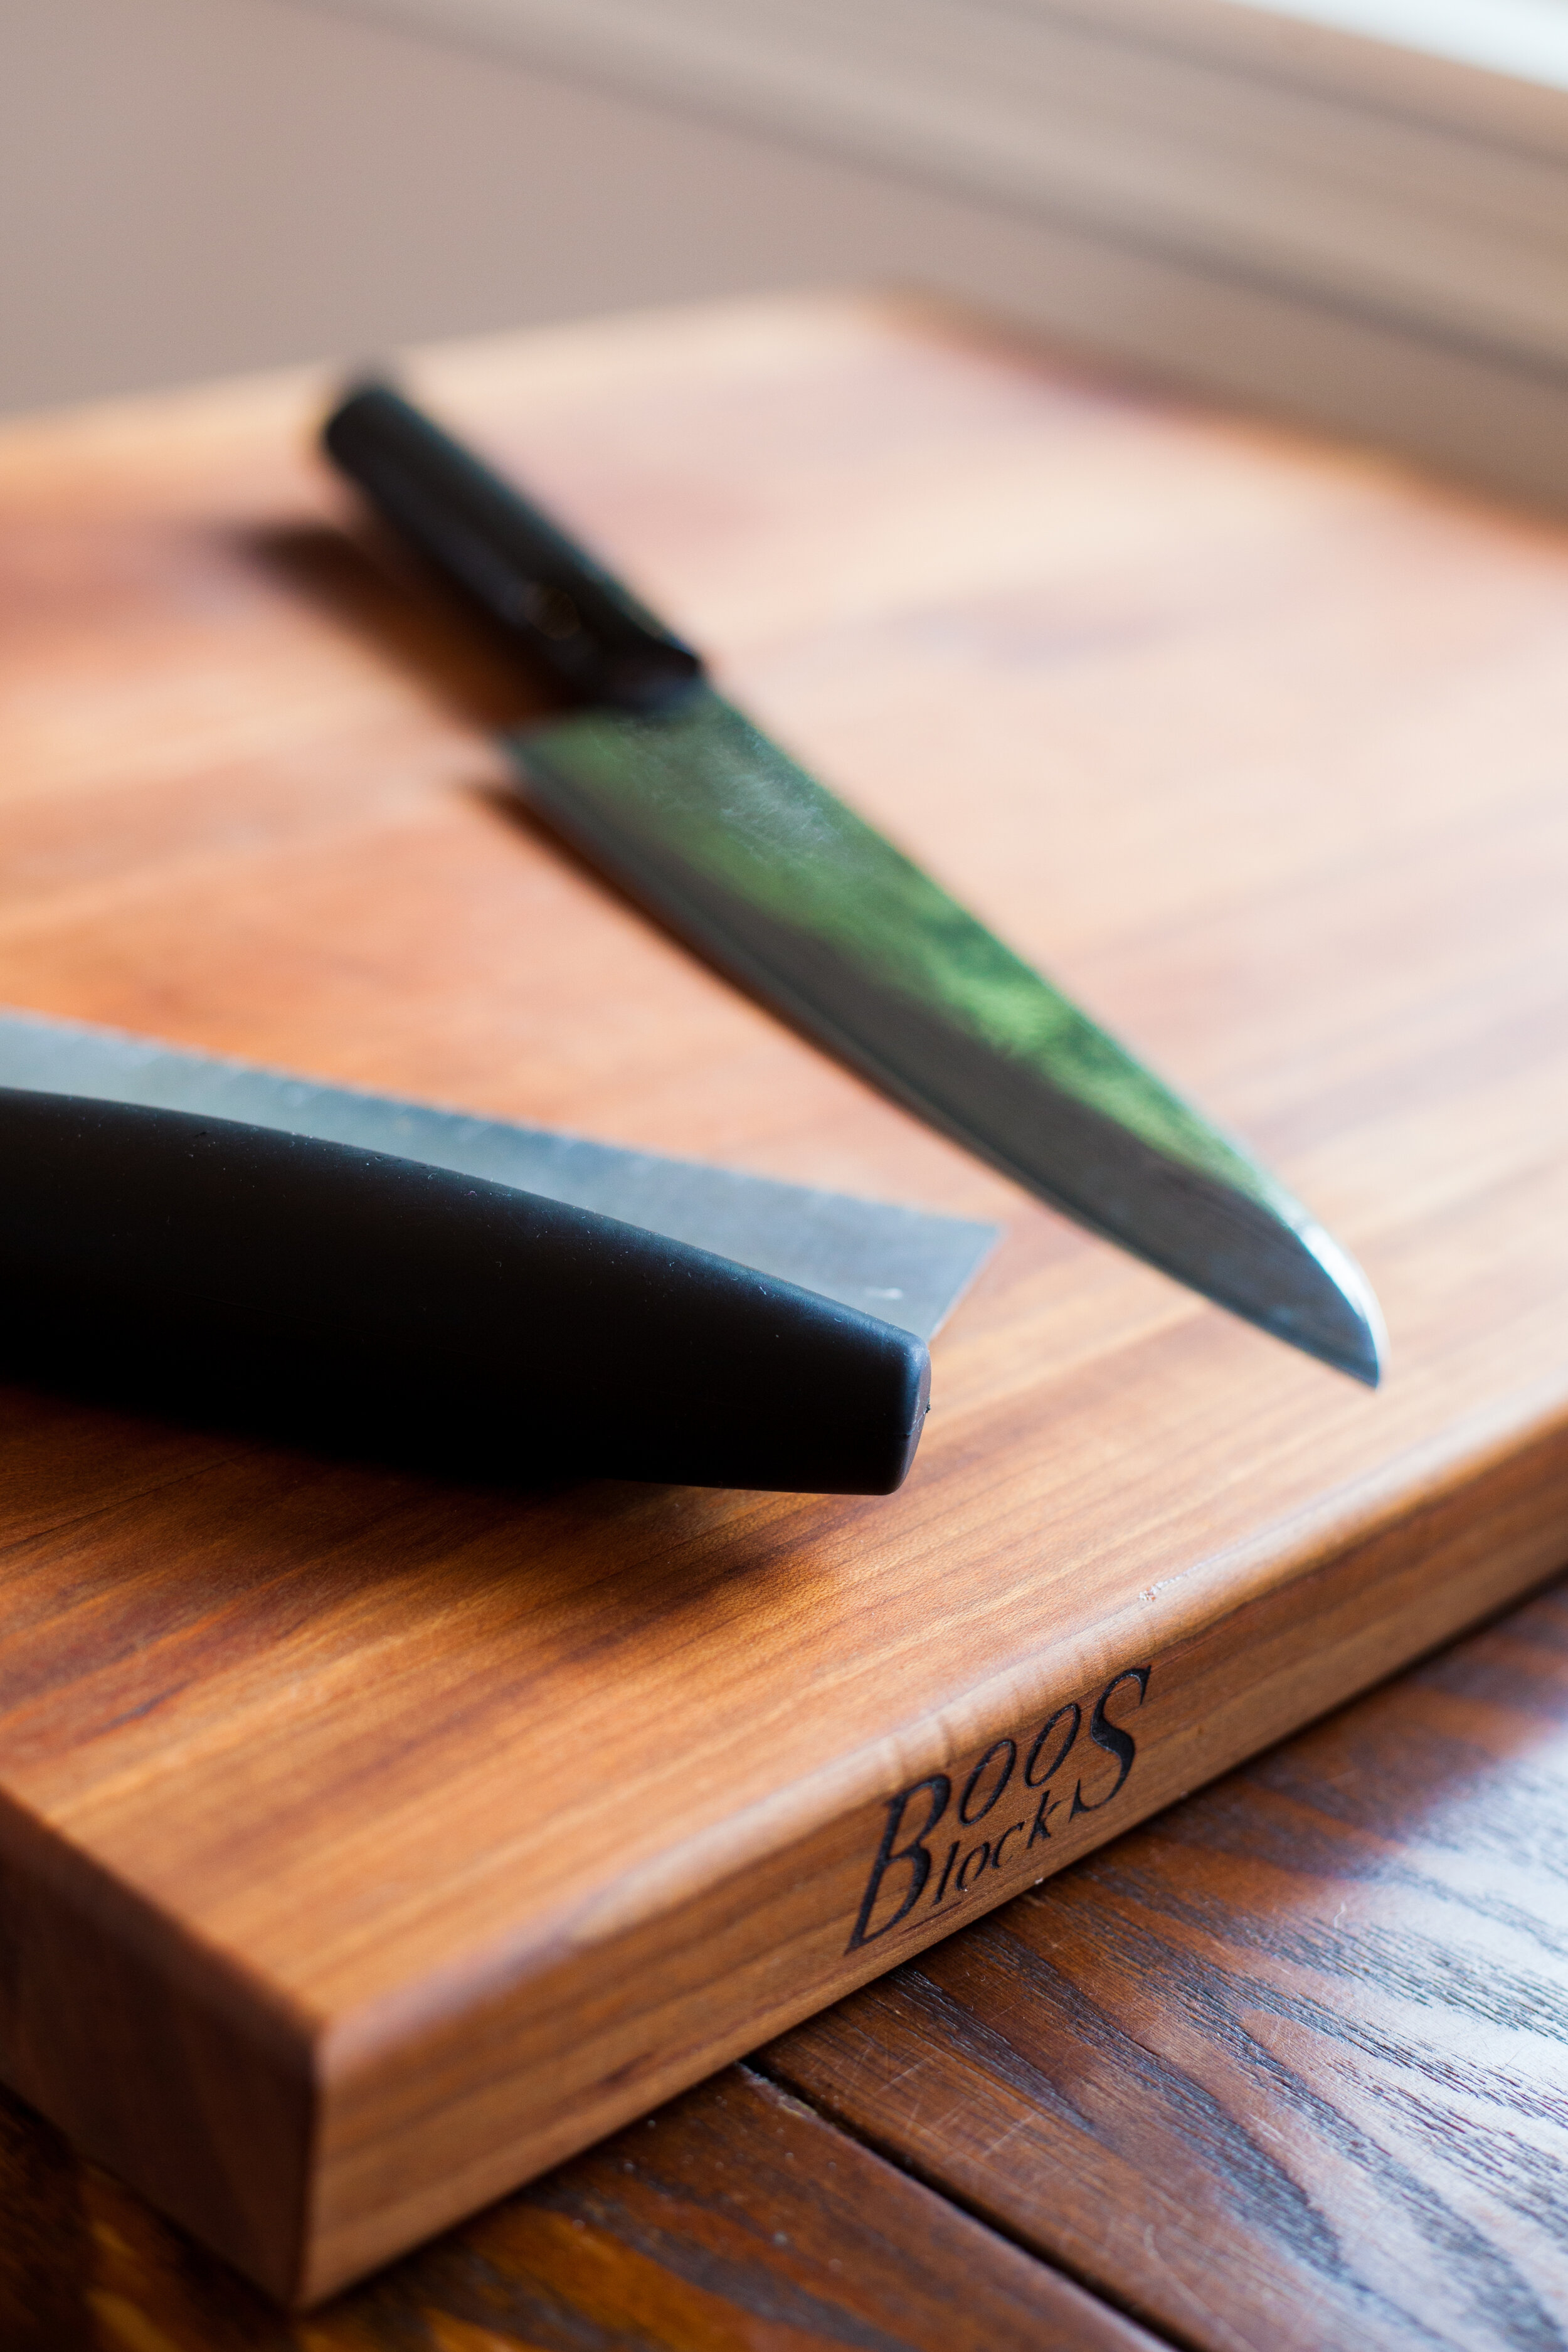
pete got me these fancy chef’s knives from pike place market for my birthday last year in the sizes i’d been blabbing about wanting. he is a sweetie!
BEFORE & AFTER
i love a good side-by-side before & after.
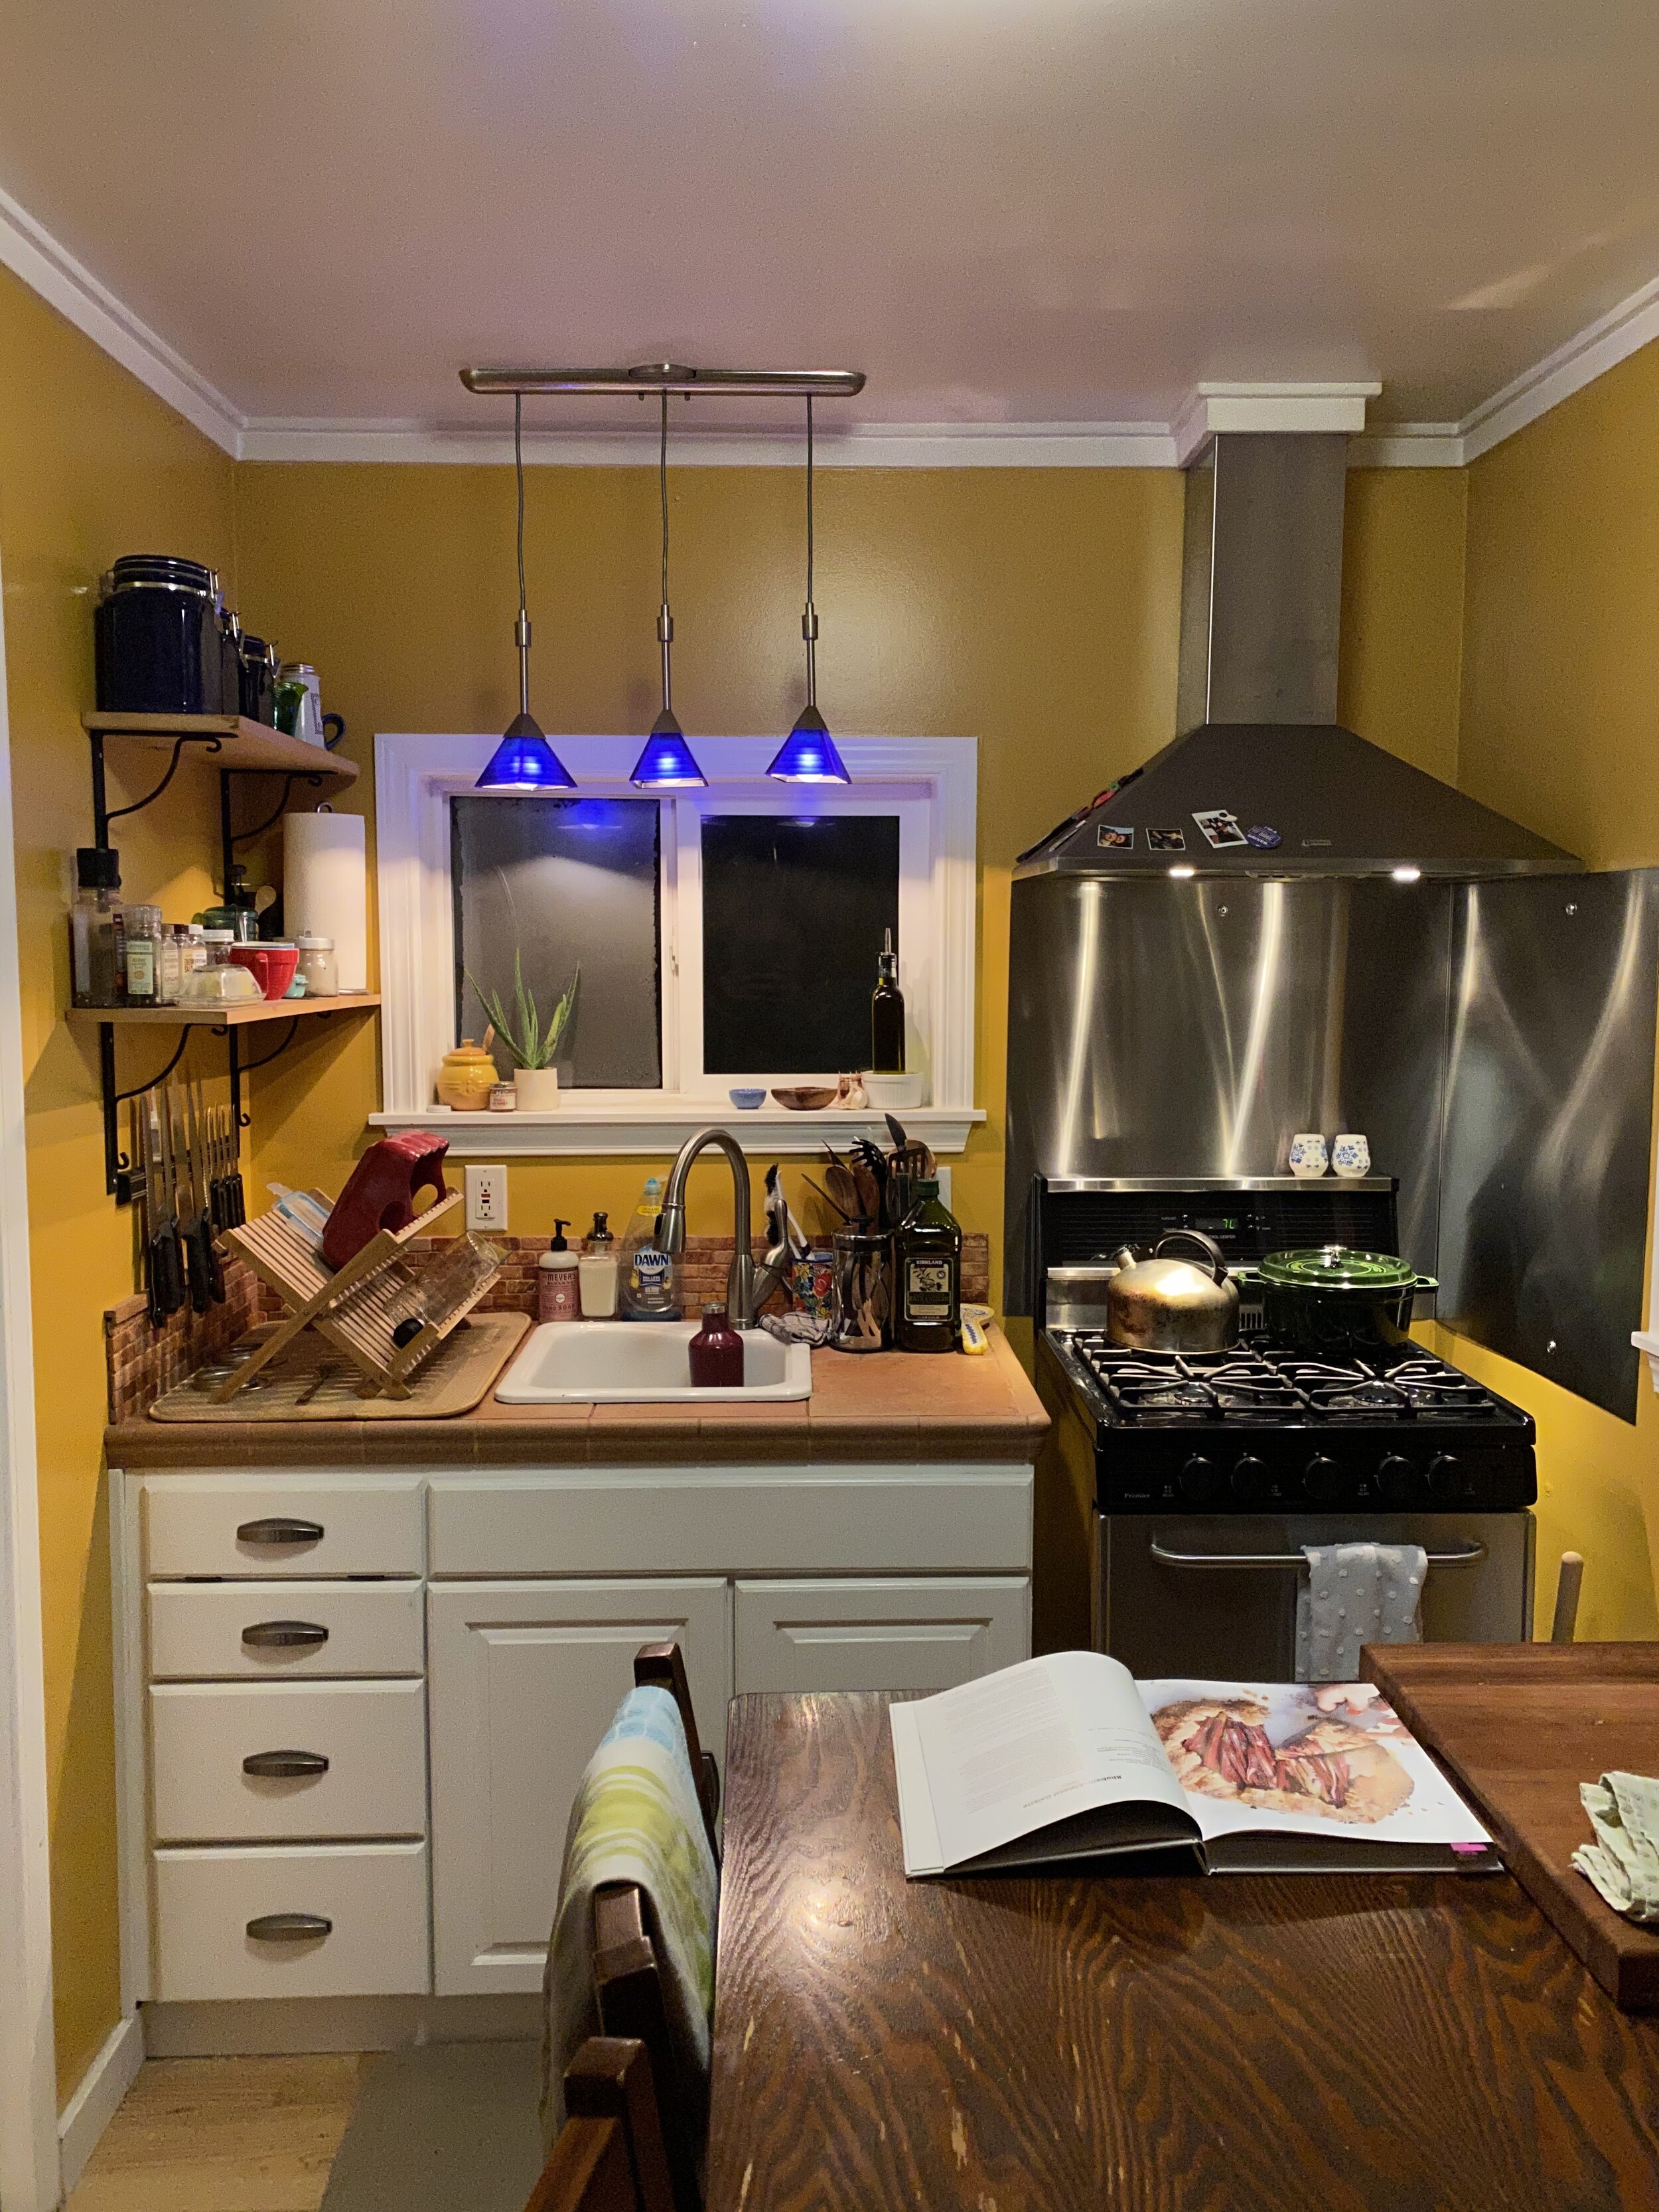
here is the school bus yellow paint color and light fixtures i was talking about………….. 😬
the overhead one especially…i simply cannot believe we let that light exist in our lives for so long. it was like the saddest gas station light with dead bugs inside.

as cheery as the yellow walls could sometimes be (i.e.: if the sun were shining), the color made this already tiny kitchen feel oh-so-small and compact.

swapping out the light fixtures alone felt like a vast improvement to us.
if we had been smart - we would have custom built an island/prep table with space for stool seating, PULL-OUT HIDDEN GARBAGE and STORAGE shelves on the sides. oh, how this tiny area would have benefitted from something like that. please, next owners of our house, do this! you need it.
the garbage can storage area was lost for the sake of the new larger sink (more important, in my opinion). pull-out garbage drawers would be top notch in this kitch.
this clunky wooden table came with the house, and again, we somehow didn’t see a problem with it until several years down the road. waste not, want not, i suppose!

^ and check out all that wasted space between the wall, stove, and counter. i mean, its actual inches of space, but in small-space living, inches are huge!!!
i look at this photo and cannot believe we were able to squeeze a whole dang dishwasher into the mix.
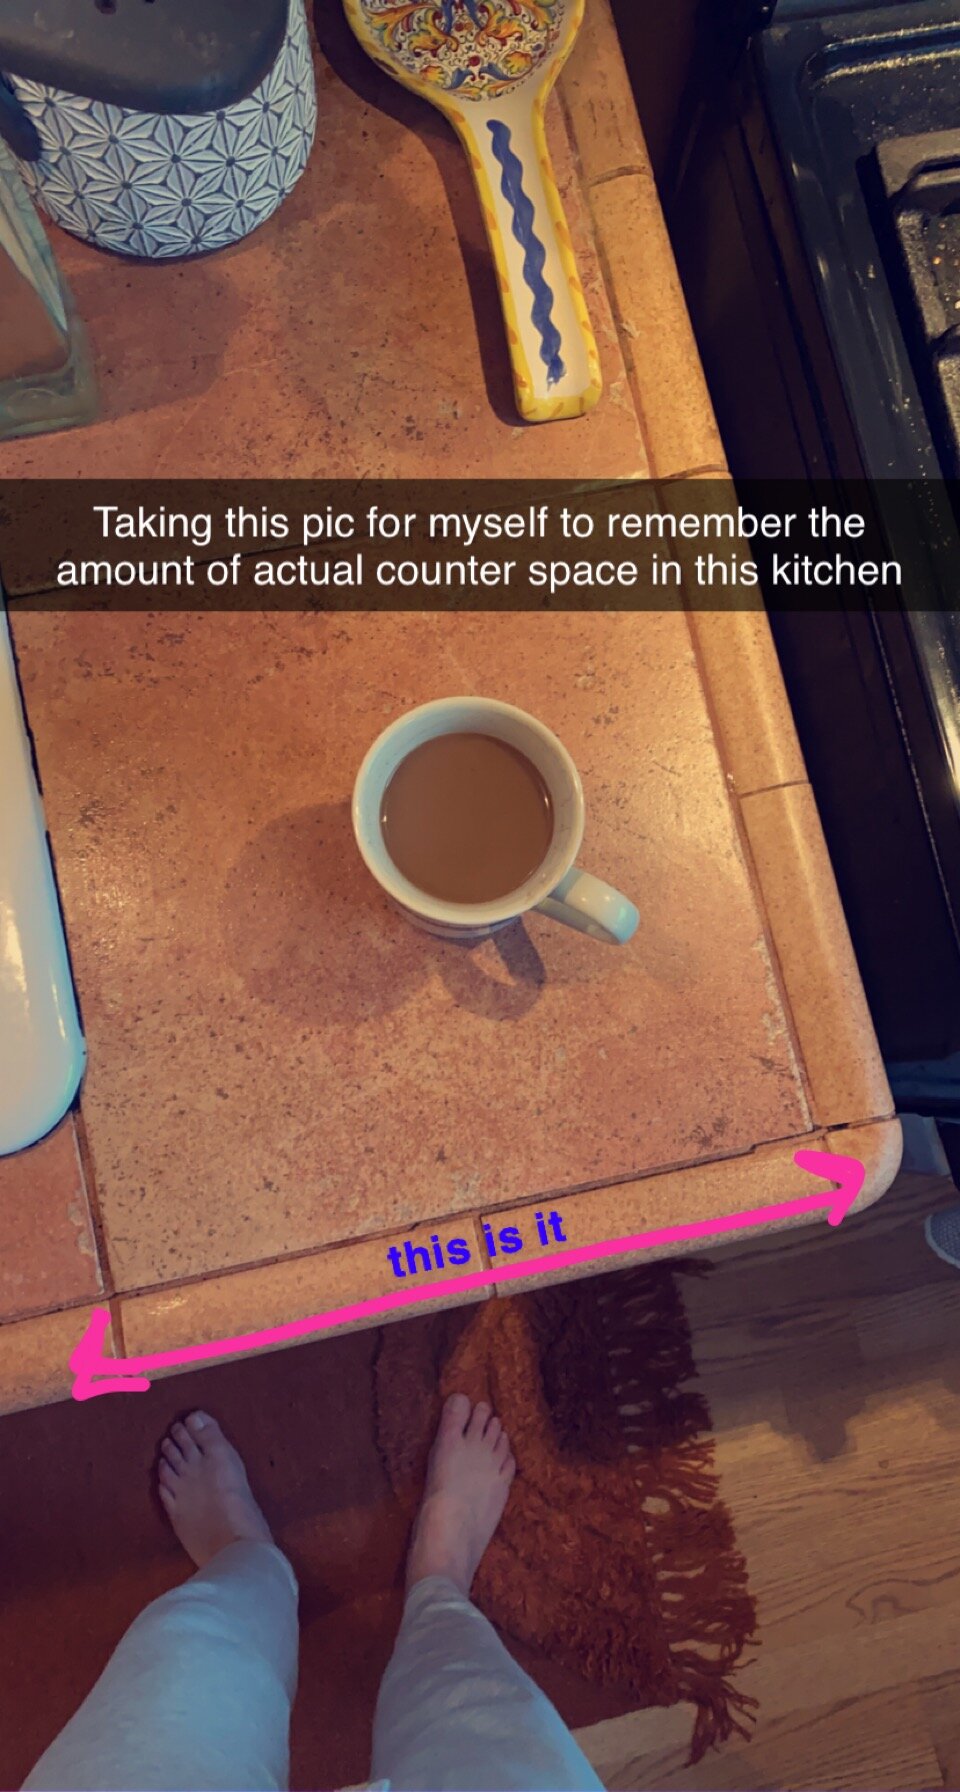
^ sometimes snapchat & instagram stories make for very useful mock-up tools.
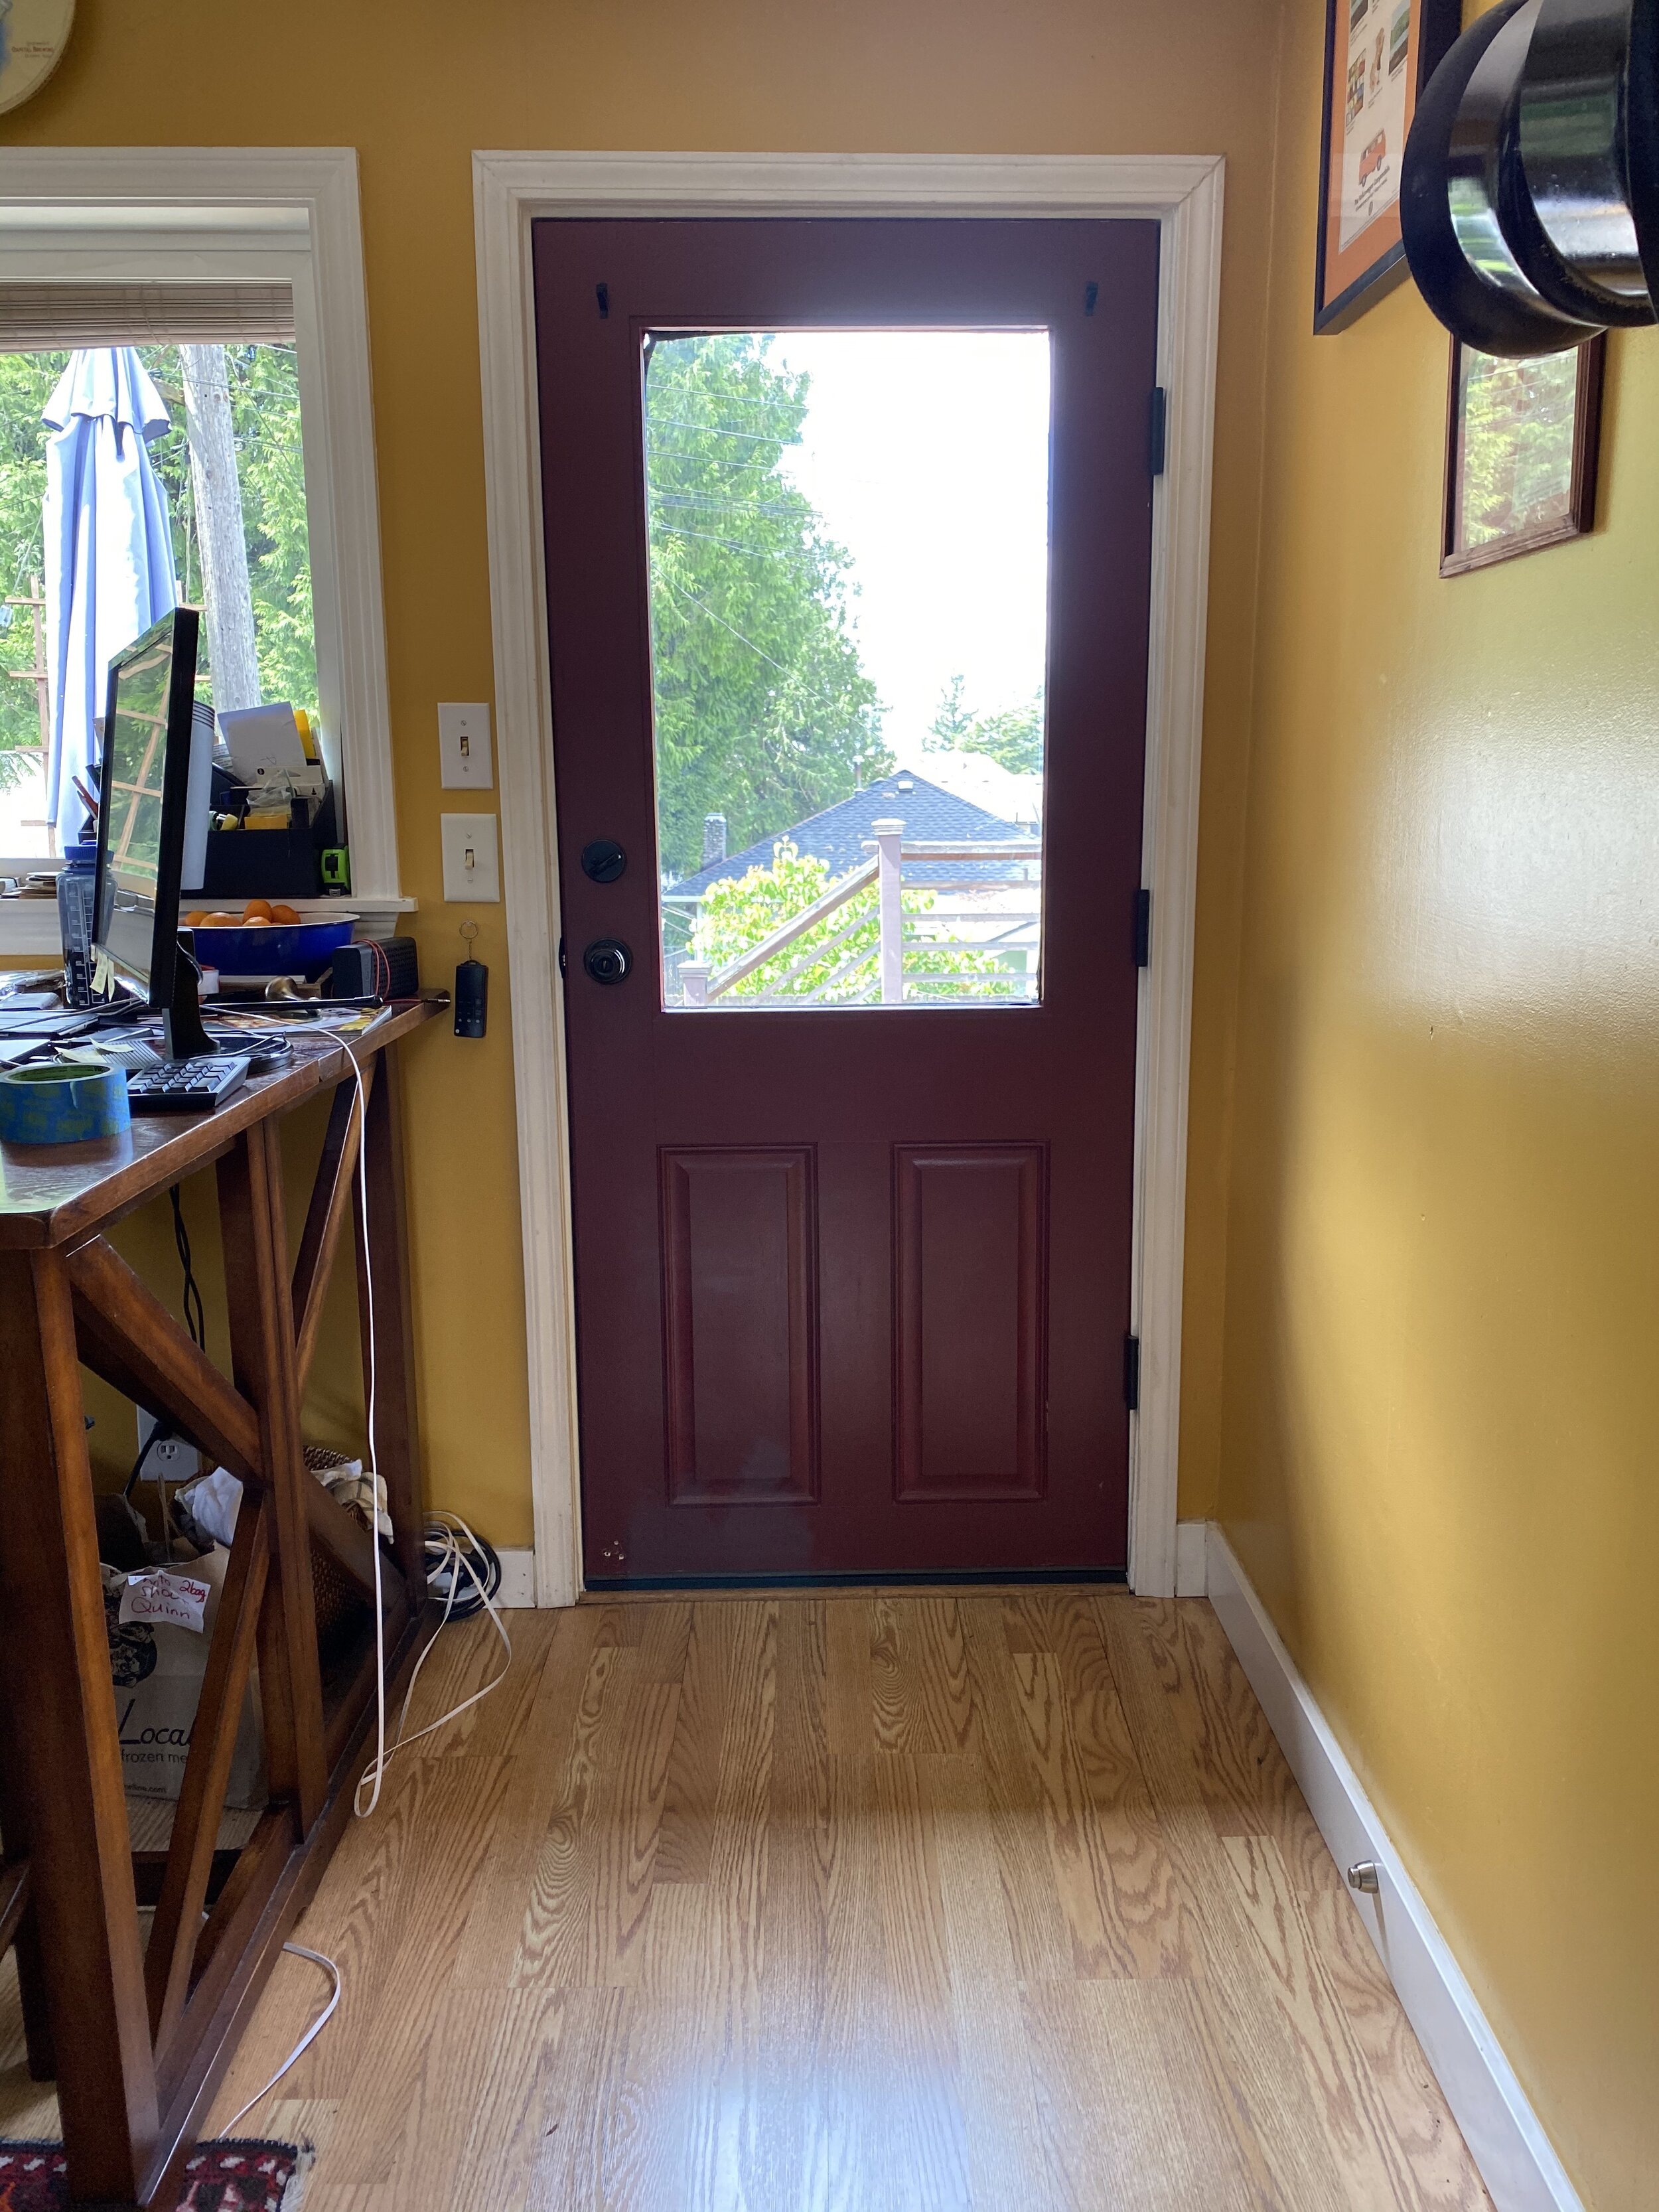
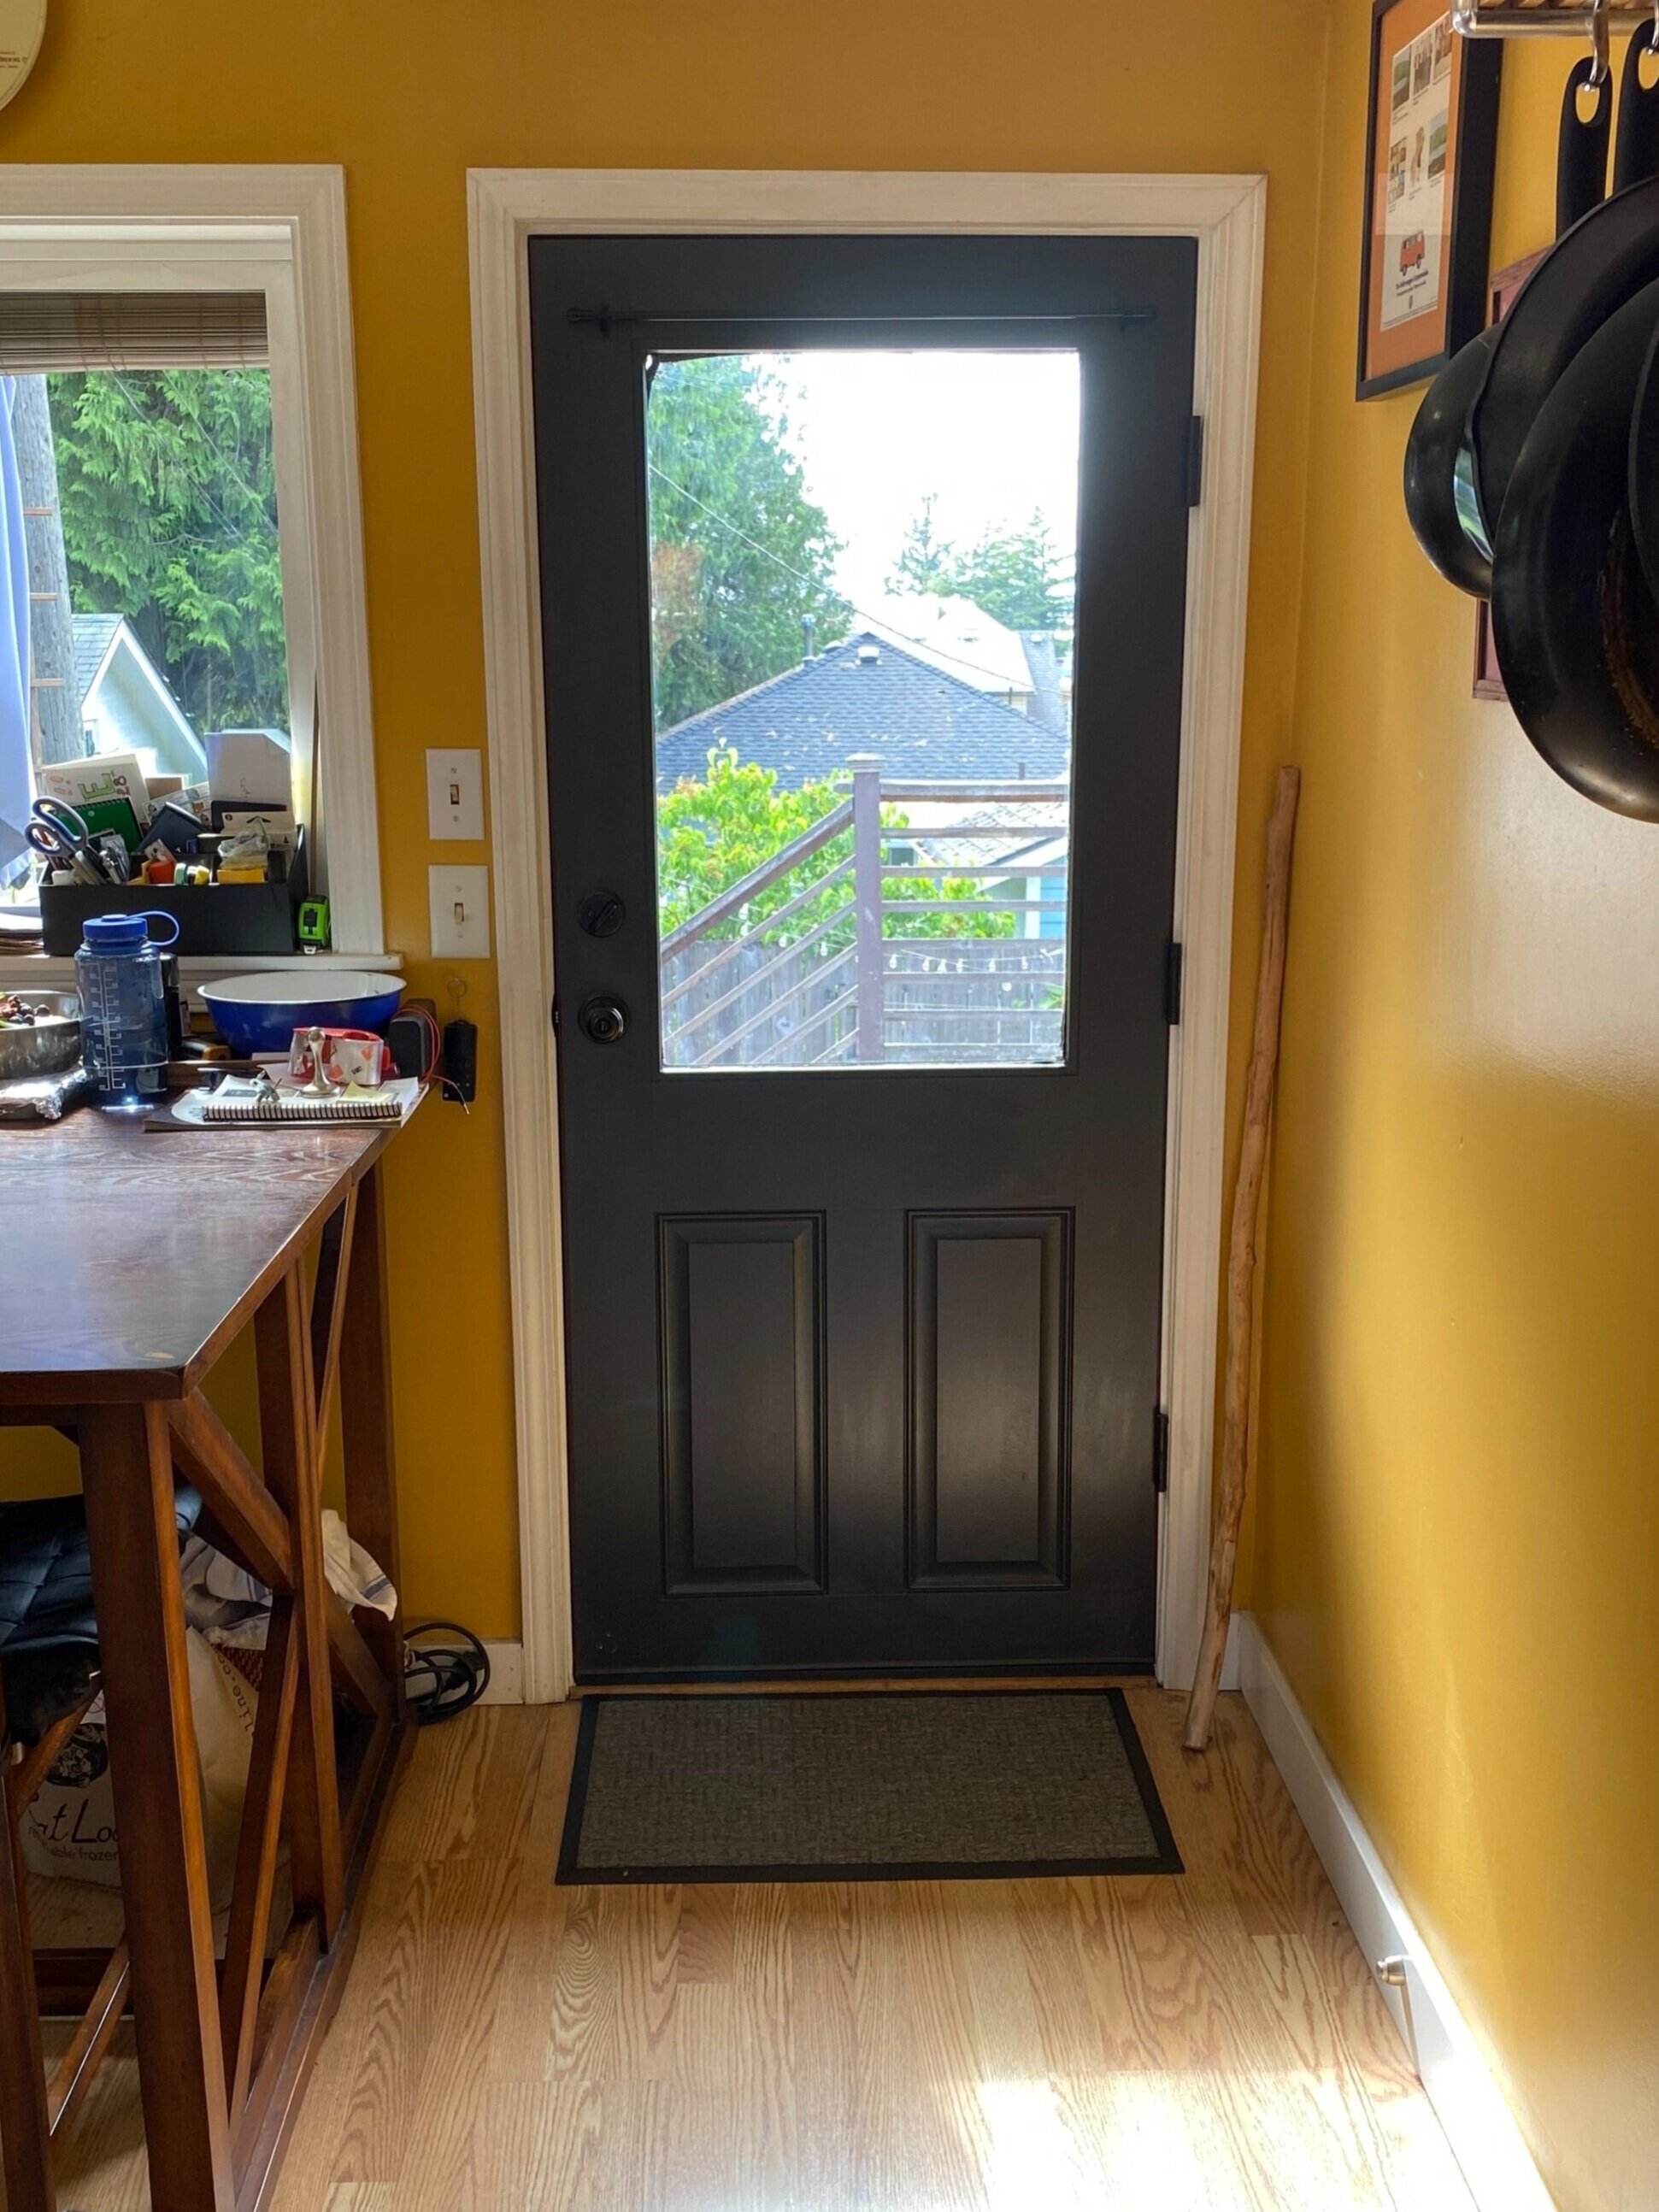
^ our doors all used to be this maroon color. i guess halfway through 2020 (cooped up in our house staring at the walls constantly) i finally had the realization that i despised the maroon doors. i randomly decided to paint our interior doors this lovely dark greyish-black color - ‘iron ore’ by sherwin williams. i loved the change! and i knew i would eventually paint the kitchen walls & hallway, but for the time being, the black & yellow looked cute together.
getting the appropriate paint quality intended for doors was really important to protect from scuffing and any dogs that might jump up and scratch on the door - no problems with paint chipping at all!
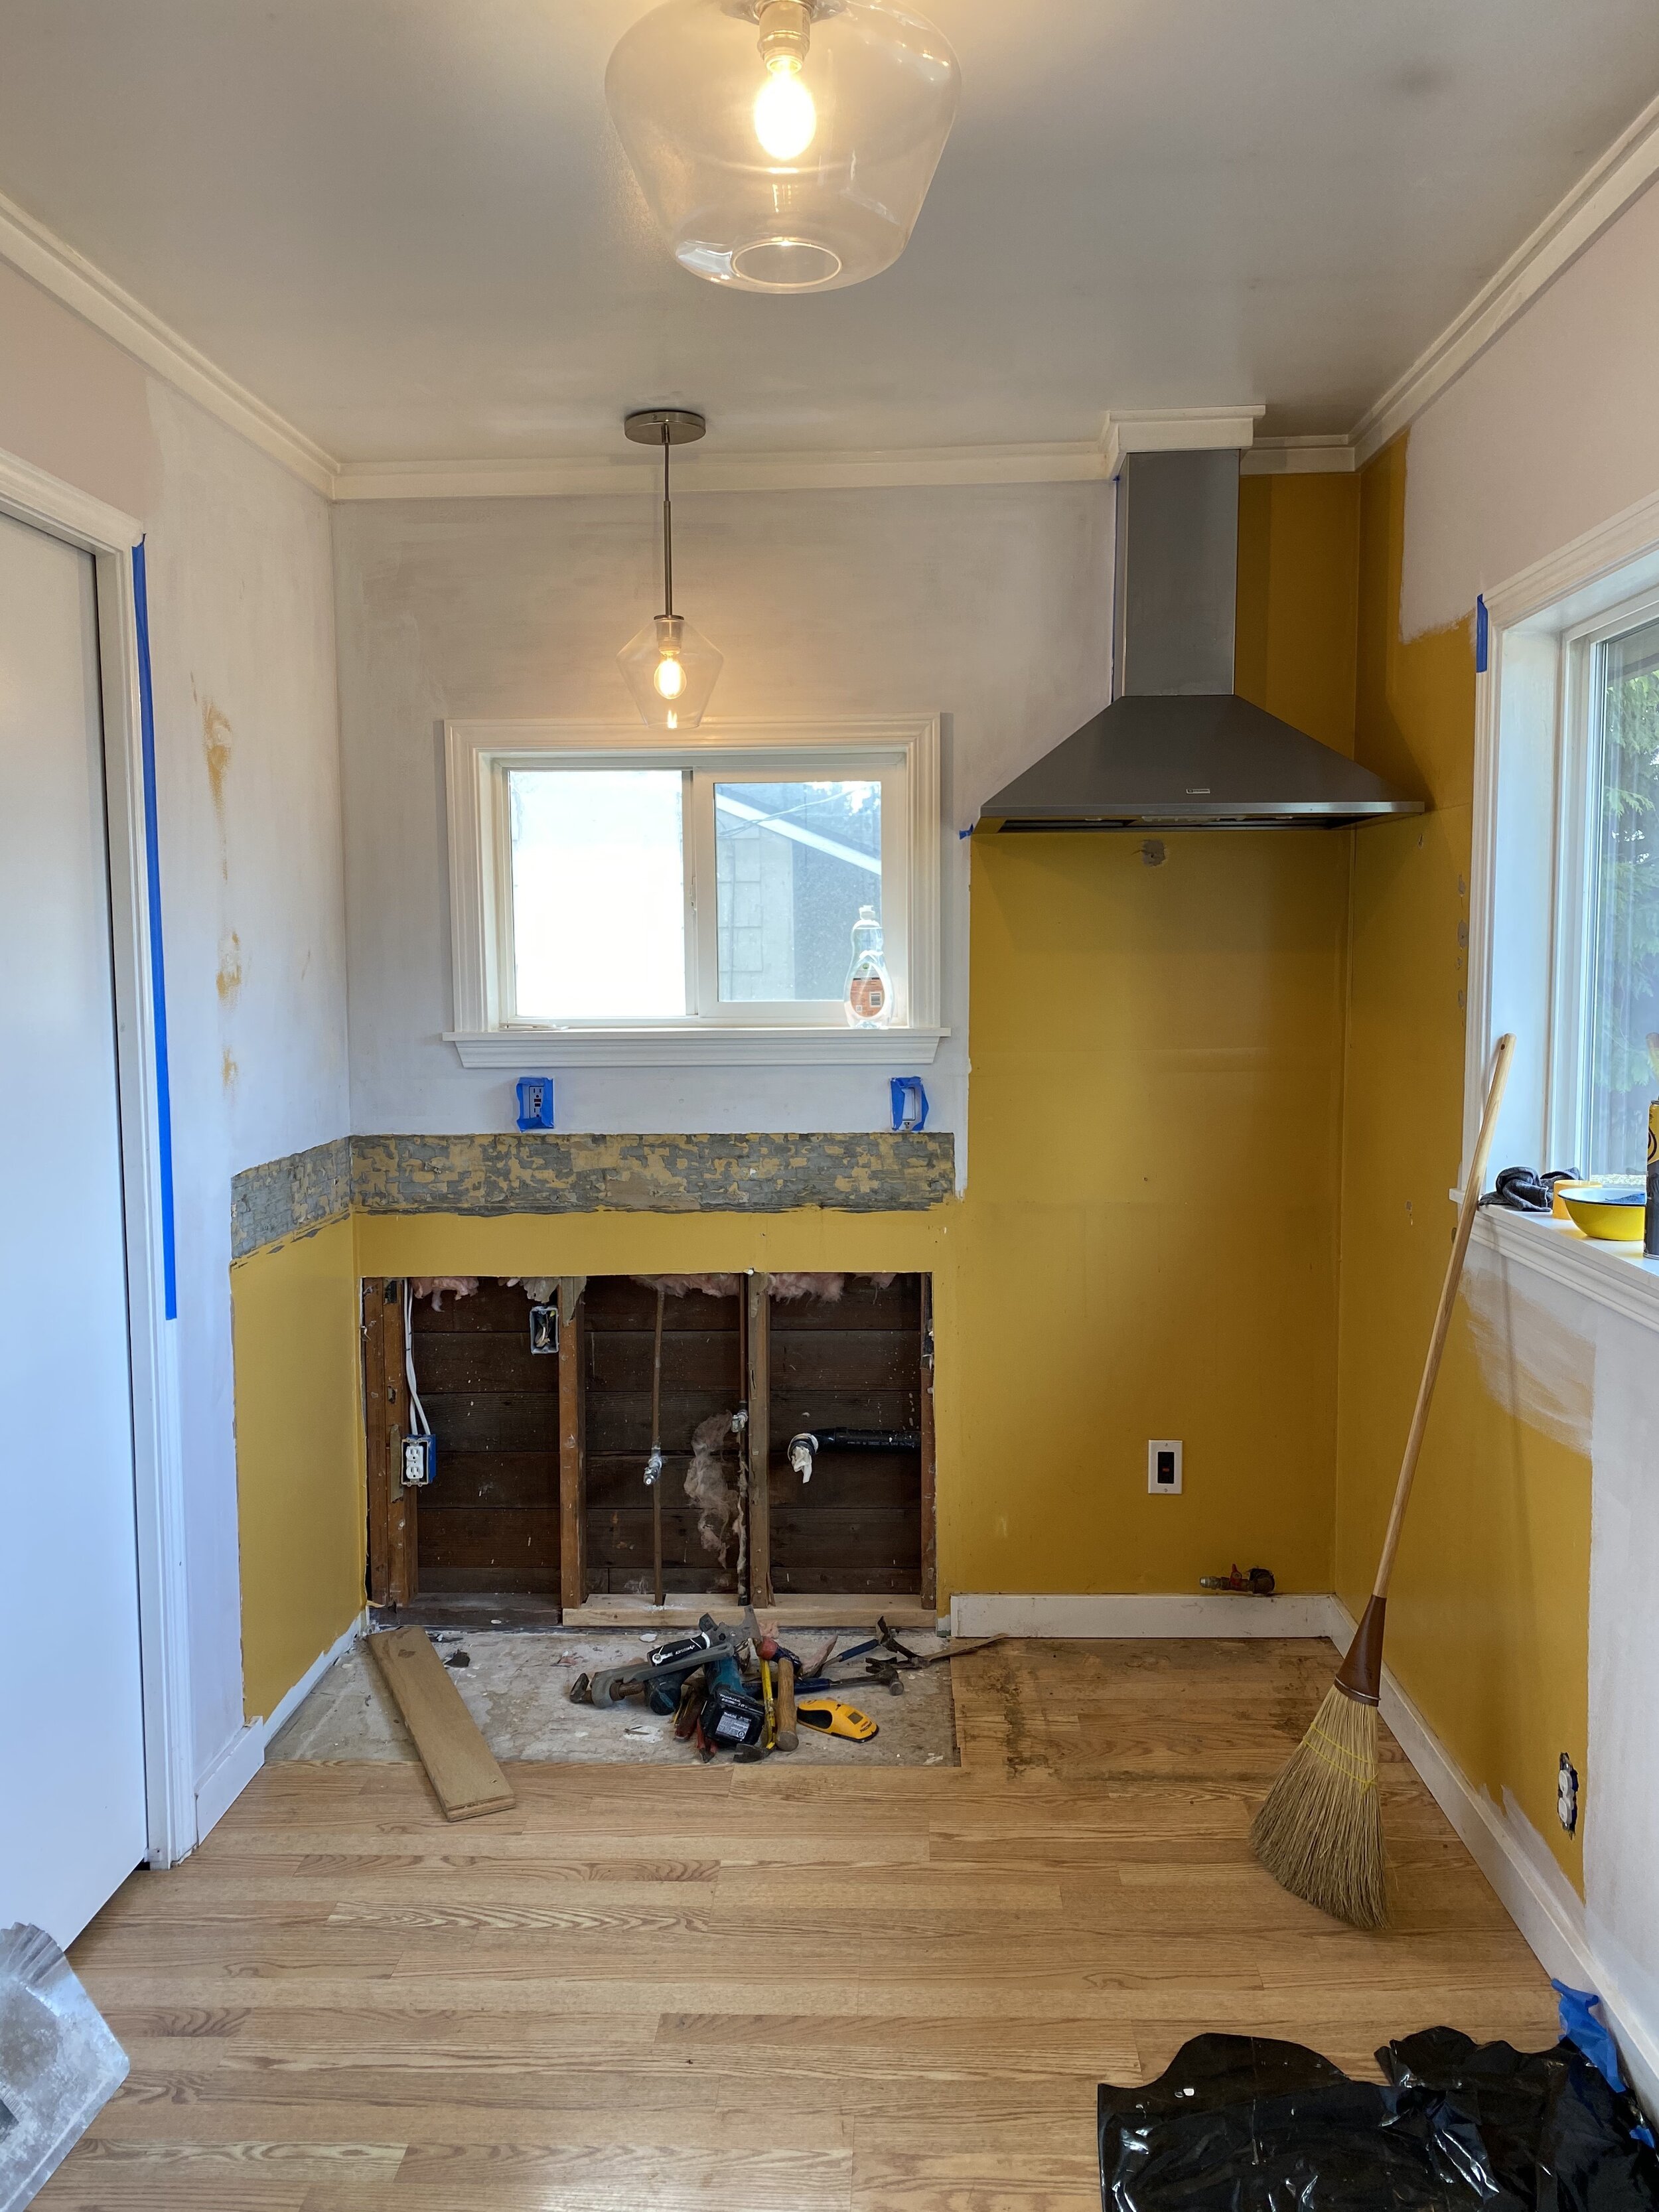
BEGINNING OF THE KITCHEN WORK - FEBRUARY 2021
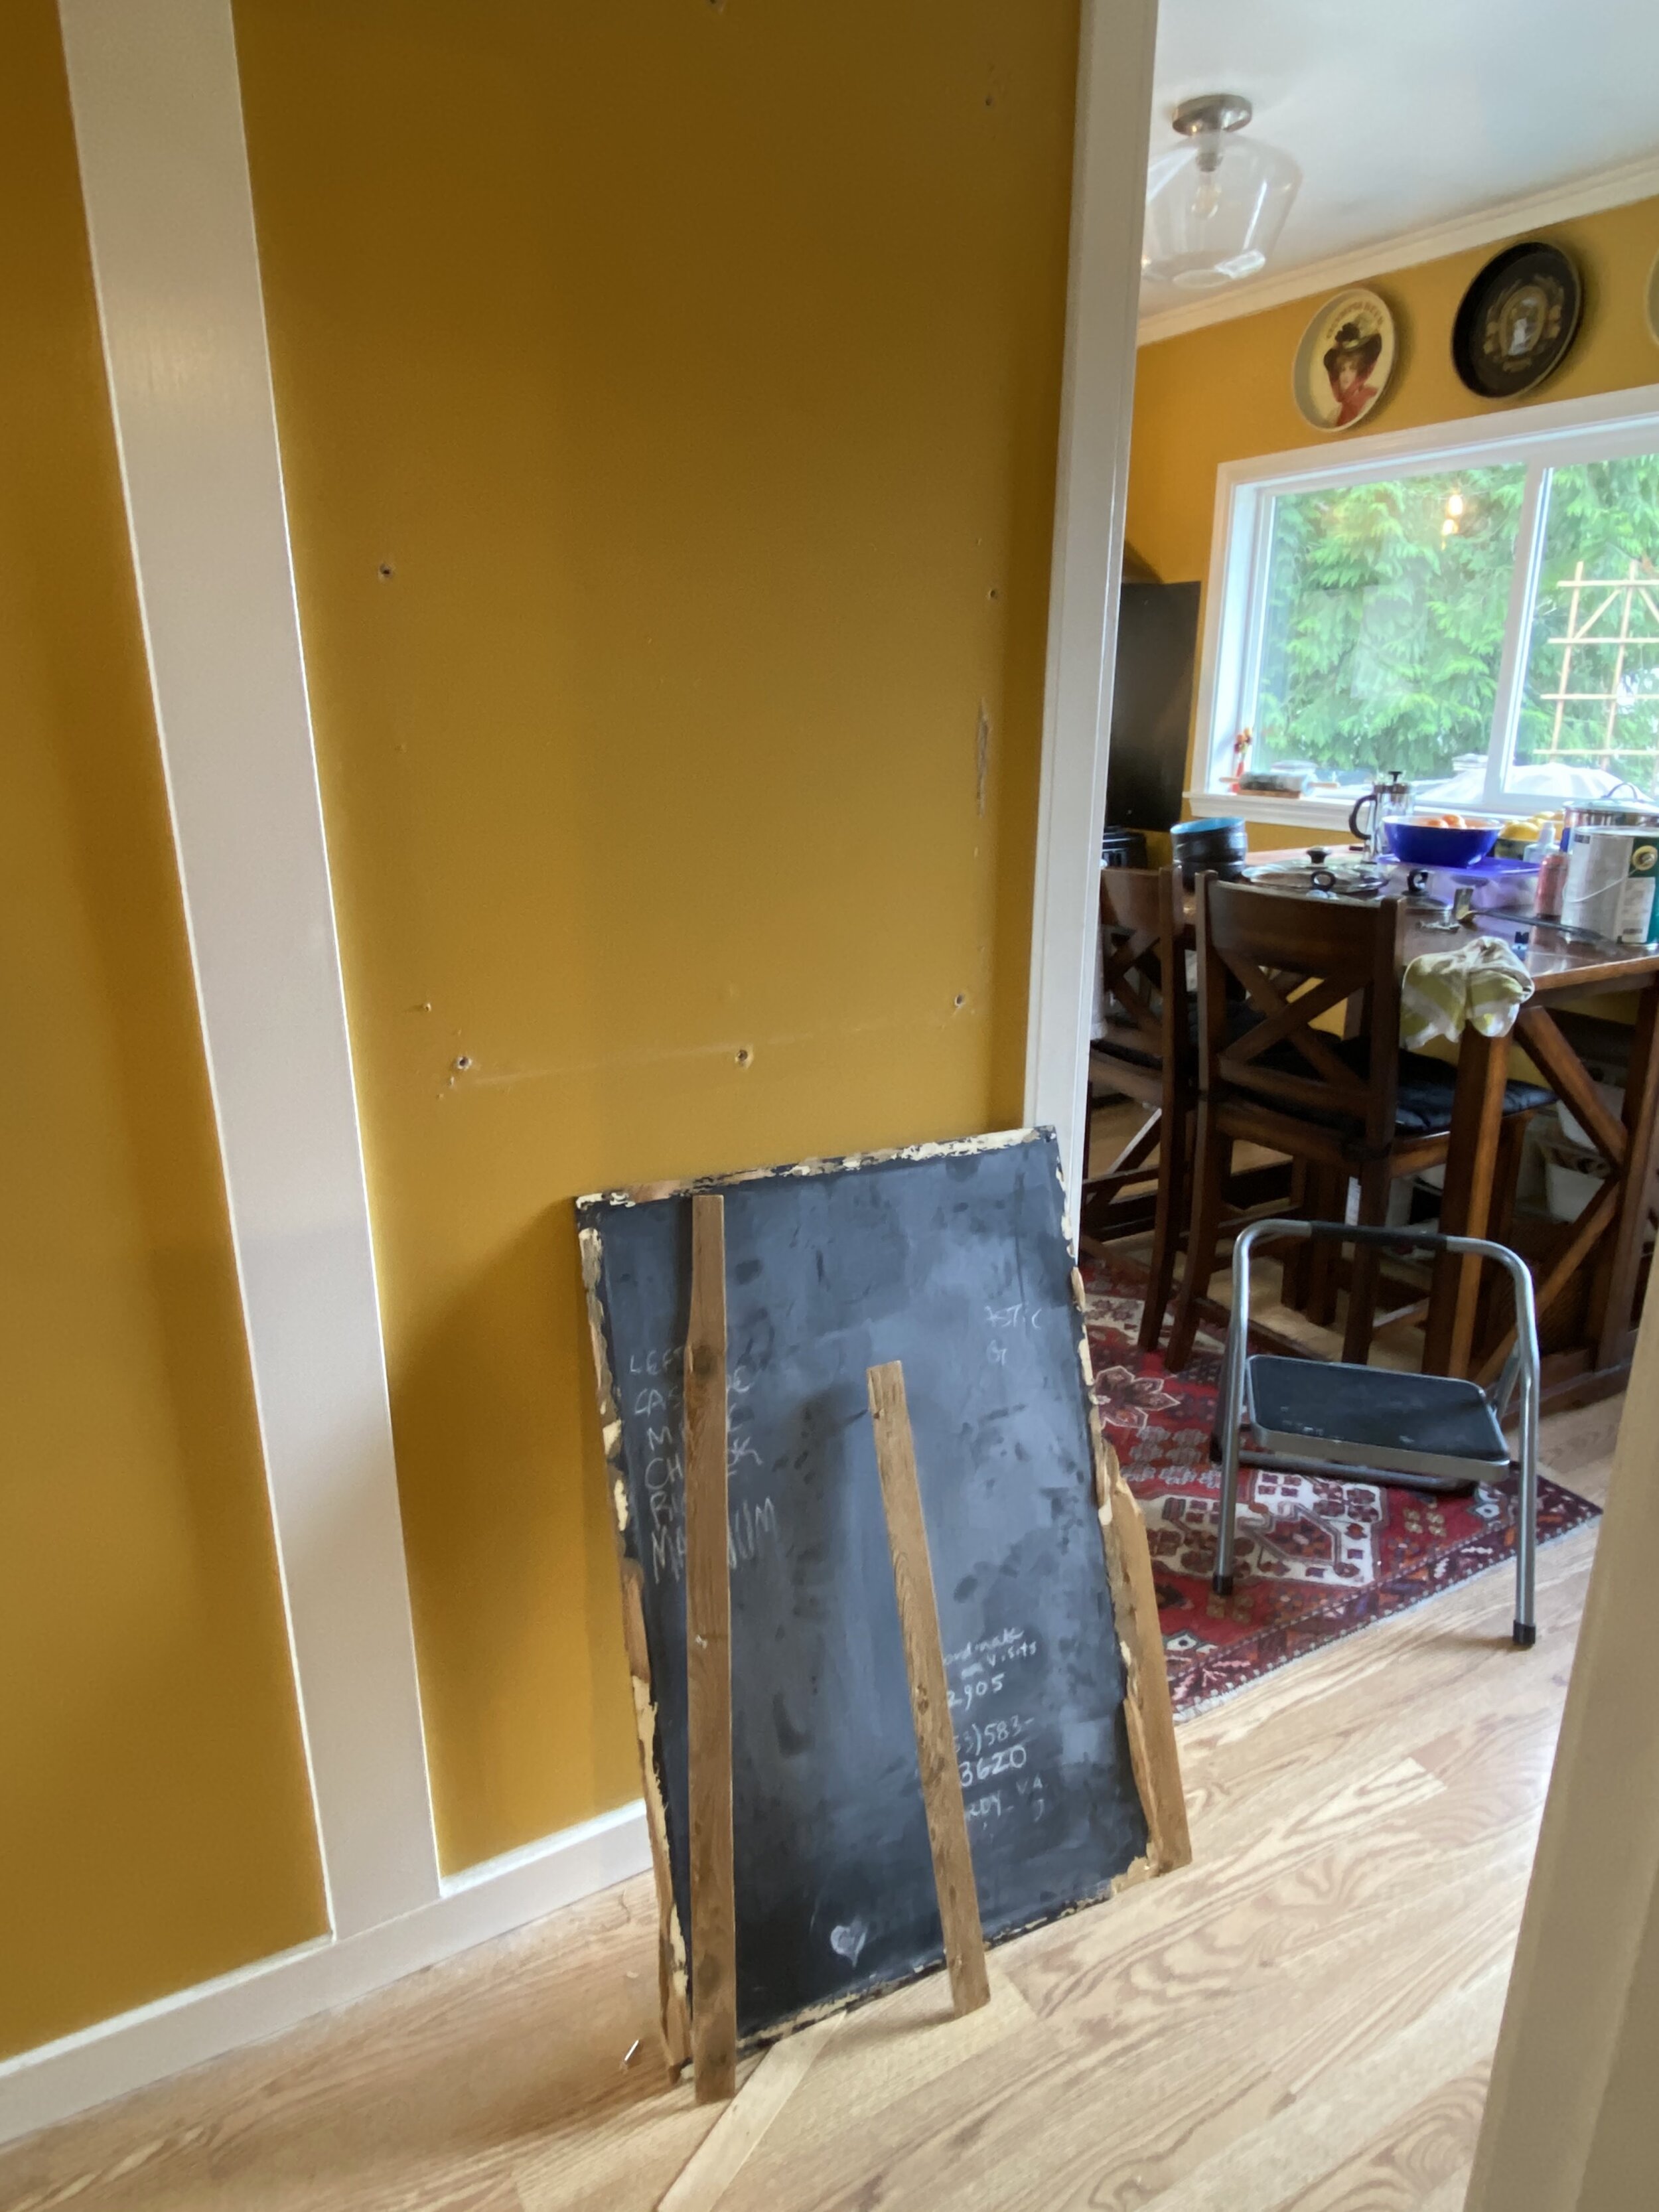
^ one of the first DIYs that peter & i did in our house was the hallway chalkboard - it was a bit sad tearing it out when it came time to paint.
oh man, my whole life was taping and painting for the last 6 months or so.
always be taping. always be painting.
i listened to SO many audiobooks and podcasts during this phase. i immediately think of the book that i was listening to when i see photos of whichever house project; kinda funny how your sense memories work in that way.

bye-bye yellow! thank you for your cheer.
^ and LOL to our old cluttered shelves and dish-drying disaster zone. and the tiny ass sink!! agh! good riddance to you all!

^ SO fresh & SO clean.

sam demo’d our cabinet area in about 5 seconds and removed the old stove. having everything out of this space did not make it feel larger at all, haha. it’s just a small room - no escaping that fact.
we had some fleeting hopes & dreams a few years back that we’d extend the kitchen outward onto the back porch area and add on a dining room as well - but decided someone else can take that task on themselves.
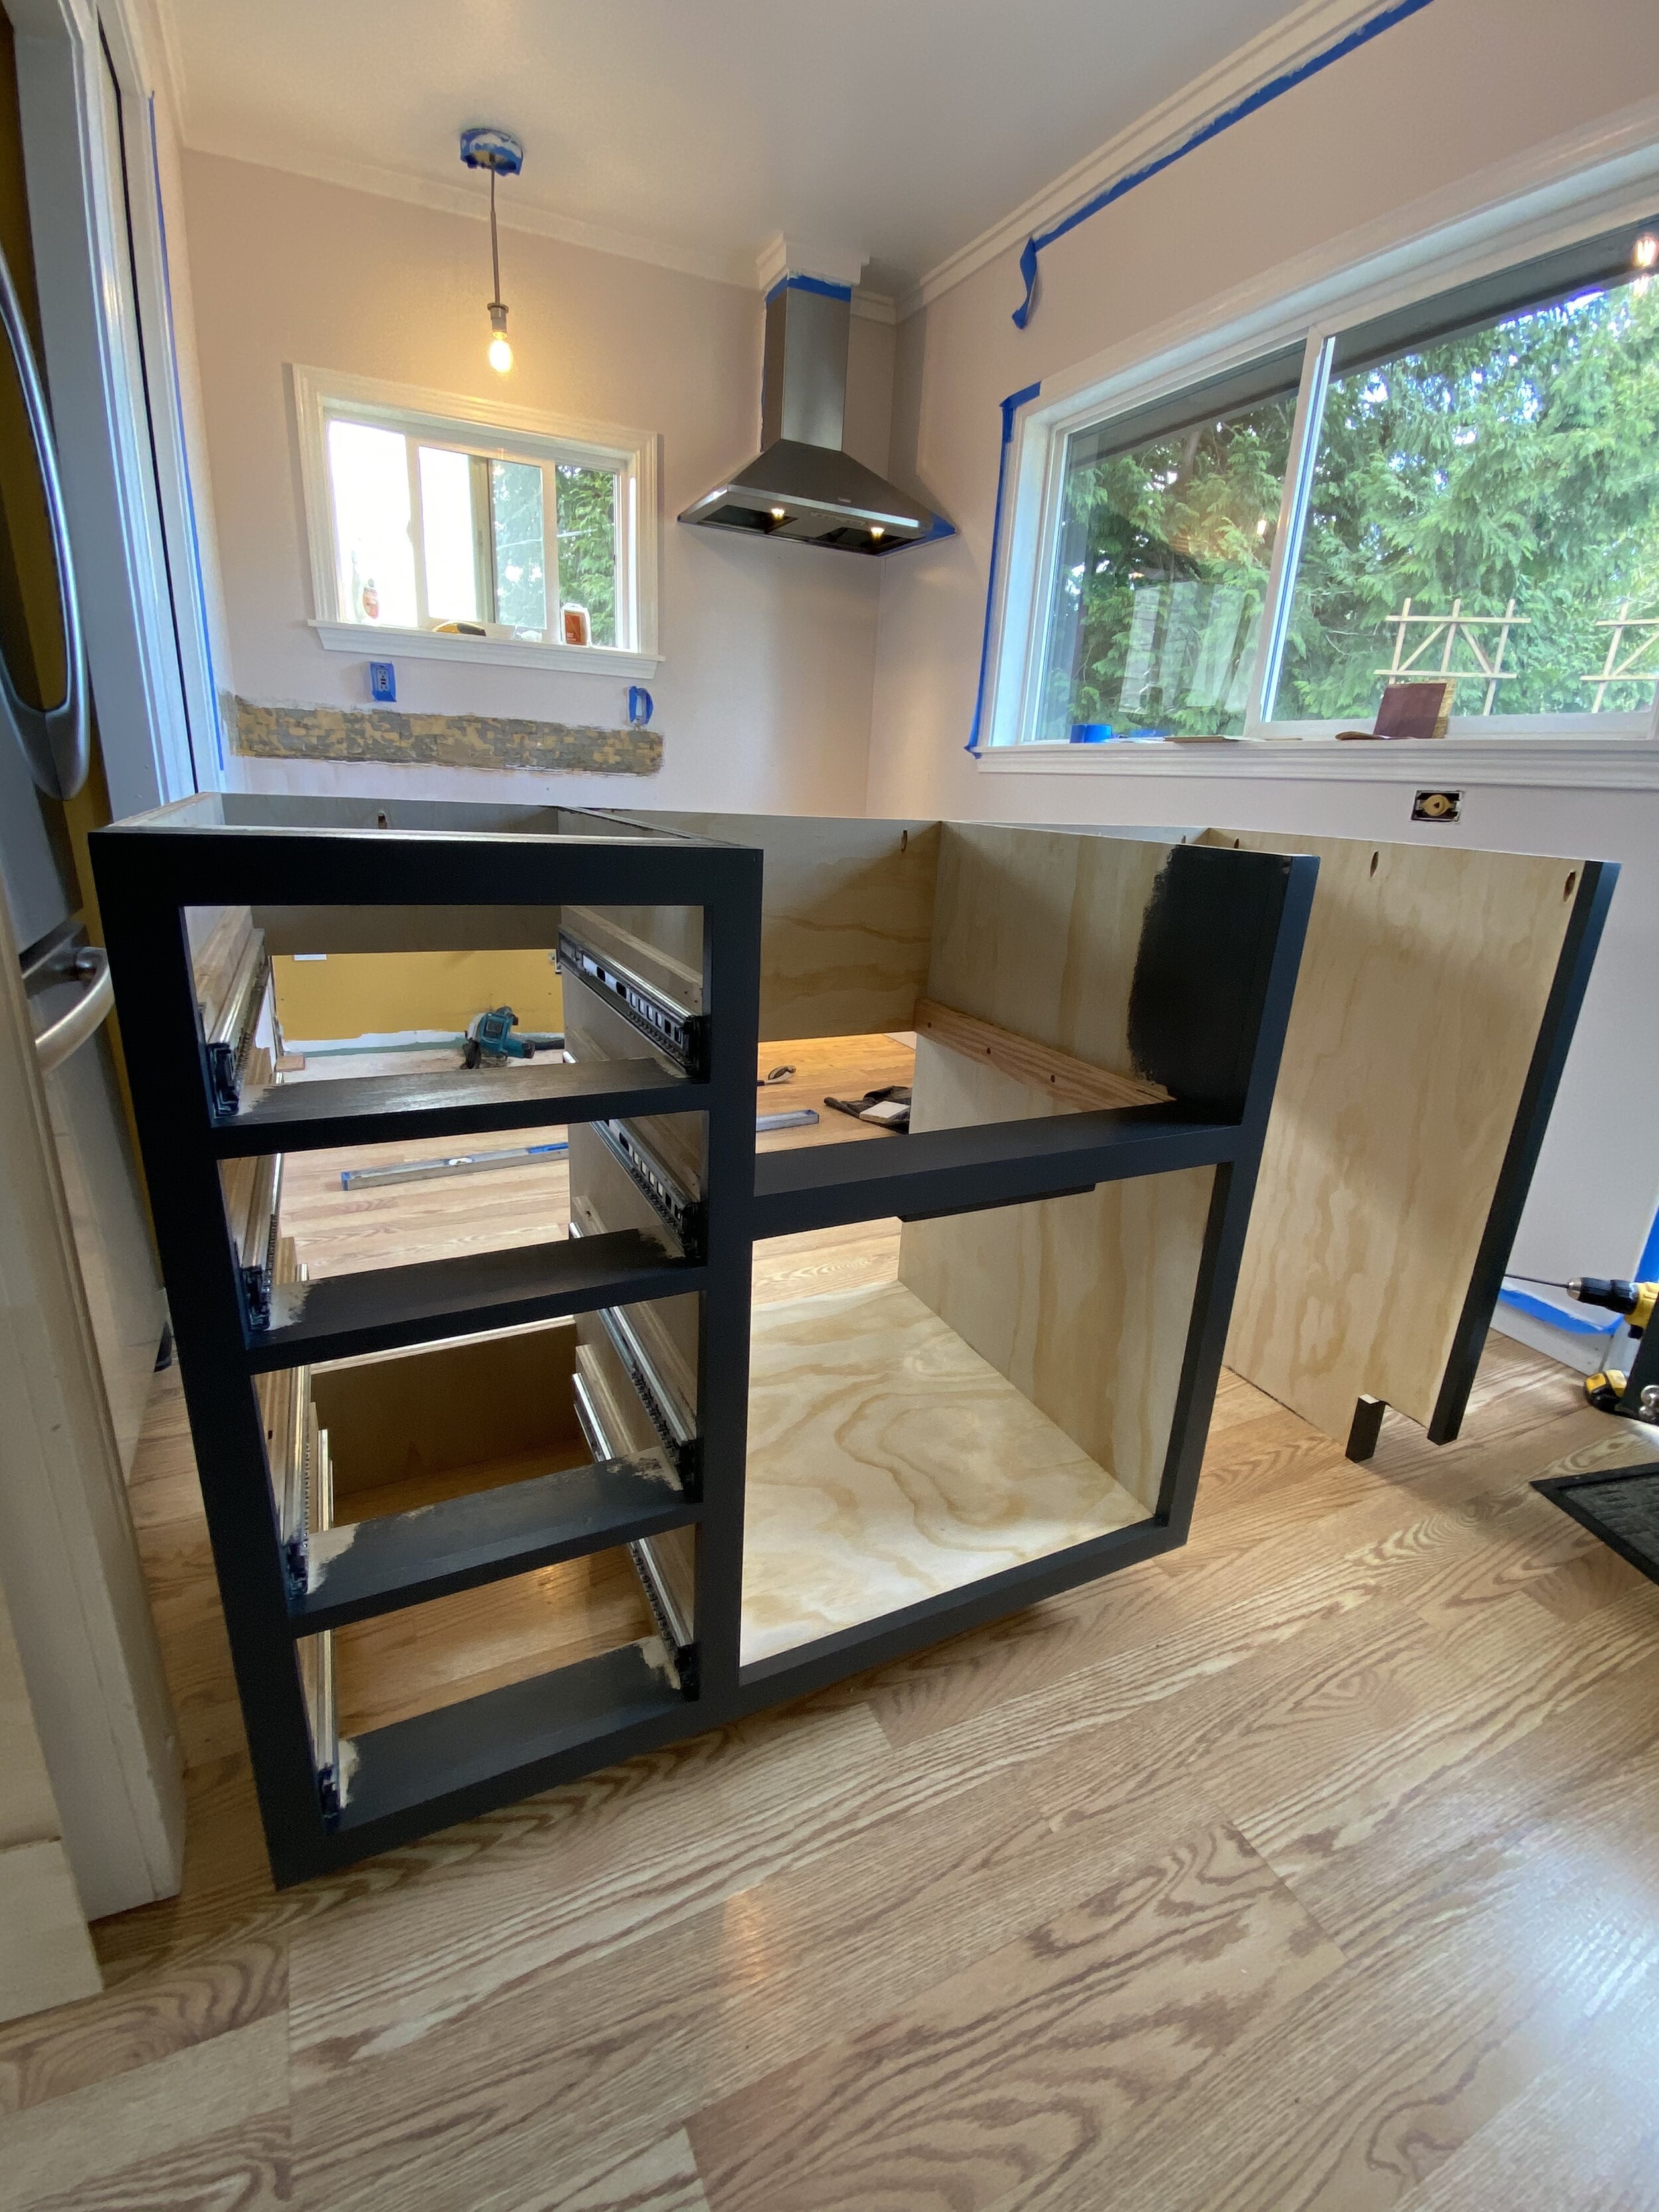
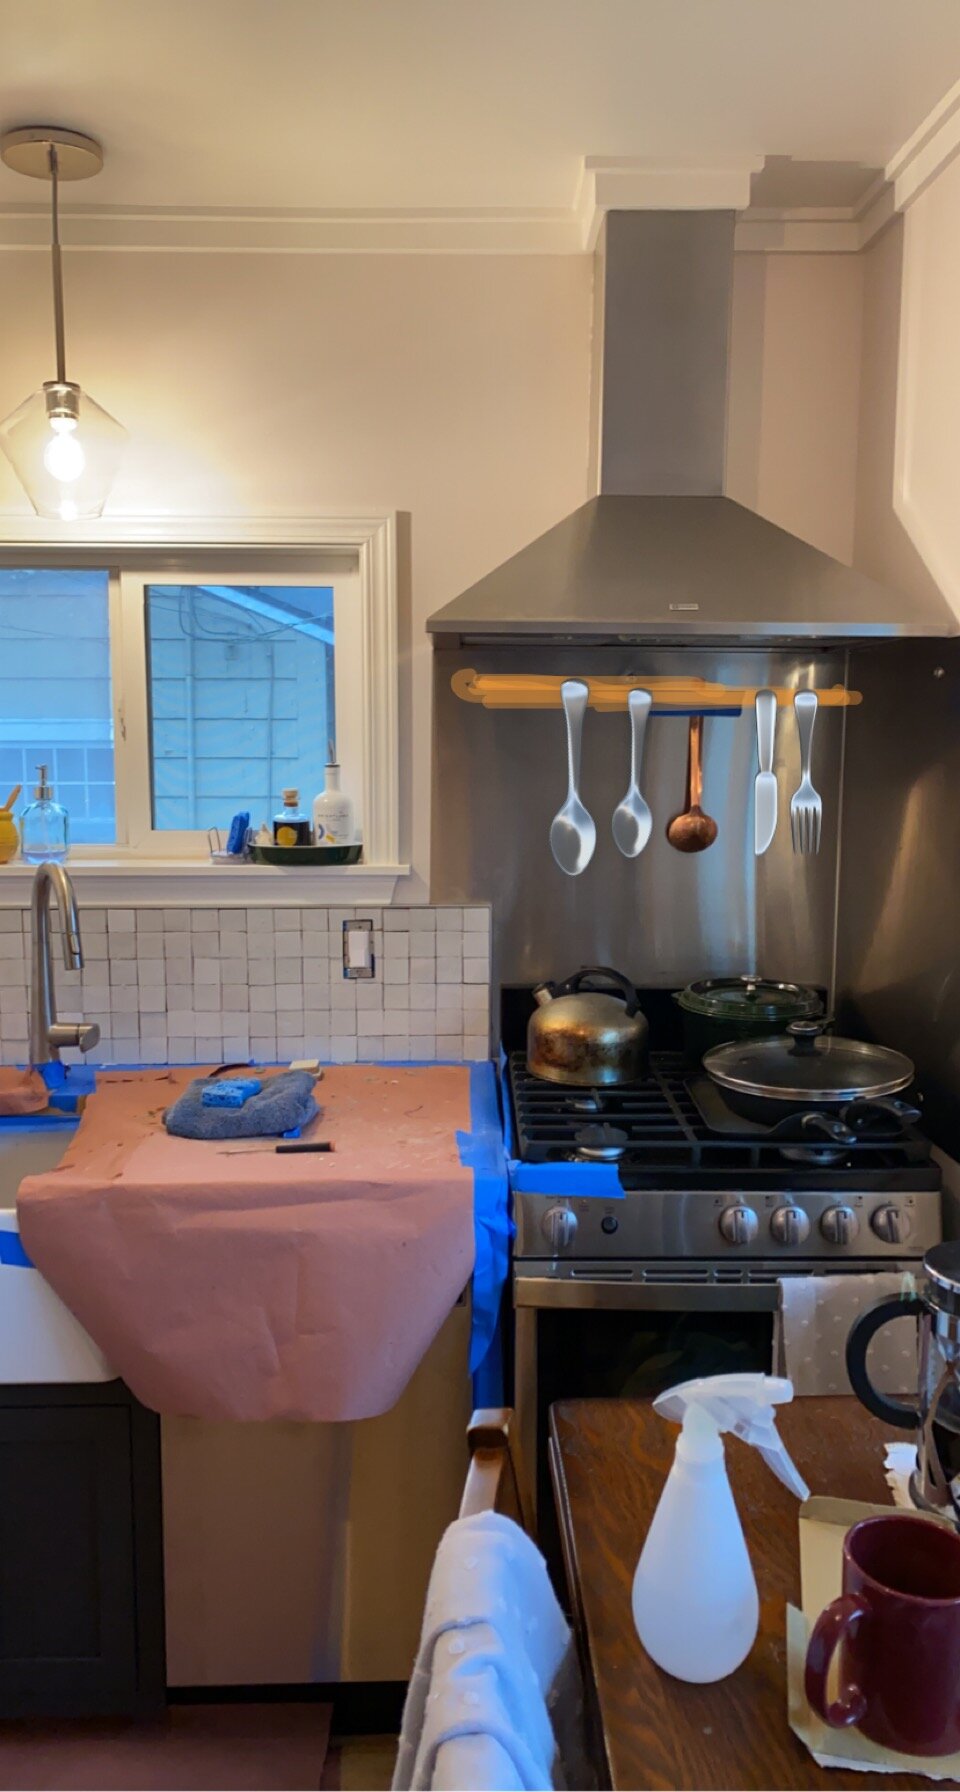
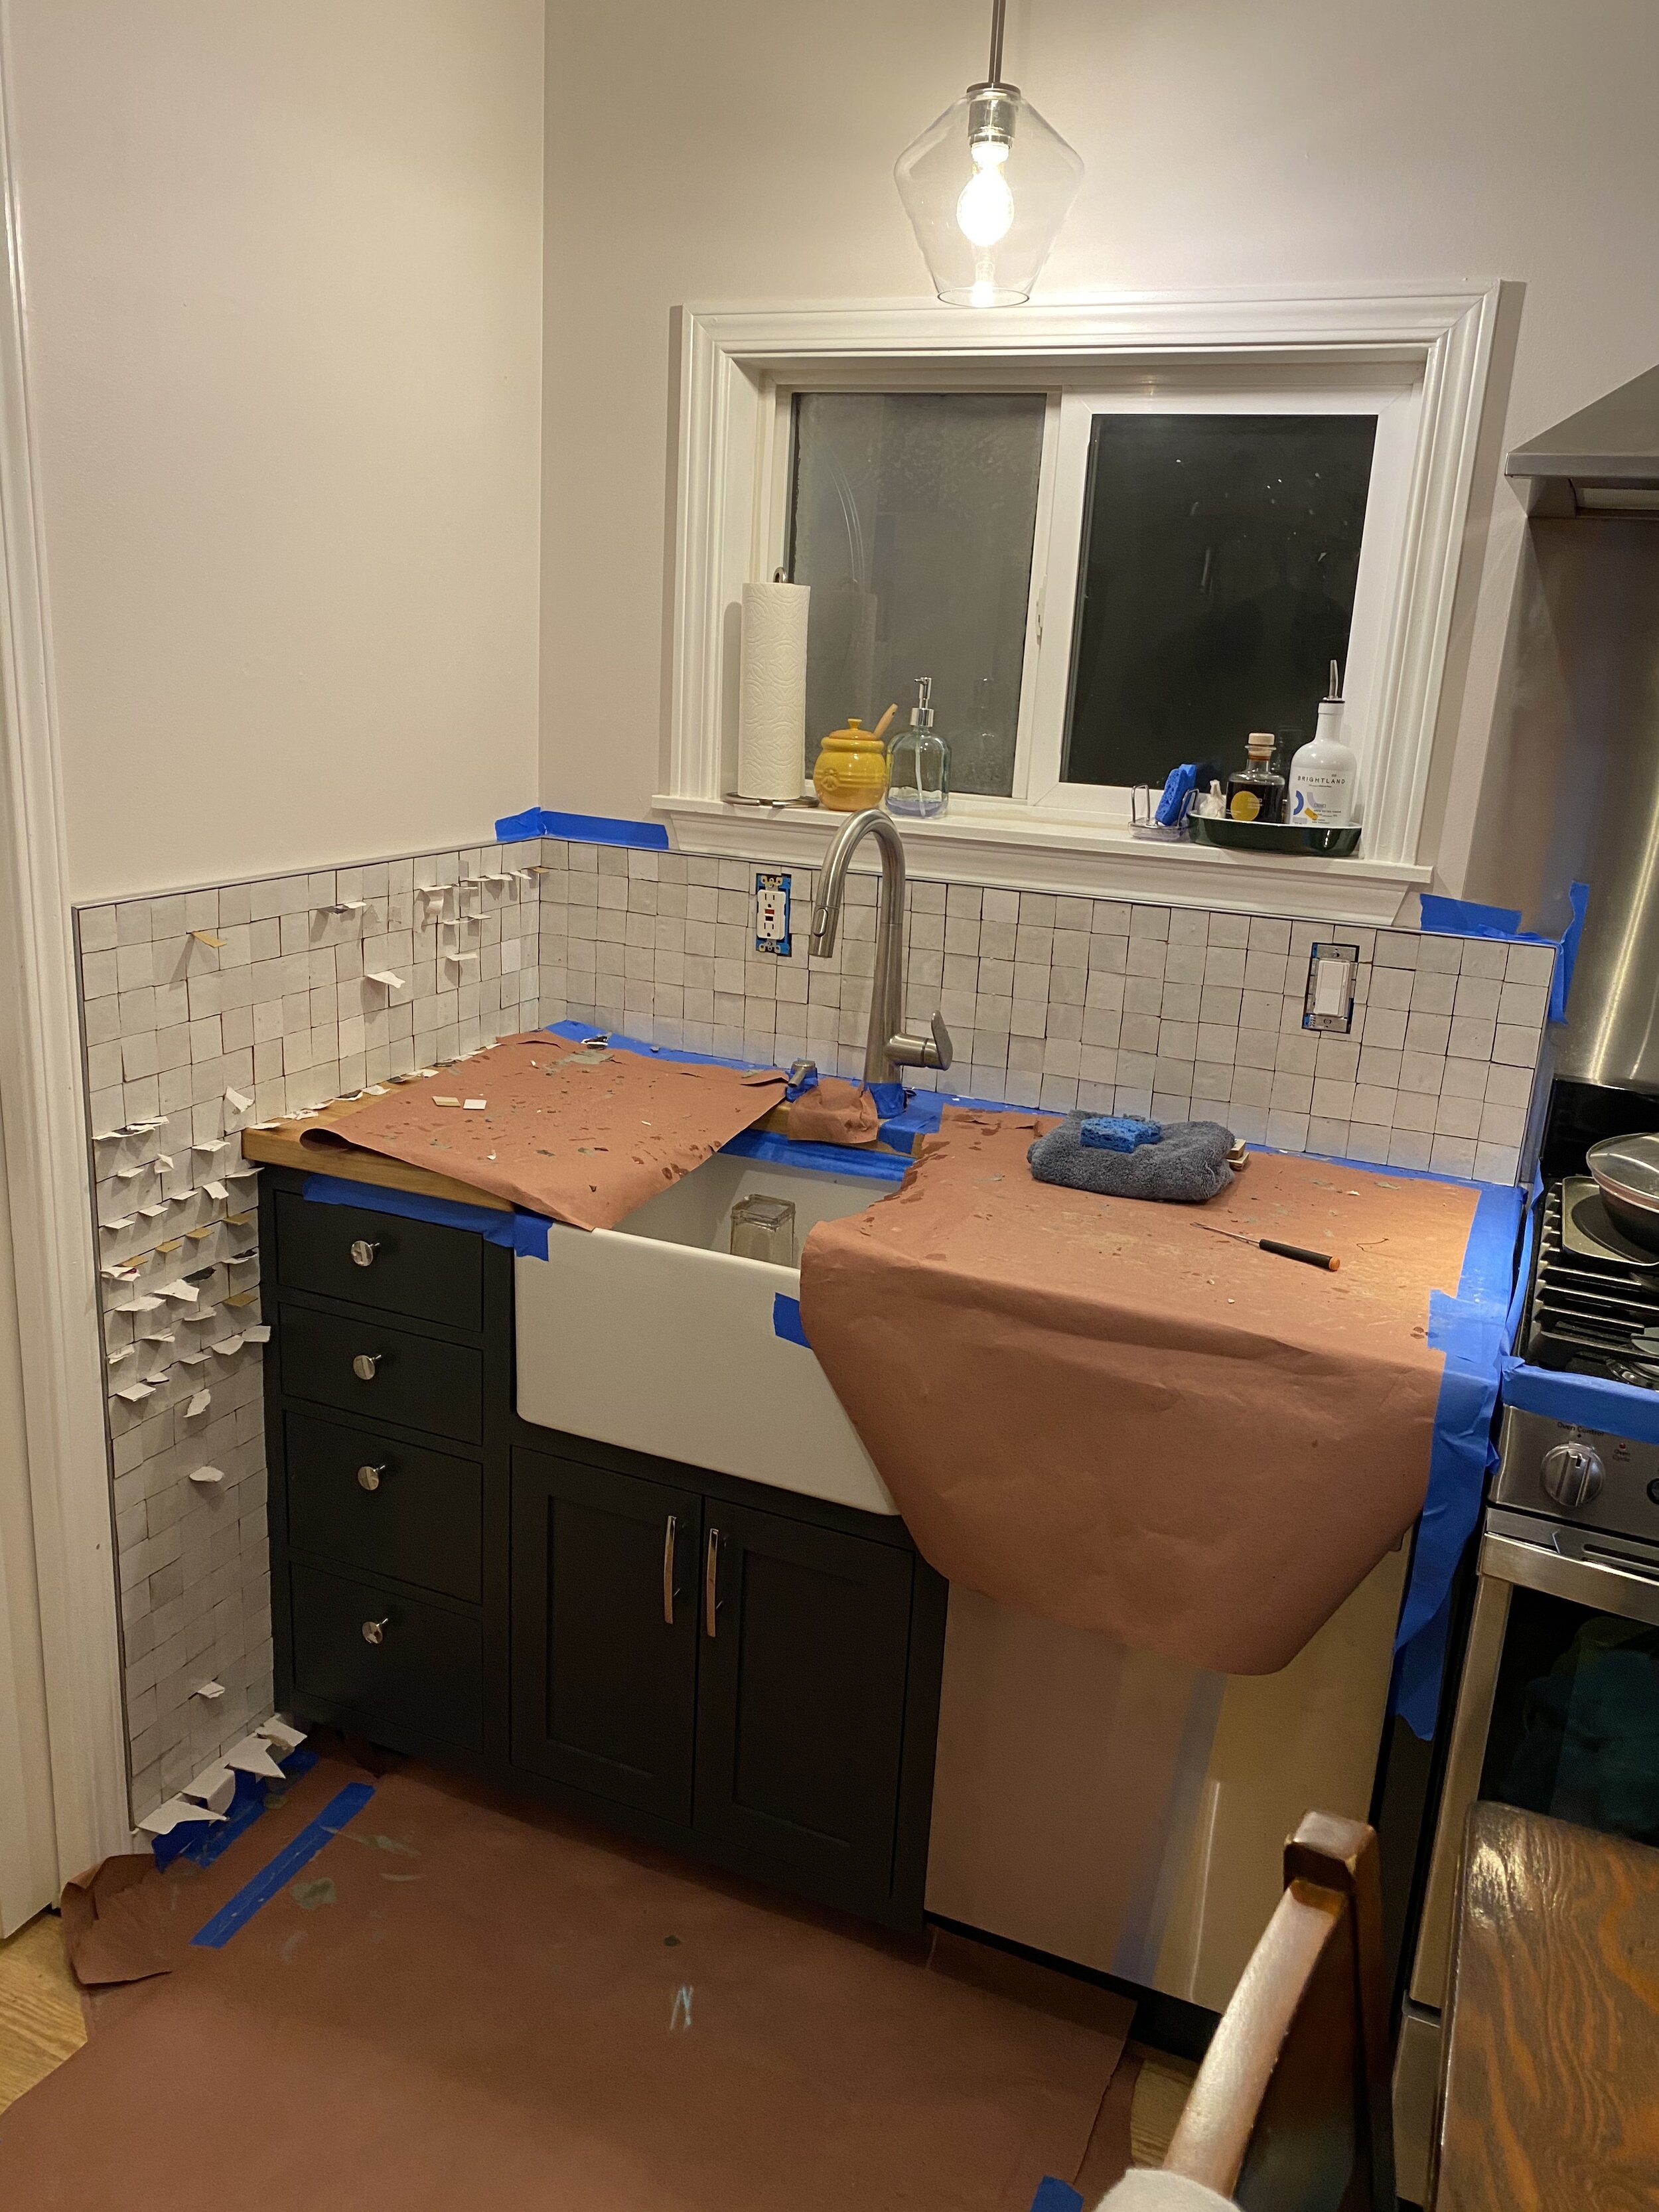
cabinet, sink, dishwasher, range and countertop install time!
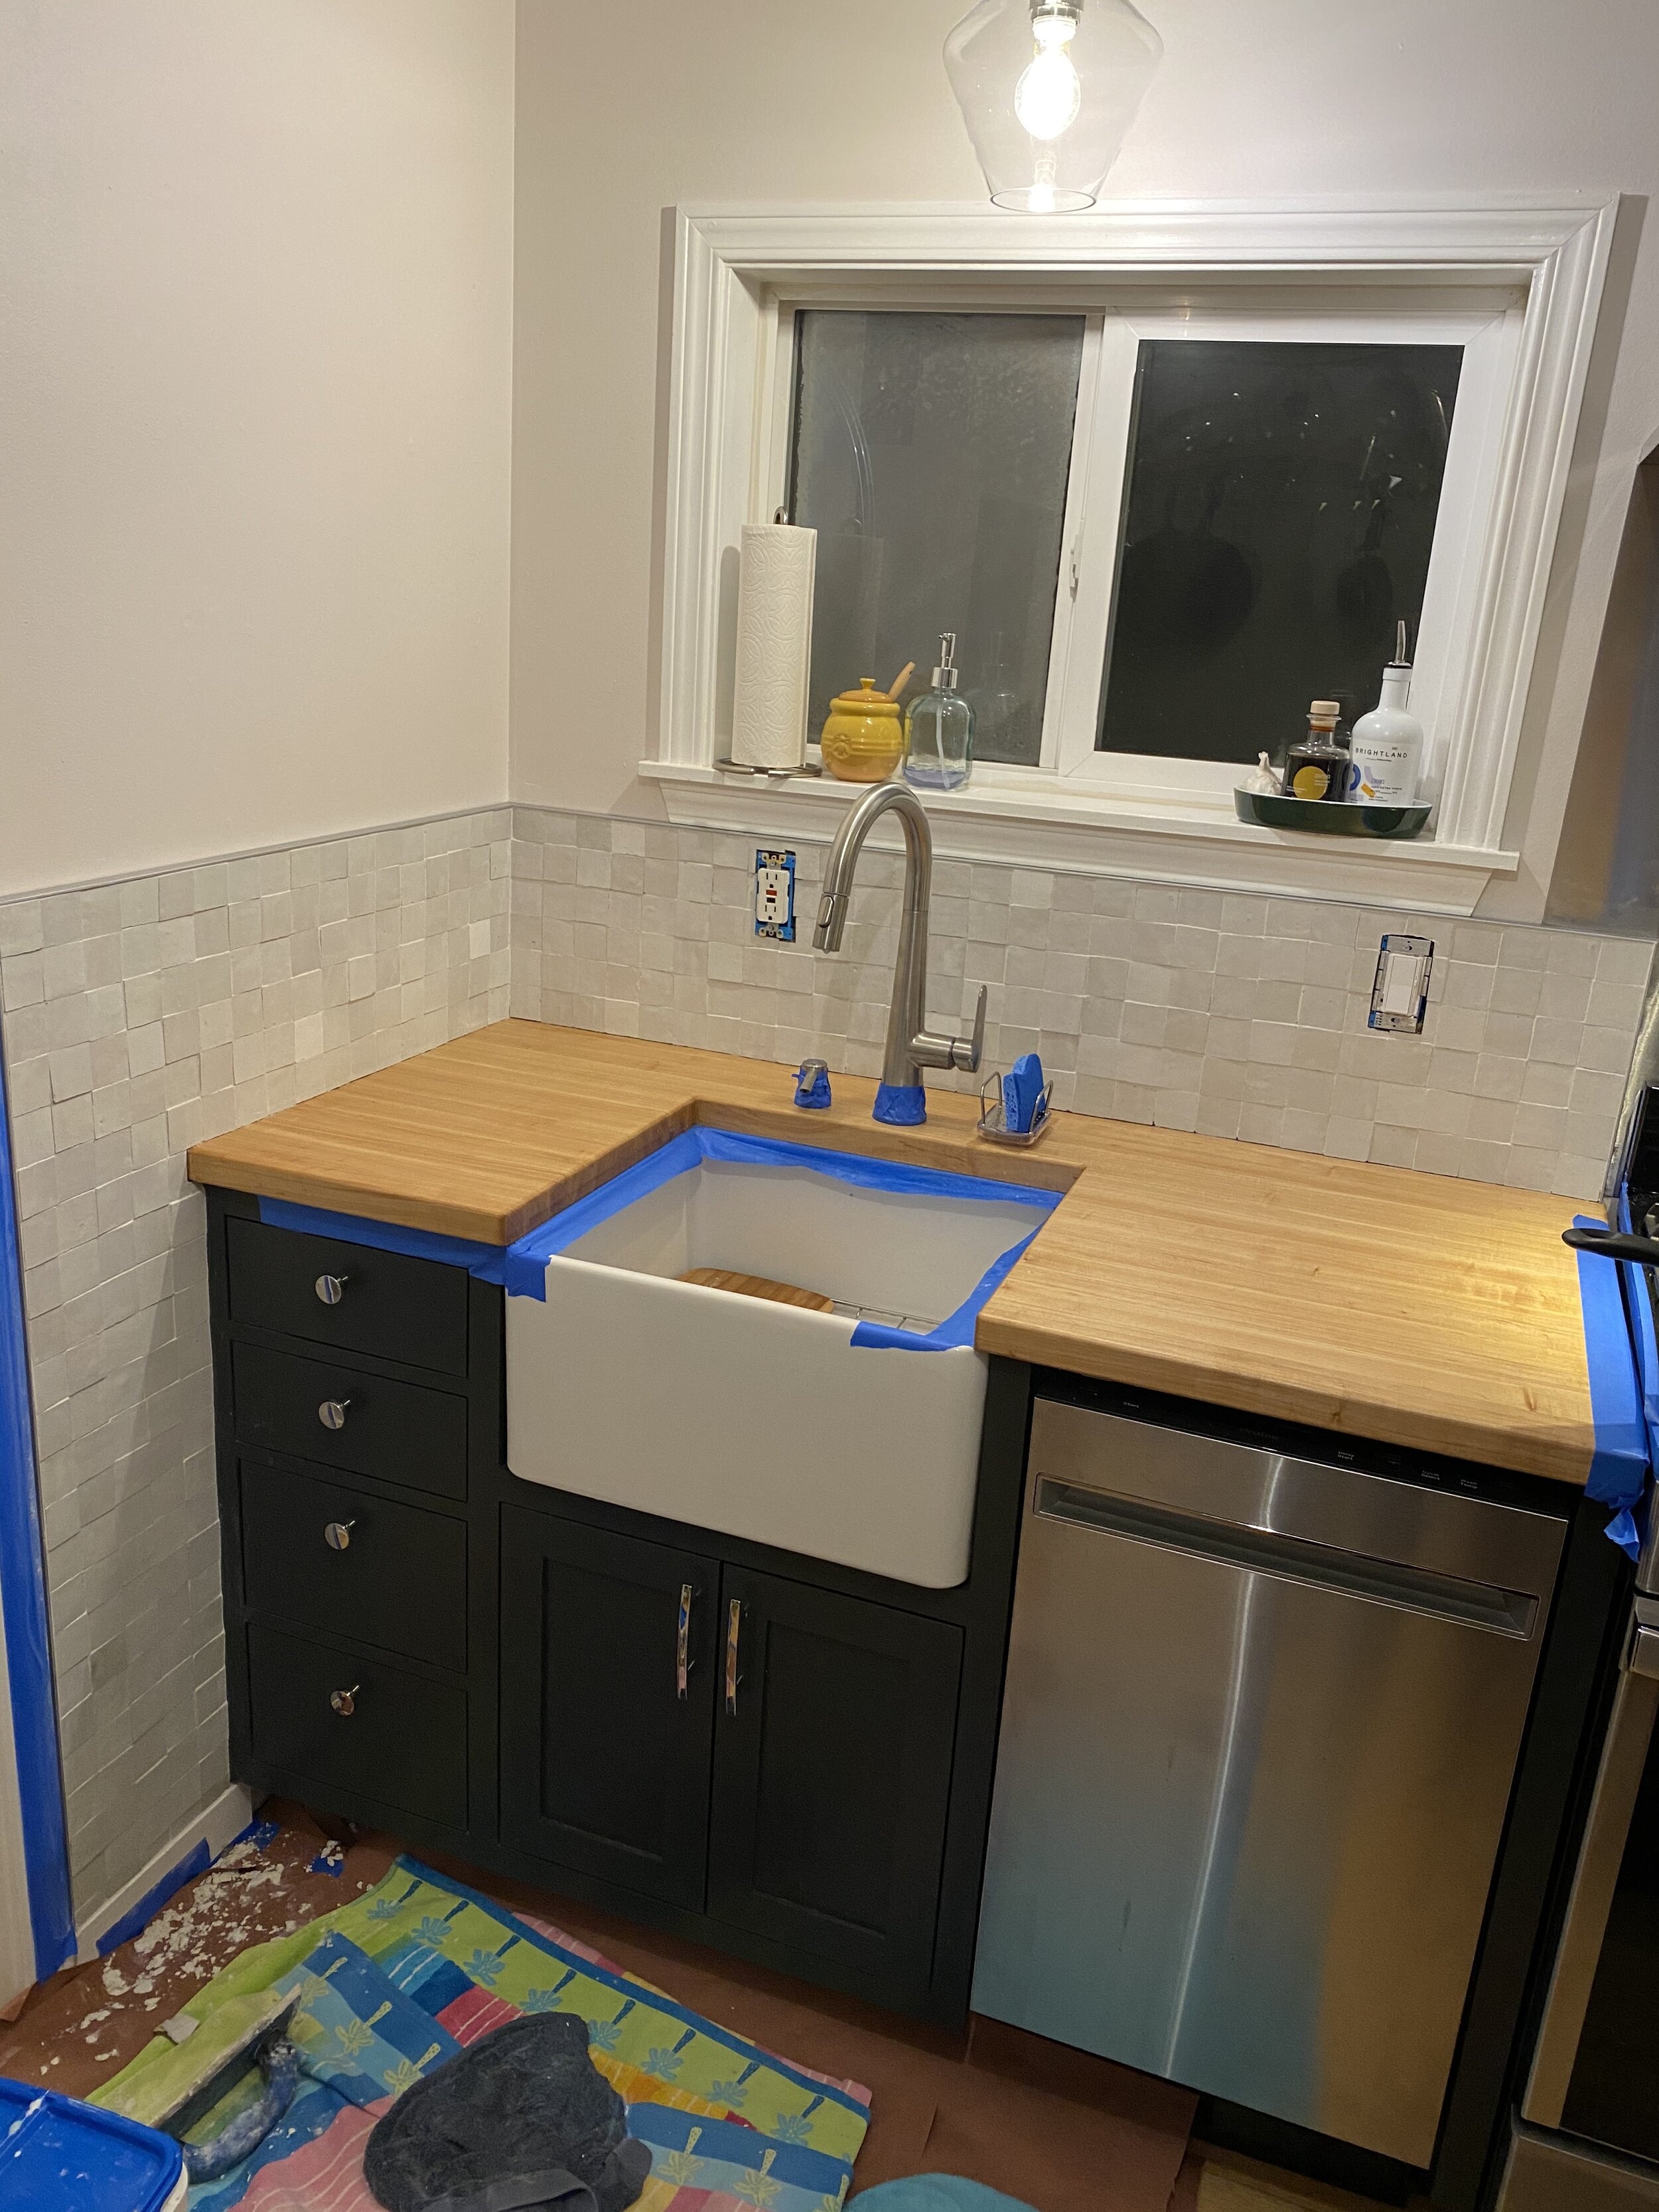
isaac painted the cabinets with the same paint i used on the interior doors, ‘iron ore’ by sherwin williams. it can sometimes look blue-ish in this kitchen light, but it is definitely dark grey/black.

so grateful & thankful for these talented people in our lives!!
thank uuuuu, sam & isaac!

^ this felt quite victorious!
what had we been waiting for?!?!
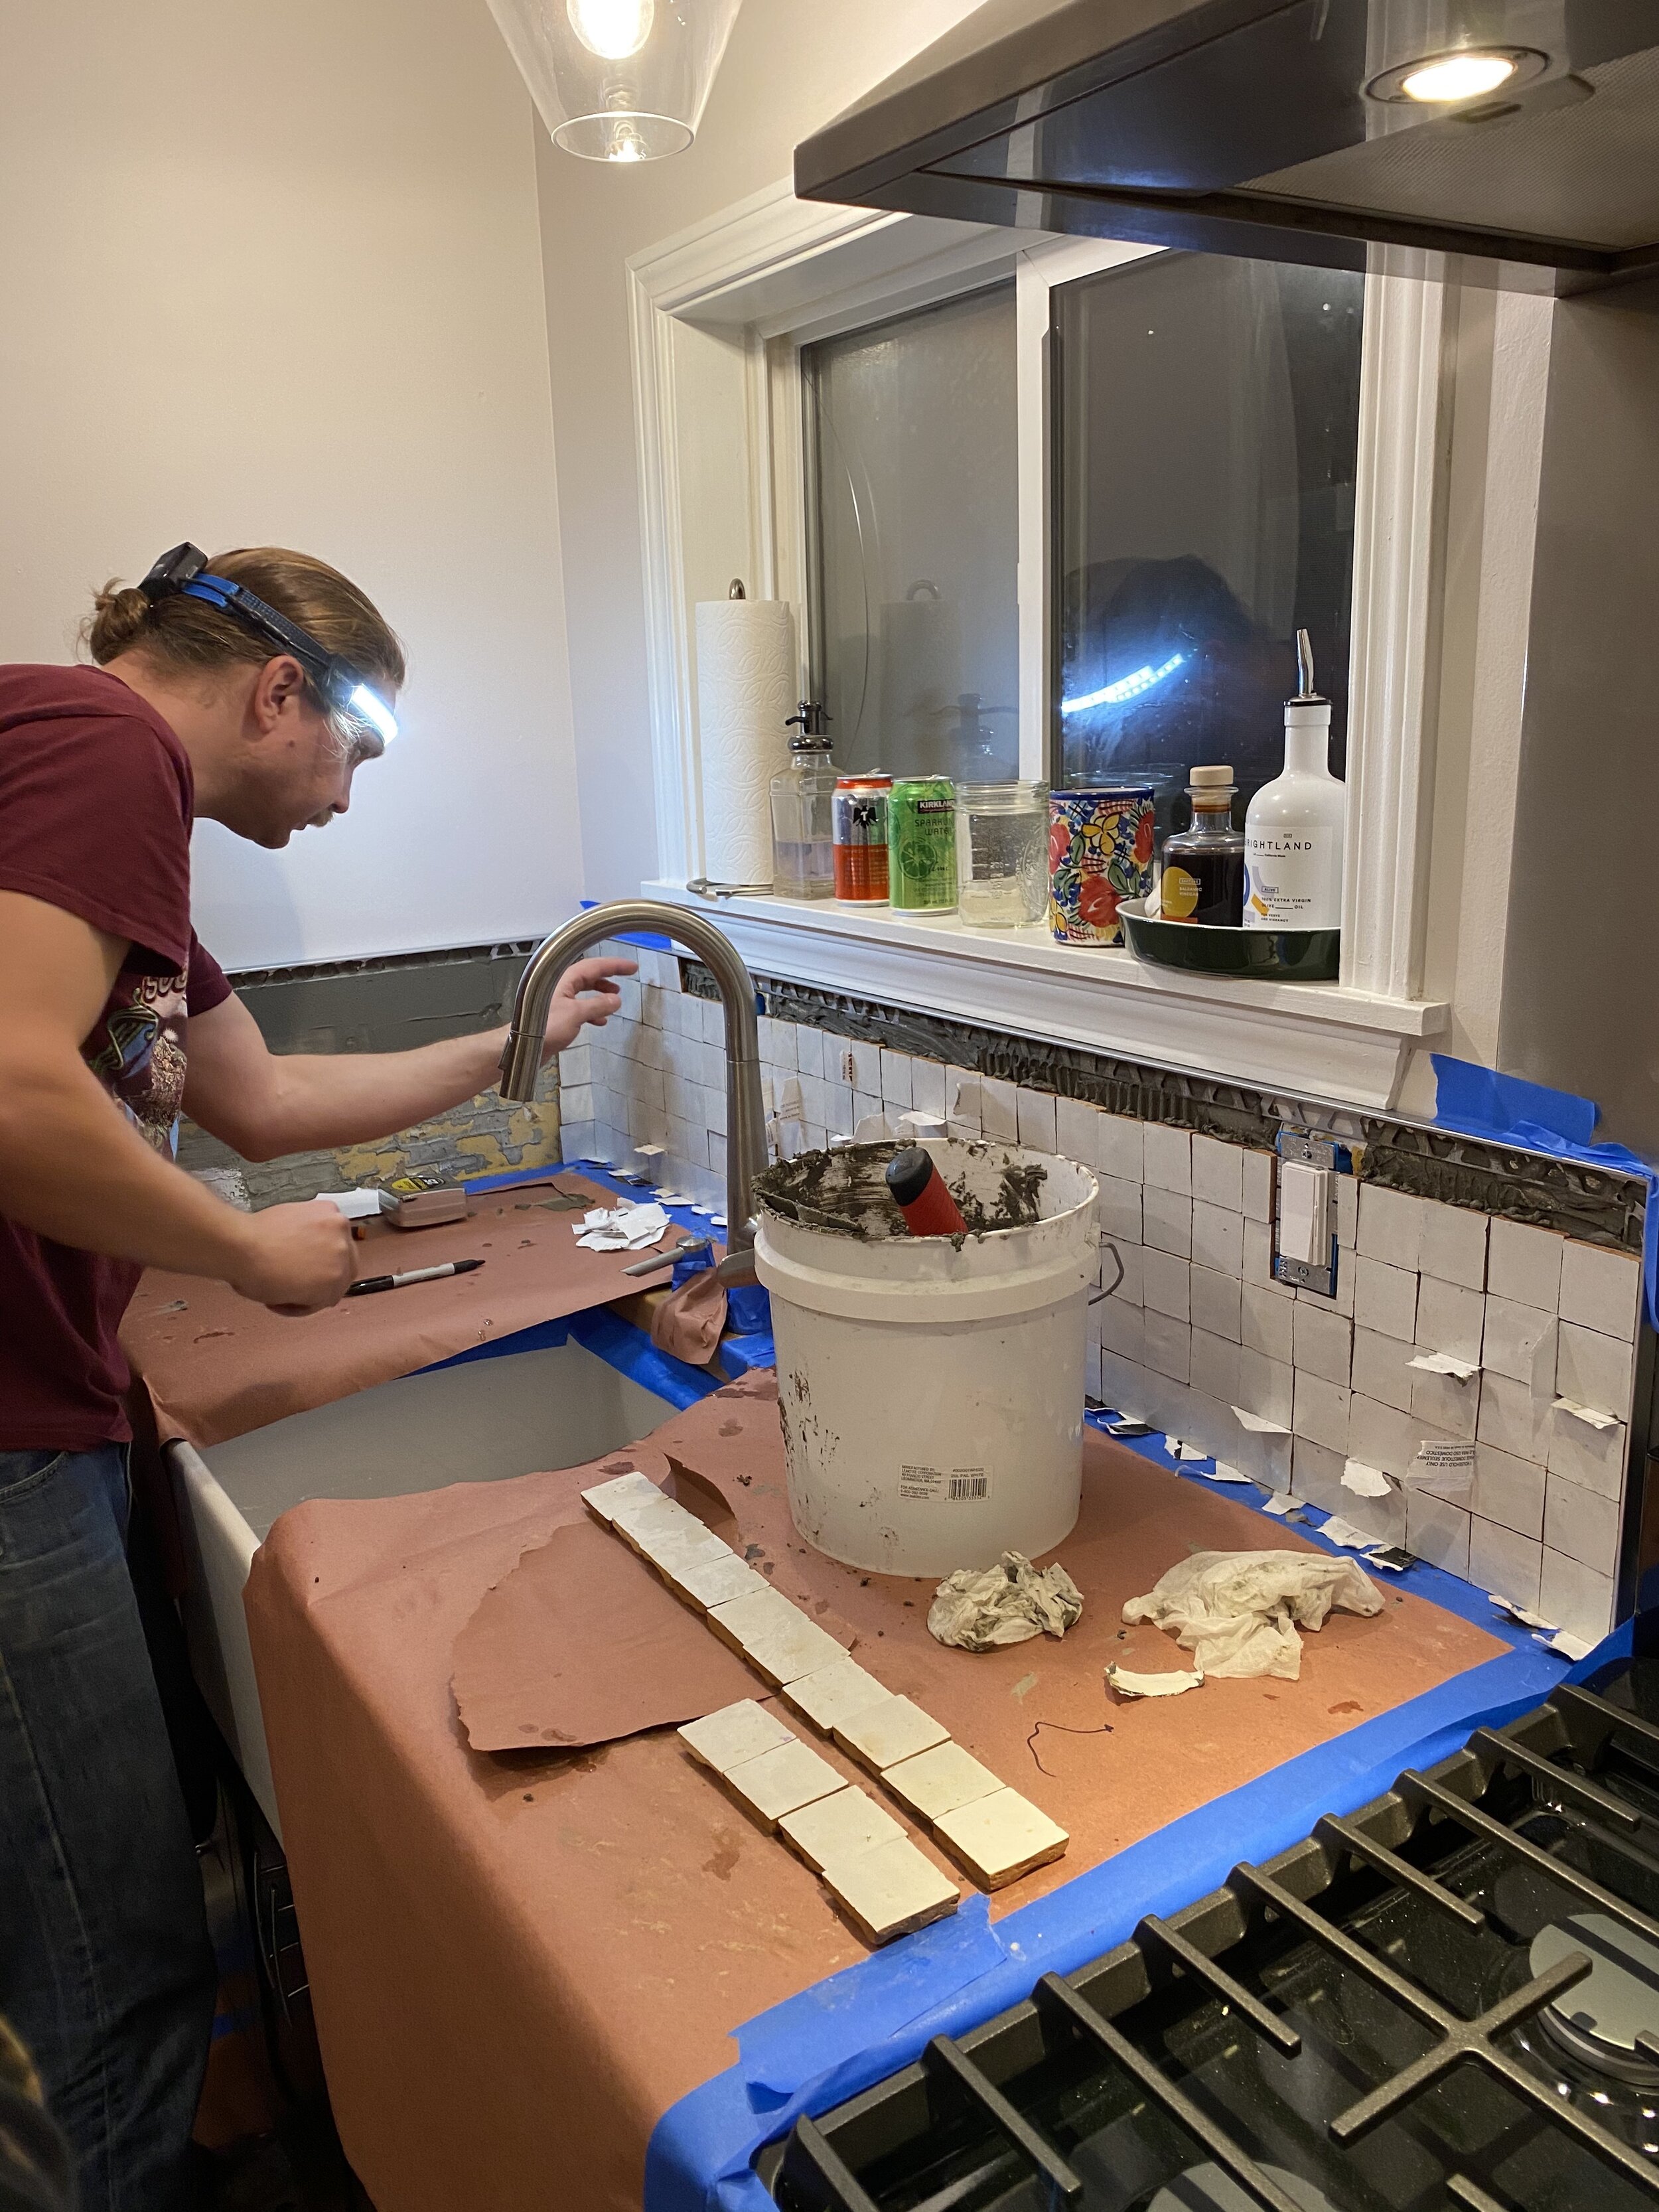
^ tiling that backsplash! as we did in the bathroom, i would soak and lay out the tiles in the order i wanted them, pete would mortar the wall, butter the backs of each tile, and place. i would go in with tile spacers or pieces of cardboard to keep the lines (mostly) straight. figured out later that we shouldn’t use the cardboard, lol. it got wet and the pressure of some of the tiles together wouldn’t release the cardboard cleanly, leaving little papery bits everywhere that i had to dig out. my dad later recommended we use playing cards since they are coated - so smart. ♣️♦️
also, i coated the butcher block at least 3-4 times with a water resistant sealant (this was a several days-long process). it did a pretty good job of wicking water right off instead of absorbing into the wood.
grout makes all the difference. ✨
we used the recommended mapei grout for natural tiles in ‘white.’

sam replacing our kitchen window that had been cracked & hazy (for 7 years)…we are weirdos for not doing a lot of fixes much sooner, but oh well.

our cute new kitchen having its cute little moments that we were able to enjoy!
we were quite proud of this much-needed kitchen update!


these photos of us in the school bus yellow kitchen in our first home together just warm my heart - and also break my heart a little bit. we’ve since sold this little house and are living on a family property while we figure out our next move!
we both loved that little house (& the neighborhood 😭) so damn much, but it was just time to move on.
there are plenty more before & after projects from our house that i need to compile - getting it ready to sell with a 2-month lead time and a hard “out” date was quite the doozie this past spring!
i could say so much more - but i love how our kitchen makeover turned out, and i’m glad we brought our little 1912 west seattle chalet into modern times for the next lovely people to enjoy.
xoxo
qp